

Apple has released it’s own package manager called ‘Swift Package Manager‘ to share and distribute Swift packages. It’s good to know that Apple is working on the replacement of the current loved and hated package managers in the iOS development world those are CocoaPods and Carthage. In this article, we will cover basics of package management & deep dive into package management in iOS especially Swift Package Manager.
Current iOS Package Managers
Most modern languages come with an official solution for code distribution e.g RubyGems for Ruby, Composer for PHP, NPM for NodeJS. In the iOS development world, developers have to rely on third party dependency management tools like CocoaPods and Carthage. The package managers in iOS has a additional job of building the code on top of downloading. Package manager should able to download as well as build the framework in case of dynamic frameworks. You can read more about static and dynamic libraries for iOS here. Let’s briefly see how they works. We will use ‘SwiftyJSON‘ which is very popular Swift library for parsing JSON as an example.
CocoaPods
CocoaPods comes as a Ruby library and needs to be installed as a RubyGem. CocoaPods is built with Ruby and is installable with the default Ruby available on OS X.
|
1 |
$ sudo gem install cocoapods |
CocoaPods can be initialised with ‘ pod init‘ command which will create template Podfile but we can create our own simple ‘ Podfile‘. Typical ‘ Podfile ‘ will look like this
|
1 2 3 4 5 6 |
platform :ios, '8.0' use_frameworks! target 'MyApp' do pod 'SwiftyJSON', '~> 2.3' end |
Now, we can download dependency using magical command
|
1 |
$ pod install |
CocoPods and Xcode
The above command (pod install) is very magical which make lots of changes to our Xcode project under the hood. The most of the times, it’s really hard to understand that what has been changed. This might be the reason most developers hates CocoaPods. CocoaPods makes following changes to Xcode.
- .xcworkspace file ( Another file on top of .xcodeproj to open project)
- Podfile.lock (Locked versions of CocoaPods)
- ‘Pods’ directory (Directory Containing source code of the Pod dependencies)
- Lots of things inside your Xcode Settings!
Now, we have to use .xcworkspace to open the project to import your dependencies otherwise CocoaPods won’t work.
CocoaPods Pros and Cons
The use of CocoaPods has following Pros and Cons
Pros
- Easy to setup and use.
- Automatically does all the Xcode setup for the project.
- Well grown community and support.It has the largest community and is officially supported by almost every open-source iOS library.
Cons
- It’s Ruby and we have to manage Ruby dependencies e.g Bundler, Gems etc etc
- CocoaPods updating Xcode Projects and Files is like magic without understanding what’s changed
- Centralised
- Can’t work with framework and project at the same time because of a two-step process for working on dependencies.
Carthage
Carthage is another simple dependency manager for the Cocoa application. It downloads and build the dependencies but will not change Project file Or Xcode project build setting like CocoaPods. We have to manually drag ‘. framework’ binaries to “ Linked Frameworks and Libraries “.
We can install Carthage using HomeBrew
|
1 |
$ brew install carthage |
We are now ready to use Carthage. As above, we need to get ‘SwiftyJSON‘ using Carthage then we have created file called ‘Cartfile‘ with following content.
|
1 |
github "SwiftyJSON/SwiftyJSON" |
Now that, we have specified our dependency in the ‘Cartfile‘, Run
|
1 |
$ carthage update |
This will fetch dependencies into a Carthage/Checkouts folder, then build each one. Now everything CocoaPods does automatically as magic, we have to do it manually.
On your application targets’ “General” settings tab, in the “Linked Frameworks and Libraries” section, drag and drop each framework you want to use from the Carthage/Build folder on disk. There is also some workaround for the App Store Submission bug, which you can read on Carthage README file. After doing this all manual work, we should be able to import dependencies.
Carthage and Xcode
Carthage won’t touch Xcode settings or Project files. Carthage is very simple and just checkout and build the dependencies and leave it to you to add the binaries to Xcode. It gives you full control of what we are adding to Xcode.
Carthage Pros and Cons
There are some pros and cons of the Carthage
Pros
- Carthage won’t touch your Xcode settings or project files. It just downloads and builds the dependencies so you have proper control on what you are doing.
- Decentralised
- Supports submodules
Cons
- Unstable and Slow
- Small Community, not many contributors
- Lot of manual steps to perform on Xcode to get everything setup
Why Swift Package Manager
As mentioned earlier, every modern programming language come up with official dependency management system so Apple has announced ‘Swift’ and they are working on it’s official package manager as an replacement for the CocoaPods and Carthage. You should definitely consider using Swift Package Manager in Swift project because
- It’s Official Package Manager for Swift
Swift Package Manager will become trusted source of the Swift packages so that developers can use it without fear.
- Managed by Apple
We have seen that both CocoaPods and Carthage has Pros and Cons and it’s managed by the open-source community or third party companies.
- It’s Future
It is still in the major development phase but sooner or later it will grow as a community as more and more people getting involved. You should definitely consider using Swift Package Manager as dependency manager if your project is 100 percent, Swift.
- Server Side
Swift is being a server side language Swift Package Manager is expected to work on both Linux and macOS. There won’t be any restriction of having macOS to build and distribute Swift packages.
Swift Package Manager
The Swift Package Manager is a tool for managing the distribution of Swift code. It’s integrated with the Swift build system to automate the process of downloading, compiling, and linking dependencies. They defined Swift Package Manager as
“The Swift Package Manager is a tool for managing the distribution of Swift code. It’s integrated with the Swift build system to automate the process of downloading, compiling, and linking dependencies.”
SwiftPM is not only package manager but also Build and Test tool. Swift Package Manager can also run on Linux as well as macOS. Swift Package Manager is
- Command Line Based tool
- Being Cross-Platform, Swift Package Manager doesn’t need Xcode to create package
- It’s decentralised
- Swift Package Manager is open-source and source code is available on Github
Swift Package Manager Setup
Swift Package Manager is already installed if we have Xcode 8.0 Or Swift3 on macOS or Linux. As Swift became server side, we can build it on the Docker containers like IBM Swift3 Ubuntu Docker image to build Swift packages. To Check version of Swift
|
1 |
$ swift --version |
This will give us version of Swift installed. Swift version should be 3 to have Swift Package Manager installed. To check if you have Swift Package Manager Installed run ‘ swift build –version‘ from terminal. It should print something like this
|
1 2 |
$ swift build --version Apple Swift Package Manager - Swift 3.0.1 (swiftpm-11504) |
This means Swift Package Manager is installed and available to use.
What is Swift Package?
Basically, Swift Package is a collection of source files, distributed as a library so that other developers can make use it. Swift Package Manager creates ‘Sources‘ directory to put all the library code inside and each directory inside the ‘Source’ became a module.
Swift Package Manager is basically
- Collection of modules (targets)
- The module is a collection of sources and test directories which can build on macOS as well as Linux.
- The module can have 3 basic types, library (Source files without main.swift), executable (Source files with main.swift) and System module.
- We can use other existing dependencies in our ‘package.swift’ file to build a package.
SwiftPM Commands
SwiftPM has few commands to setup, build and test Swift package. Mostly used commands are
- swift package
- swift build
- swift test
Swift Package Commands
Swift Package has following commands to initialise project, fetch dependencies, update dependencies or generate Xcode Project. The packages have types e.g library, executable or system package.
We can list all the available options with ‘swift package –help‘ command by running
|
1 |
$ swift package --help |
This will list all the commands available to use with ‘swift packages’
|
1 2 3 4 5 6 7 8 9 10 11 12 13 14 15 16 17 18 19 20 21 22 23 24 25 26 27 |
$ swift package --help 12/31/16 - 11:56 am OVERVIEW: Perform operations on Swift packages USAGE: swift package [command] [options] COMMANDS: init [--type <type>] Initialize a new package (type: empty|library|executable|system-module) fetch Fetch package dependencies update Update package dependencies generate-xcodeproj [--output <path>] Generates an Xcode project show-dependencies [--format <format>] Print the resolved dependency graph (format: text|dot|json) dump-package [--input <path>] Print parsed Package.swift as JSON OPTIONS: -C, --chdir <path> Change working directory before any other operation --build-path <path> Specify build/cache directory [default: ./.build] --color <mode> Specify color mode (auto|always|never) --enable-code-coverage Enable code coverage in generated Xcode projects -v, --verbose Increase verbosity of informational output --version Print the Swift Package Manager version -Xcc <flag> Pass flag through to all C compiler invocations -Xlinker <flag> Pass flag through to all linker invocations -Xswiftc <flag> Pass flag through to all Swift compiler invocations NOTE: Use `swift build` to build packages, and `swift test` to test packages |
Create New Package with template code
In order to create library package, we can run
|
1 |
$ swift package init --type=library |
Fetch dependencies code
Similarly, we can initialise ‘executable system’ packages. Swift package has commands to fetch the dependencies or update the dependencies. This will checkout source code in “Packages” directory and update it.
|
1 2 3 4 5 6 |
# Fetch Packages from Package.swift $ swift package fetch # Update package source code $ swift package update |
Generate Xcode Project
Swift Package has command to generate Xcode project from the source code so that we can use Xcode for autocompletion etc etc
|
1 |
$ swift package generate-xcodeproj |
This will create xcproj file to open the project in Xcode.
Swift build
Swift build command is used to build and compile all the Swift files inside ‘Sources” directory. It create build put in the ‘.build/’ directory. We can list all the available options with ‘ swift build –help‘
|
1 2 3 4 5 6 7 8 9 10 11 12 13 14 15 16 17 18 19 |
$ swift build --help 12/31/16 - 12:00 pm OVERVIEW: Build sources into binary products USAGE: swift build [mode] [options] MODES: -c, --configuration <value> Build with configuration (debug|release) [default: debug] --clean [<mode>] Delete artifacts (build|dist) [default: build] OPTIONS: -C, --chdir <path> Change working directory before any other operation --build-path <path> Specify build/cache directory [default: ./.build] --color <mode> Specify color mode (auto|always|never) [default: auto] -v, --verbose Increase verbosity of informational output -Xcc <flag> Pass flag through to all C compiler invocations -Xlinker <flag> Pass flag through to all linker invocations -Xswiftc <flag> Pass flag through to all Swift compiler invocations NOTE: Use `swift package` to perform other functions on packages |
Swift Test
Swift test command is used to run all the tests inside ‘Tests” directory. We can list all options with ‘swift test –help’
|
1 2 3 4 5 6 7 8 9 10 11 12 13 14 15 16 17 18 19 |
$ swift test --help 12/31/16 - 12:04 pm OVERVIEW: Build and run tests USAGE: swift test [options] OPTIONS: -s, --specifier <test-module>.<test-case> Run a test case subclass -s, --specifier <test-module>.<test-case>/<test> Run a specific test method -l, --list-tests Lists test methods in specifier format -C, --chdir <path> Change working directory before any other operation --build-path <path> Specify build/cache directory [default: ./.build] --color <mode> Specify color mode (auto|always|never) [default: auto] -v, --verbose Increase verbosity of informational output --skip-build Skip building the test target -Xcc <flag> Pass flag through to all C compiler invocations -Xlinker <flag> Pass flag through to all linker invocations -Xswiftc <flag> Pass flag through to all Swift compiler invocations NOTE: Use `swift package` to perform other functions on packages |
Create Template Swift Package [Library Module]
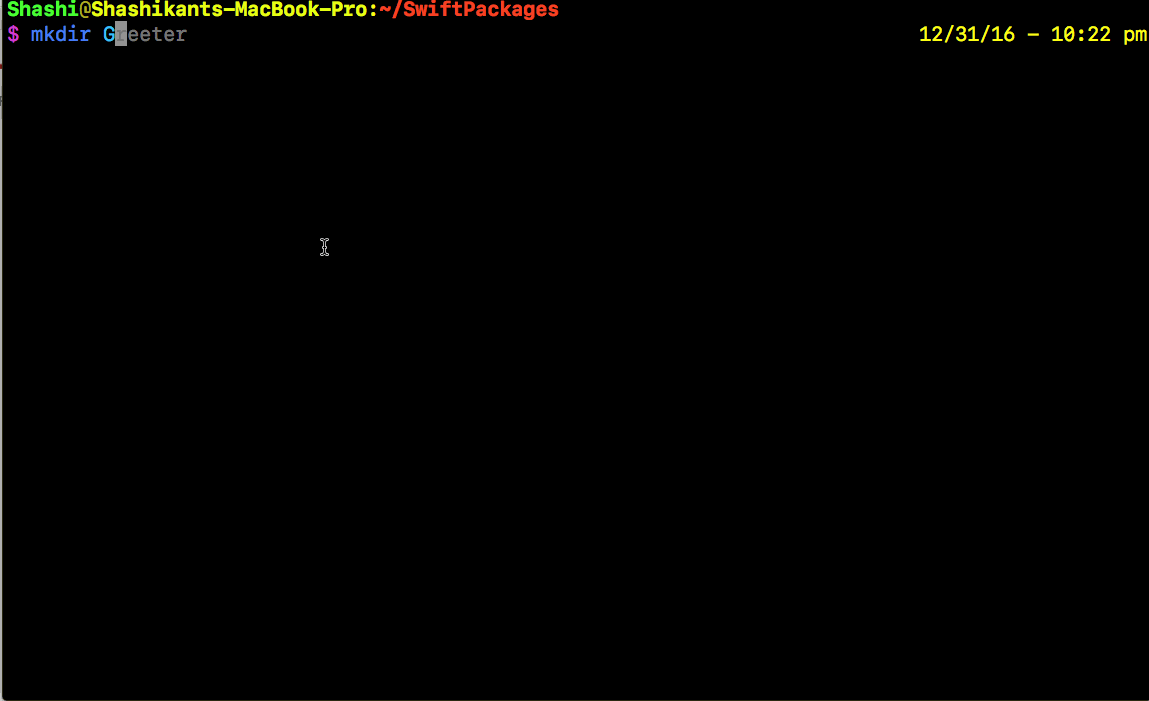
Let’s see the swiftPM commands in action. We have created ‘Greeter’ directory and executed commands. Your default ‘Hello World” Package is ready to publish if you execute following commands.
|
1 2 3 4 5 6 |
$ mkdir Greeter $ cd Greeter $ swift --version $ swift package init --type=library $ swift build $ swift test |
At this stage, we should have default “Hello World” package ready. Let’s see this in action
Publish Swift Package
To publish a package, we need to push it to GitHub account. Assuming we have git setup. Replace username and package name with yours. Swift packages use semantic versioning to version packages.
|
1 2 3 4 5 6 |
$ git init $ git commit -am "Publishing Swift Package" $ git remote add origin git@github.com:YOUR_GITUSERNAME/PACKAGE_NAME.git $ git push origin master $ git tag v1.0.0 $ git push origin v1.0.0 |
Congratulation !! We have published our first Swift Package. The published package can be found on Github here.
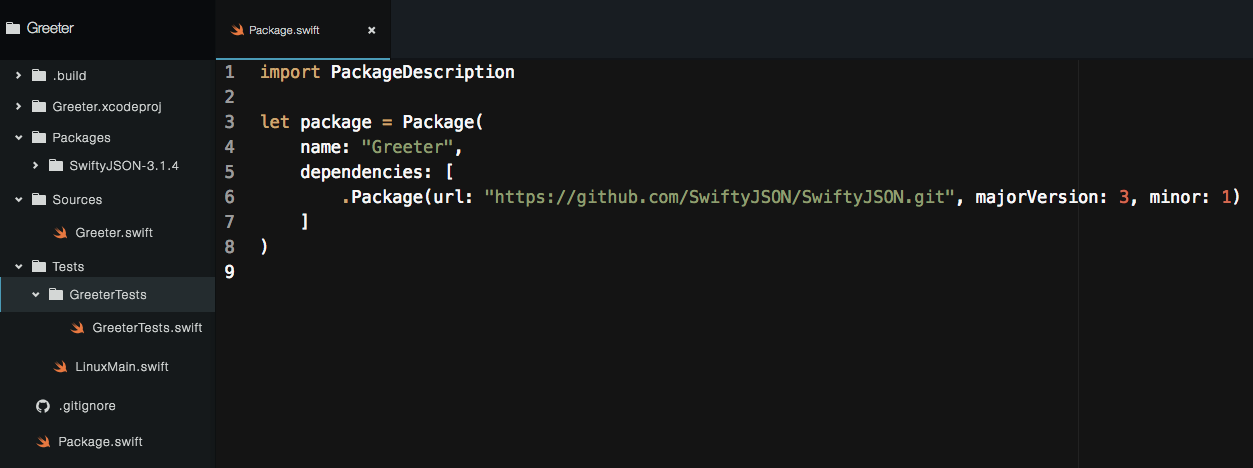
Adding Swift Dependencies
This is default ‘Hello World” package created by the SwiftPM template and we have executed all the commands including generating Xcode project. Now, let’s add SwiftyJSON as dependencies in ‘package.swift‘ file. This file should look like this
|
1 2 3 4 5 6 7 8 |
import PackageDescription let package = Package( name: "Greeter", dependencies: [ .Package(url: "https://github.com/SwiftyJSON/SwiftyJSON.git", majorVersion: 3, minor: 1) ] ) |
We will download the SwiftyJSON dependency using the fetch command.
|
1 |
$ swift package fetch |
Now that, we should have SwiftyJSON dependencies checked out inside “Packages” directory. We can use that dependency now in our project using
|
1 |
import SwiftyJSON |
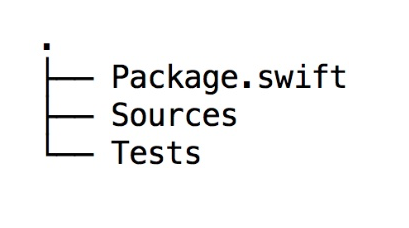
Swift Package Directory Structure
Swift package has specific directory structure in order organise Swift code. It puts all package code inside ‘Source’ directory and Test code inside ‘Test’ directory. Once we initialised swift package then it will create basic directory structure with ‘Sources’, ‘Test’ and ‘package.json’ file.
After fetching, building and generating Xcode project it, creates additional directories
- swift package fetch => ‘Packages’ directory
- swift build => ‘.build’ directory
- swift package generate-xcodeproj => YOUR_APP.xcodeproj.
Our Greeter example above, It will look something like this now!
Swift Package Manager and Xcode
We have just seen that Swift Package Manager can generate Xcode project for us but it involves lots of steps to get everything working with Xcode. There is already couple of articles on internet how to do that
However, while building Swift Packages shouldn’t need Xcode as Swift is being server side language. You should be able to use linux based lightweight editors like VIM, Nano etc etc but on other hand you will miss autocompletion and some important Xcode features. Using IDE is basically everyone’s personal choice.
Create Another Swift Package [ Executable Module]
Now let’s create a simple Swift executable package which parse JSON string using ‘SwiftyJSON’ library. Let’s start by creating a directory by naming what we want to call that package. I will call it “MyCity” and initialise Swift package with type executable.
|
1 2 3 |
$ mkdir myCity $ cd myCity $ swift package init --type executable |
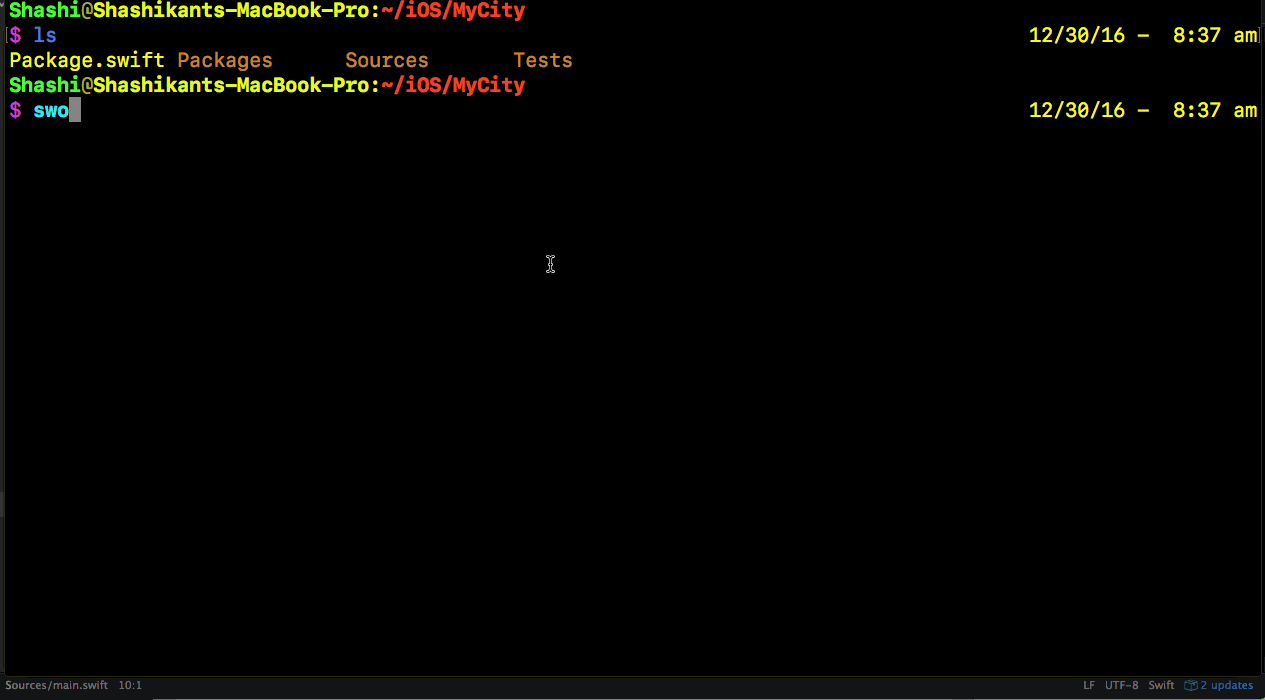
Now that, we have all the project setup, let’s add SwiftyJSON dependencies to our ‘package.swift‘ file
|
1 |
$ vim package.swift |
then add following Swift code
|
1 2 3 4 5 6 7 8 |
import PackageDescription let package = Package( name: "MyCity", dependencies: [ .Package(url: "https://github.com/SwiftyJSON/SwiftyJSON.git", majorVersion: 3, minor: 1) ] ) |
Let’s download the dependencies using
|
1 |
$ swift package fetch |
We have SwiftyJSON source code checked out in the “Packages” directory. Let’s use it in our ‘Sources/main.swift’ file. Let’s edit that file
|
1 |
$ vim Sources/main.swift |
Now we will add following code which print name of the City from the JSON.
|
1 2 3 4 5 6 7 8 9 |
import SwiftyJSON import Foundation let mycity = "{\"city\": \"London\"}" if let city = mycity.data(using: String.Encoding.utf8, allowLossyConversion: false) { let json = JSON(data: city) print(json["city"]) } |
Now, we will build the package and execute it from command Line.
|
1 2 |
$ swift build $ ./.build/debug/MyCity |
This should print ‘London” as our city.

Generate Xcode Project
We can write code in VIM or equivalent editor but if you can’t live without Xcode then we can create Xcode Project for our Swift Package with simple command
|
1 2 |
$ swift package generate-xcodeproj $ open MyCity.xcodeproj |
This will open our Swift package in the Xcode. Now we can use awesome features of Xcode like autocompletion, syntax highlighting etc
There are few steps to setup Xcode to fully work with Swift Package. Please follow this article to get Xcode and Swift Package Manager working together.
Now that, we have finished our first Swift Package. Let’s tag it and publish it on Github.
|
1 2 |
$ git tag v1.0.0 $ git push origin v1.0.0 |
Congratulation !! We have published our another Swift Package. The published package can be found on Github here.
Add Continuous Integration To Swift Package
It’s good idea to add free Continuous Integration to our open-source Swift Packages so that we made sure nothing is broken with code changes. Fortunately TravisCI give you free services for the all open-source project on Github. you need to signup with your Github and add repo. You simply need to add “.travis.yml” file at the root of the project. Let’s add the .travis.yml to our Greeter example package above with following content.
|
1 2 3 4 5 6 7 8 9 10 11 12 13 |
os: - osx language: generic sudo: required dist: trusty osx_image: xcode8 script: - swift build - swift test notifications: email: on_success: never on_failure: change |
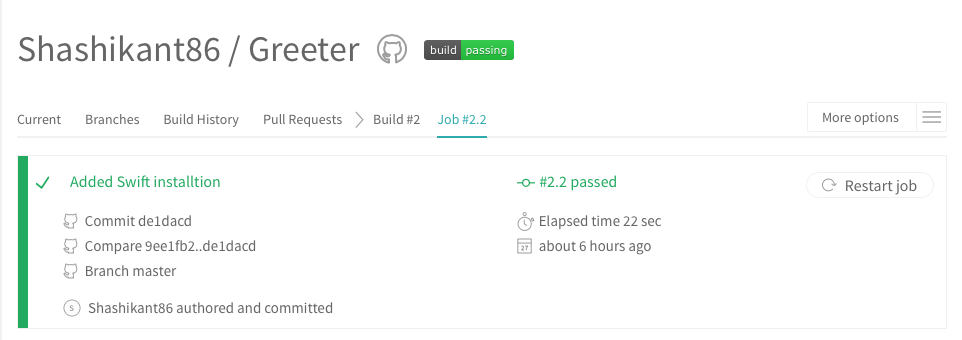
Now that, we have added support for TravisCI, we need to enable project on Travis and it will ‘build’ and ‘test’ our project after every commit or new Pull request. The example Travis project for our Greeter example can be found here
Find Other Swift Packages
Unfortunately, there is no official centralised place yet to find Swift Packages. We need to find it on Github if the Swift library is compatible with Swift Package Manager. Here is a list of currently available packages but it’s crazy to find the packages in that way. Let’s hope Apple will have something centralised for the hosting Swift Packages. There are some third party companies like IBM is working on Server Side Swift as well as have IBM package catalogue which contains some Swift packages. There are couple of other places where you can look for packages i.e libraries.io or search on CocoaPods if they support Swift Package Manager yet.
However third parties are third parties, not reliable. Let’s hope that Apple will have centralised hosting for all the Swift Packages.
Migrating to SwiftPM from CocoaPods/Carthage
If you want to migrate existing package manager CocoaPods or Carthage to Swift Package Manager then good starting point will be
- Start analysing dependencies and see if they support Swift Package Manager or not, most of the popular projects should be supporting Swift Package Manager so feel free to add them into ‘package.swift’ file
- Change the existing source code structure to SwiftPM directory structure and organise all targets as modules.
- Migrating from CoacoPods will be tricky but there is a good project on Github “schoutedenapus” to convert existing CocoaPods spec file to ‘package.swift’ file. This would good starting point.
- Migrating from Carthage should be fairly easy as it doesn’t involve any Xcode file or project settings.
You should start thinking of migration as it will be the future of the dependency management for iOS. Sooner o later, you have to do it.
Where to Find Support?
- Official Web page
Apple has open-source Swift and there is official web page for Swift Package Manager, all the important updates/documentations can be found there. There are still community proposal can be found here.
- Github
The source code of the Swift Package Manager is available on Github. We can keep an eyes on latest development and issues. Create issue if you have any problem
- Mailing List
There is an official mail list Swift-Build-Dev of developers and users of Swift Package Manager, get involved.
- IRC & Slack
There is a Slack group of Swift Package Manager contributors, join here. If you use IRC then I don’t think anyone object asking question in channel #swift-lang
What Next?
Now it’s time to move on from existing dependency management system and start looking if your dependencies has been supported by Swift Package Manager or not. If you are still worried if Swift Package Manager is ready for production application then try it on pilot project or keep using current dependency manager till Swift Package Manager is fully adopted. Look forward to hear your views on Swift Package Manager !