

An iOS app needs the backend services for performing the various task like storing data in the database, hosting of files, caching data, monitoring etc. Firebase is a cloud-based service that provides most of the server side things for our iOS apps so that we don’t have to manage the infrastructure like databases, servers and server-side things by yourself. The Firebase will take care of everything. Firebase provides many useful services that make our life easier but most important services are
- Remote Database
- Remote Config
- Analytics
- Authentication
- Crash Reporting
In this post, we will see how to get started with Firebase and see how to configure database and authentication services provided by Firebase. So Let’s get started
Setup FireBase
To get started with Firebase, you need to have a Google Account. With your google account visit https://firebase.google.com/ and log in with your credential. You can go to the Firebase console where Firebase will ask you to Create a Project with your country. Firebase UI is very friendly and guides you through every step so don’t need to worry about anything once you entered in the console.
Add iOS App
We can then able to add our iOS App to the project by clicking on the Add Firebase to Your iOS App
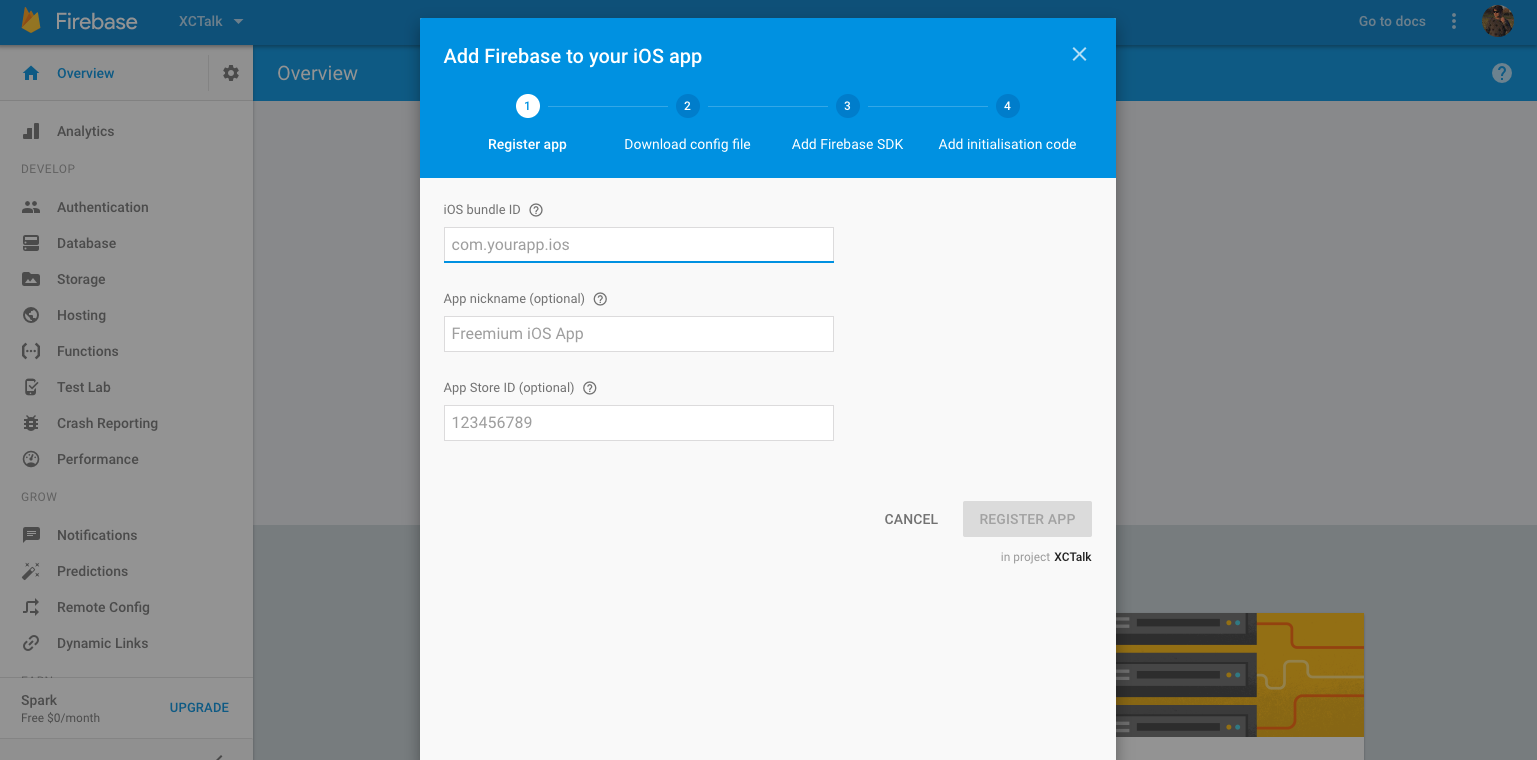
Here, we need to specify Bundle ID of our iOS app which has to be unique. I have created com.sashikantjagtap.XCTalk for personal project.
Download Config File
Inthe next step, Firebase creates a file called GoogleService-Info.plist file which we need to download and add it to our Xcode project, just near to Info.plist file. Don’t forget to select Copy items if needed and Create folder references
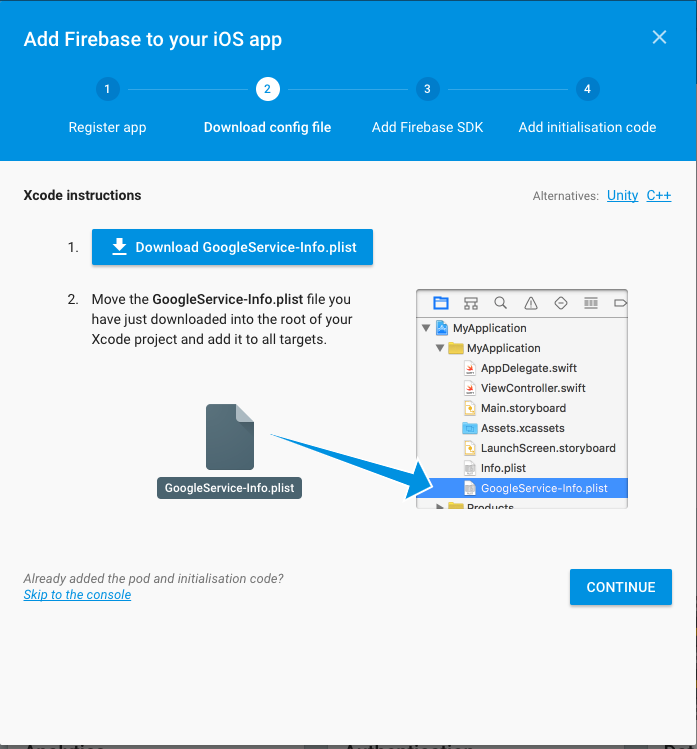
When you download the config file, drag it to Xcode project and Don’t forget to select Copy items if needed and Create folder references
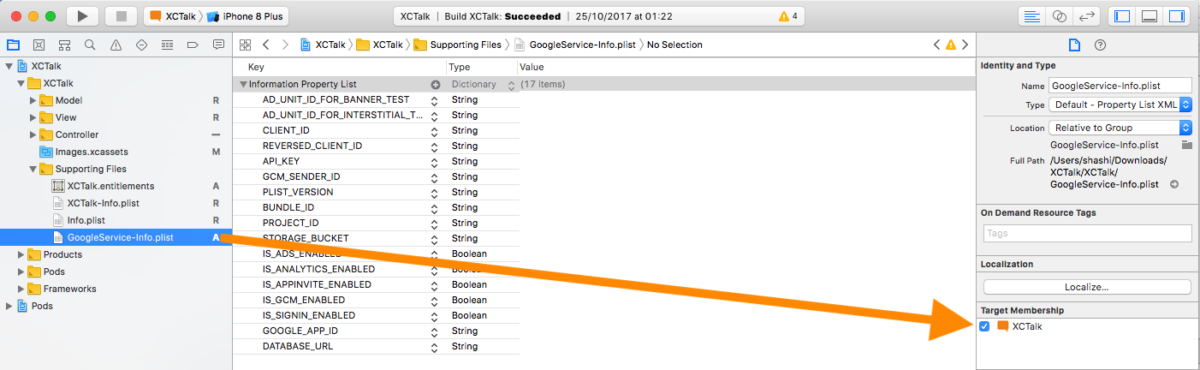
There is the little bug in Xcode where you need to check that GoogleService-Info.plist file has correct target membership as we have to explicitly add it for some reason.
Setup CocoaPods
The next step is to configure some CocoaPods that comes up with Firebase.
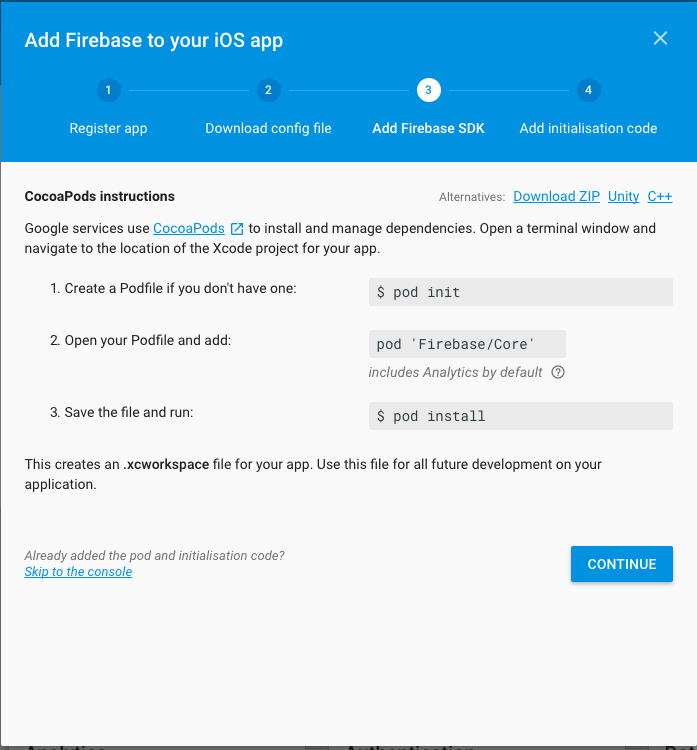
We basically need Firebase Database and Authentication mechanism so add those to Podfile
|
1 2 3 4 |
pod 'Firebase' pod 'Firebase/Core' pod 'Firebase/Database' pod 'Firebase/Auth' |
and then install the pod using pod install command.
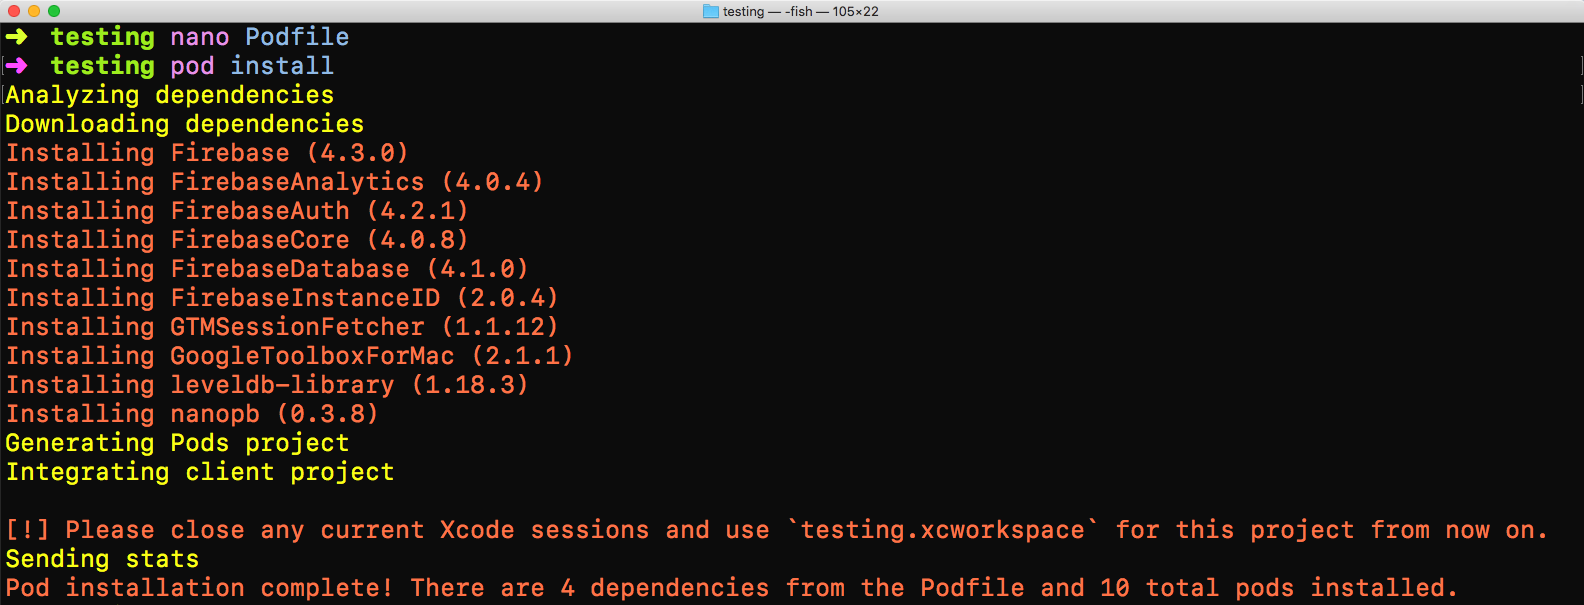
Register Firebase with App
The final Step is to configure our iOS app to use Firebase. We can modify AppDelegate.Swift file to use Firebase in our App.

That is everything needed and everything is well documented in the setup Guide of Firebase. I have followed all the steps for the demo app. Now that, the interesting part is to use the Firebase and its services inside our App. At the end, you will see your app in the Firebase console.
Firebase Database
Now that, we have done all the setup to for the iOS app to use Firebase Database and Authentication. Let’s try to create the database and add dummy message to test that connection is working.
Test Connection
Let’s add following code in the AppDelegate.Swift file just below where we have configured Firebase i.e FirebaseApp.configure()
|
1 2 |
let db = Database.database().reference() db.setValue("Hello Firebase") |
Now run the app and see if you can write to Firebase Database.
Probably not, you will get a permission denied error in the Xcode console which indicates that we need to allow permission for our app to write to Firebase. So head over to firebase console and Select Database service and Rules and change it to something like this
|
1 2 3 4 5 6 |
{ "rules": { ".read": true, ".write": true } } |
We are basically allowing everyone to write to the database for now. If you run the app, you can see that your message has been logged in the Cloud database. Yay !
Add Data
We probably need to add more complex stuff to the database, not the just hello message. Let’s consider your app has UI to add messages and we are adding messages and sender info to the Firebase. We can create a child database and add it using code looks something like this:
|
1 2 3 4 5 6 7 8 9 10 11 12 13 |
let messagesDB = Database.database().reference().child("Messages") let messageDictionary : NSDictionary = ["Sender" : Auth.auth().currentUser!.email as String!, "MessageBody" : messageTextfield.text!] messagesDB.childByAutoId().setValue(messageDictionary) { (error, ref) in if error != nil { print(error!) } else { print("Message saved successfully!") } } |
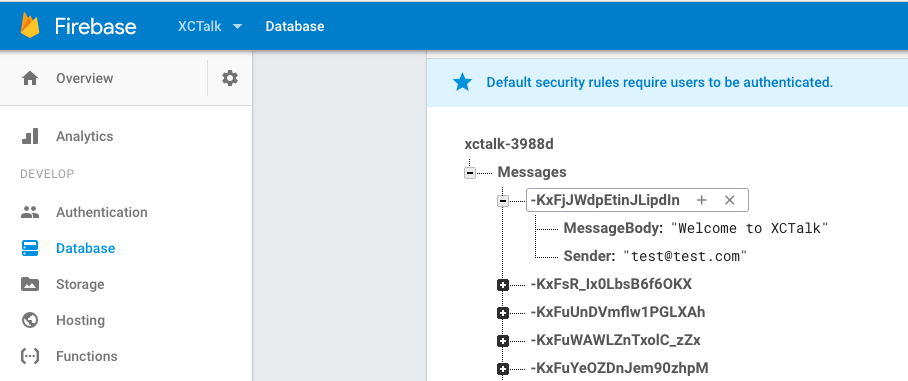
Let me see how those values look like in the Firebase Database.
Retrieve Data
We can also retrieve the data from database using Firebase. Let’s see how to retrieve the sender and messages that we just added to the database.
|
1 2 3 4 5 6 7 8 |
let messageDB = Database.database().reference().child("Messages") messageDB.observe(.childAdded, with: { snapshot in let snapshotValue = snapshot.value as! NSDictionary let text = snapshotValue["MessageBody"] as! String let sender = snapshotValue["Sender"] as! String } |
We can do the more complex operation on the database but for now, we will carry on with next section i.e Authentication of users.
Firebase Authentication
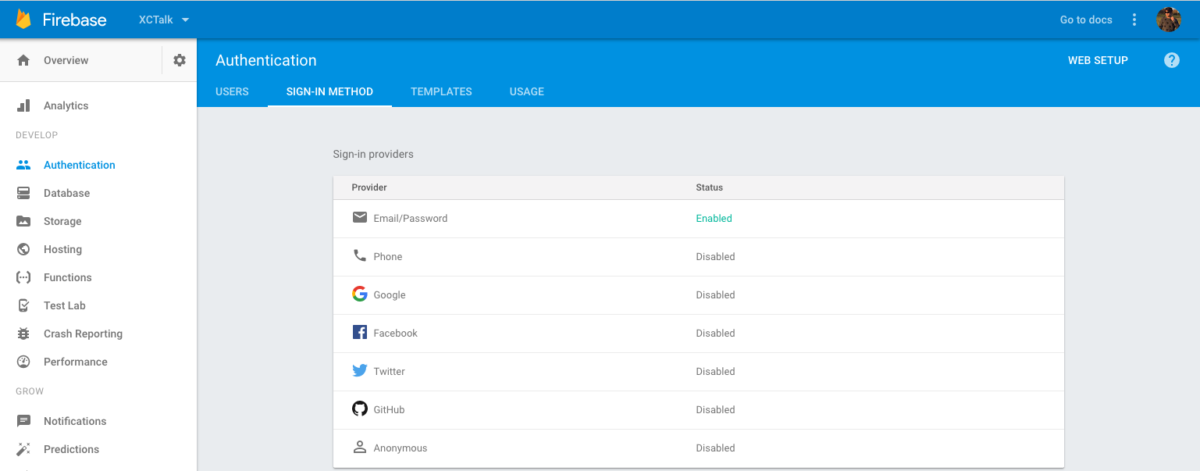
Firebase has also used for the authentication services like login and registration. Firebase handles authentication painlessly by providing easy methods. Before diving into the authentication service code, we need to enable the authentication from Firebase console. From the console, select the Authentication tab and SIGN-IN METHOD and select method we want to use for sign-in users. I will select email/password method.
Let’s consider our app has UI to enter username and password for registration and login.
Registration
We can easily register user using firebase methods createUser like this
|
1 2 3 4 5 6 7 8 |
Auth.auth().createUser(withEmail: emailTextfield.text!, password: passwordTextfield.text!, completion: { (user, error) in if error != nil { print(error!) } else { print ("Registration Successful!") } |
Firebase will take care all the registration stuff internally.
Login/SignIn
Similar to registration, Firebase recognise the registered user and allow them to sign in using the signIn method
|
1 2 3 4 5 6 7 8 |
Auth.auth().signIn(withEmail: emailTextfield.text!, password: passwordTextfield.text!, completion: { (user, error) in if error != nil { print(error!) } else { print("login successful") } |
SignOut
Firebase also has the method to log out users. It has signOut method which can be used like this
|
1 2 3 4 5 6 7 |
do { try Auth.auth().signOut() } catch { print(error) print("error: there was a problem logging out") } |
As you can see how easy it is to use Firebase for registering users to the app.
There are many other services that Firebase provides for the iOS apps but we will have to stop here as you might have the basic understanding how Firebase works in general.
Conclusion
Using the Cloud-based services like Firebase, we can simplify a lot of the iOS app development activities and develop application rapidly in the fast-paced market. However, you have to find the balance how much you depend on Cloud. What are your experiences of using Firebase in production? Let me know in the comment. Thanks for reading.