

macOS Sierra, Xcode 8 and Swift3
Apple has just released macOS Sierra public beta in the UK and we couldn’t wait to see new features of macOS Sierra and Xcode 8. macOS Sierra brings Siri to MacBook Pro with lots of performance improvements but I was keen to try features of the Xcode8 and Swift3 with my recent pet-project XCFit: Full Stack BDD framework for iOS and macOS Apps. I am very impressed with enhancements in the ‘xcodebuild’. In this post I will step by step guide to setup BDD for iOS10/macOS Sierra project using XCFit, Cucumberish, Xcode 8 and Swift3.
XCFit on Xcode8 and Swift3
XCFit is a full stack BDD framework for the iOS and macOS applications. You can read article on mobile DZone to know more about it. It uses Cucumberish and OCSlim to perform Acceptance and UI testing on iOS and macOS application and Apple’s XCUI Test Framework to implement steps. It uses Apple’s brand new XCUI Testing framework. Its native Xcode implementation, No Appium, Calabash etc etcYou can find official web page of XCFit on shashikant86.github.io. XCFit allows us to write API, UI and Acceptance Tests with Swift in human readable language using tools like Cucumber and Fitnesse in Xcode. We can still use Apple’s brand new UI Testing framework (XCUI) under the hood of Cucumberish. XCFit is fully automated solution for Cucumberish and Fitnesse. You can use 80(Fitnesse):20(Cucumberish) formula to automate Acceptance and UI Testing for better coverage and faster feedback. XCFit is available on RubyGem and CocoaPods.
Software Requirements:
- Ruby – Use RVM for GEM management. Ideally Ruby > 2.X
- Xcode – Ideally Xcode 7.x and above
- RubyGems – RubyGem with Cocoapods installed
- Curl on Mac – Might be pre-installed but worth double checking.
- Ruby Packages : Xcpretty, Fastlane(Optional), Rake, Bundler.. Install with ‘gem install ‘
XCFit works well with Xcode8 and Swift as well with minor tweaks. Here is what we need
|
1 2 3 |
$ gem install xcfit $ xcfit set_xcode_templates |
Now whenever you create iOS or macOS targets for Xcode 8, you will see
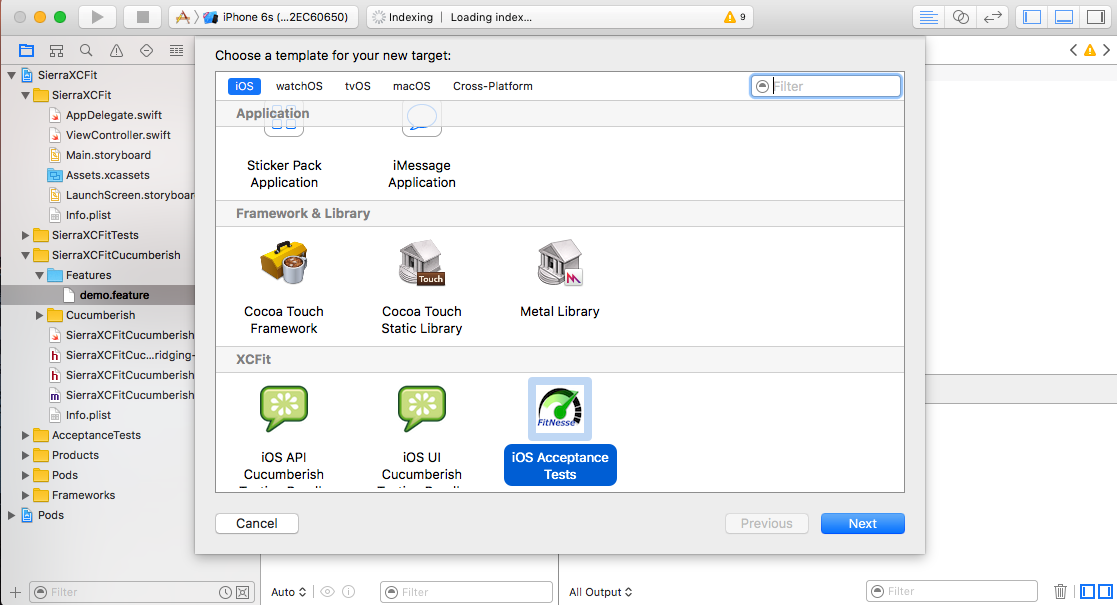
We can the add Cucumberish or Fitnesse targets from there. Let’s cover the BDD with Cucumberish as part of this post. Cucumberish allows us to write tests in Given When Then (Gherkin) format. You can now add new Xcode project and add Cucumberish UI tests target. You need to take following steps to get setup
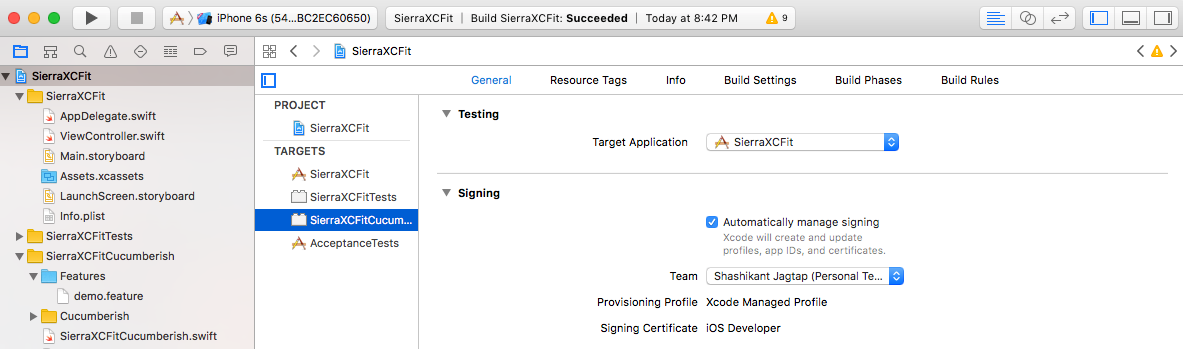
- Add Cucumberish UI tests target and you will have all required Swift and Objective-C files ready. Add ‘Testing target’ to test your App from General setting of CucumberishTarget.
- Navigate to target directory and download Cucumberish using XCFit
|
1 2 |
$ cd $CUCUMBERISH_TARGET_DIR $ xcfit get_cucumberish |
This will download ‘Cucumberish’ and ‘Features’ Directory. You add those to Xcode as follows
Cucumberish ==== Create Group -> Copy if needed
Fearures ===== Create Folder Reference (Don’t create group)
- Xcode will migrate to Swift 3 syntax and Fix any build errors. Click Edit -> Convert -> To Current Swift Syntax
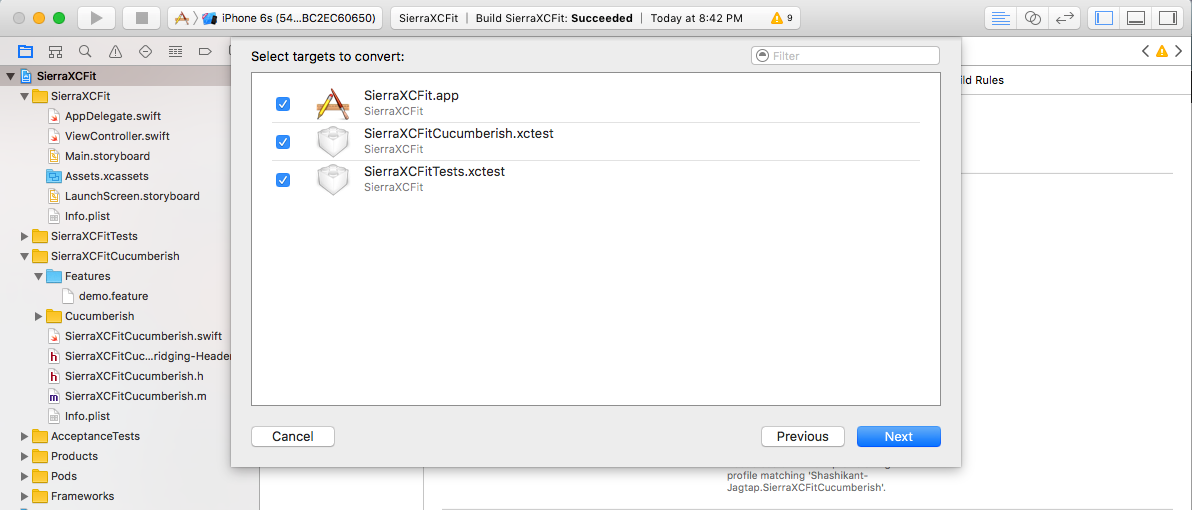
This will generate preview. You probably need to fix Swift file in the Cucumberish target which Xcode do it for you.
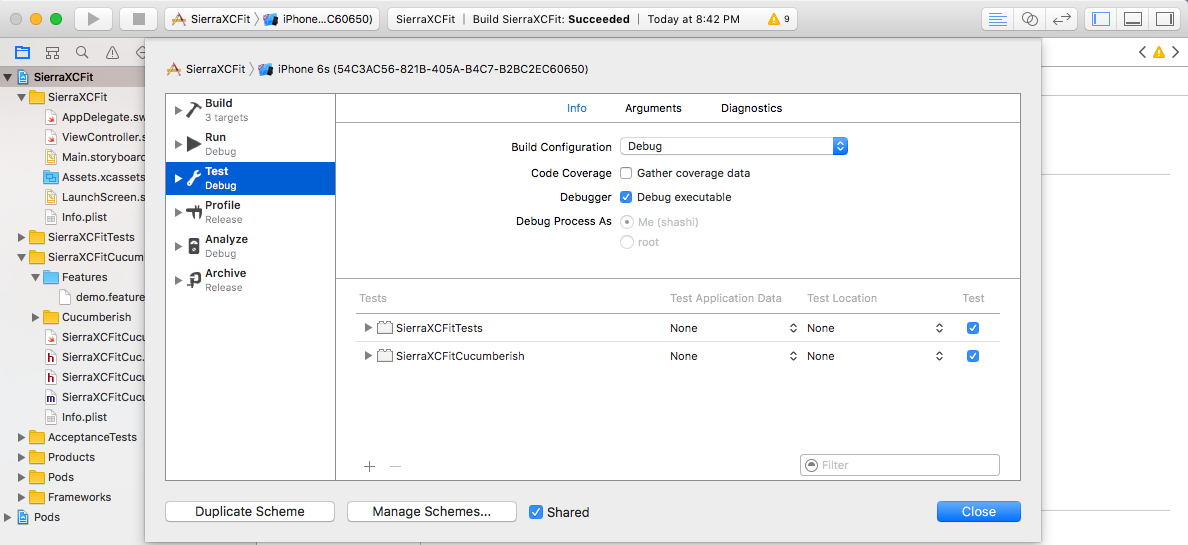
- Edit Application ‘Scheme’ to add ‘Cucumberish UI Target’ to the ‘Test’ task Or Create separate Scheme as per your need.
Now, you need to write your sample feature file in the ‘features’ directory.
Add somethings like this
|
1 2 3 4 5 |
Feature: test Scenario: Test Given the app is running |
Now you are all set to run your first cucumber tests as this step is pre-implemeted by XCFit/Cucumberish.
Watch It in Action

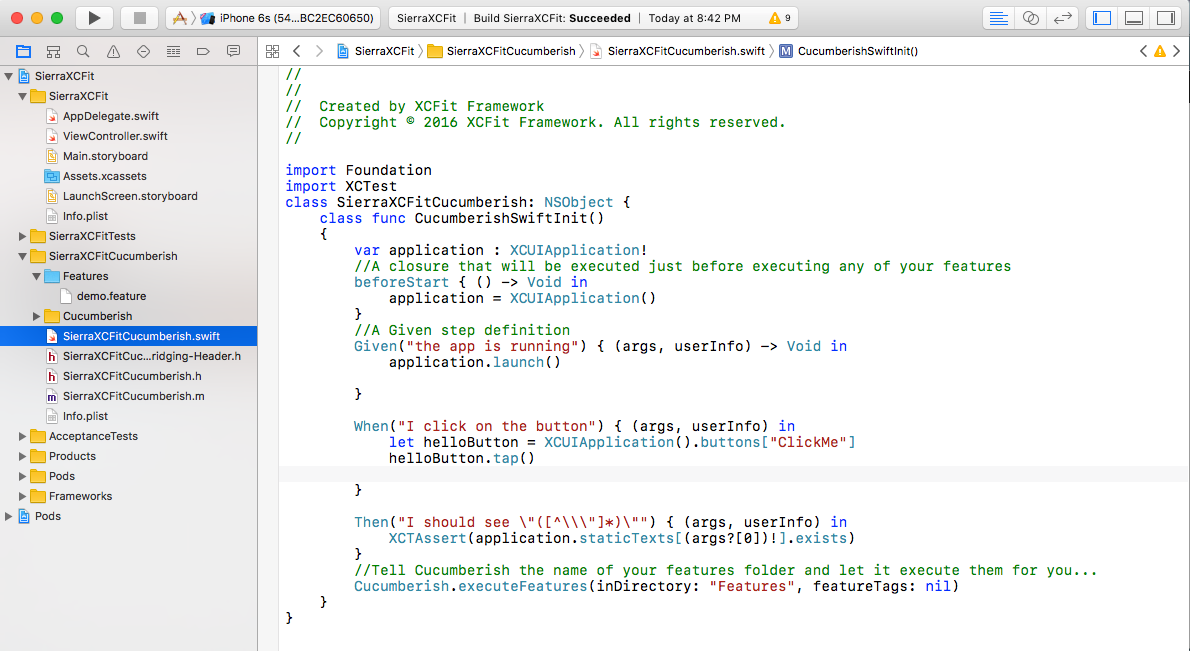
Now we can implement new steps as we go on, we have a lot of steps here. Look at following implementation and most important brand new Xcode Font SF Mono. You now use Apple’s XCUI Test Framework under the hood of Cucumberish !!
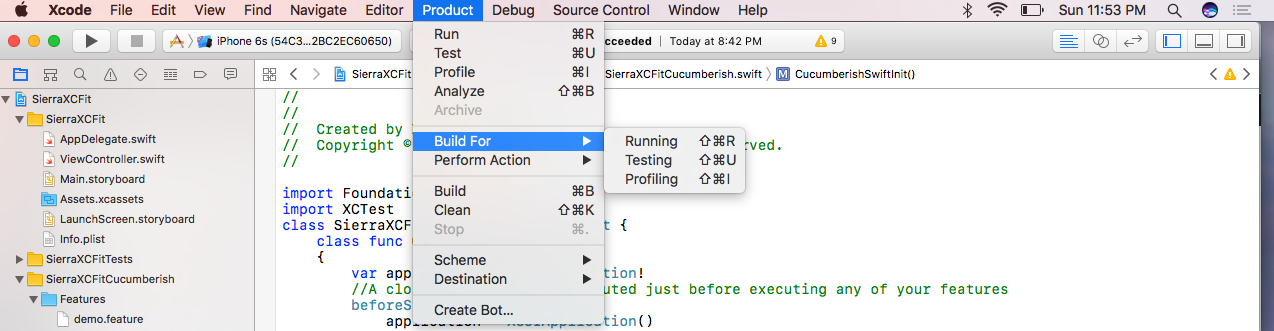
Now that, you can run your Unit and Cucumberish Tests together by CMD + U but there are couple of option Xcode 8 provided to you. “Build for Testing” which will create XCTESTRUN file future use of testing. We will cover those option with xcodebuild later in the post but in the Xcode it looks like this
Source Code is available on GitHub “XCFit-macOS-Sierra”
https://github.com/Shashikant86/XCFit-macOS-Sierra
Exploring new ‘xcodebuild’
‘xcodebuild‘ is the command line tool to build, run and execute our application from command line. This is used in the Xcode server. Xcode 8 now has some improvements in the xcodebuild command line tools.
Build For Testing
The xcodebuild now has ‘build-for-testing’ option, it takes workspace scheme and destination as usual but on top of that it will create ‘XCTESTRUN’ file. Let’s see how we can use it with XCFit project above. Just need to run following command
|
1 |
$ xcodebuild -workspace SierraXCFit.xcworkspace -scheme SierraXCFit -sdk iphonesimulator -destination 'platform=iOS Simulator,id=54C3AC56-821B-405A-B4C7-B2BC2EC60650,OS=10.0' build-for-testing |
This should build our app for the testing and create ‘xctestrun’ file. Watch it in action

Test without Building
The xcodebuid also has another option called ‘test-without-building’ where we don’t need to provide workspace instead we specify the ‘XCTESTRUN file which will inject that file and runs all the tests.
This feature can be highly useful for the distributed testing as we can created XCTESTRUN file at one machine and distributed to other test specific machine. In order to use it we can specify this option to ru tests without building
|
1 |
$ xcodebuild -workspace SierraXCFit.xcworkspace -scheme SierraXCFit -sdk iphonesimulator -destination 'platform=iOS Simulator,id=54C3AC56-821B-405A-B4C7-B2BC2EC60650,OS=10.0' test-without-building |
This should run our Unit as well as Cucumberish UI tests.
Only-Testing/Skip-Testing
Suppose, you don’t want to run your unit test. Xcodebuild now has two new testing options
- –only-testing : Include Test suites
- –skip-testing : Exclude Test suits
We can use this option to run just our Cucumberish UI tests like this :
|
1 |
$ xcodebuild -workspace SierraXCFit.xcworkspace -scheme SierraXCFit -sdk iphonesimulator -destination 'platform=iOS Simulator,id=54C3AC56-821B-405A-B4C7-B2BC2EC60650,OS=10.0' -only-testing:SierraXCFitCucumberish test-without-building |
You can see that Unit tests are skipped

Setting up Continuous Integration for Xcode 8
Continuous Integration is integral part of the software development. Ideally Cucumberish XCUI Tests should be set on Xcode Server which is Apple’s own native CI server but I would wait until public release in autumn. Thankfully TravisCI has announced support for the Xcode8 last month which allows us to set CI System with Xcode8 project.
In order to set TravisCI build, you need to register and add repo and then create .travis.yml file. Add following to execute Cucumberish UI tests
|
1 2 3 4 5 6 7 8 9 10 11 12 13 14 15 16 |
# references: # * http://www.objc.io/issue-6/travis-ci.html # * https://github.com/supermarin/xcpretty#usage osx_image: xcode8 language: objective-c before_install: - gem install xcpretty - gem install xcpretty-travis-formatter # cache: cocoapods script: - set -o pipefail && xcodebuild -list - echo "==========Now Building for Tests===================" - set -o pipefail && xcodebuild -workspace SierraXCFit.xcworkspace -scheme SierraXCFit -sdk iphonesimulator -destination 'platform=iOS Simulator,id=7453E43C-6352-44AA-8BE0-2E09643F5F88,OS=10.0' build-for-testing | xcpretty -f `xcpretty-travis-formatter` - echo "==========Now Running Only Cucumberish Tests===================" - set -o pipefail && xcodebuild -workspace SierraXCFit.xcworkspace -scheme SierraXCFit -sdk iphonesimulator -destination 'platform=iOS Simulator,id=7453E43C-6352-44AA-8BE0-2E09643F5F88,OS=10.0' -only-testing:SierraXCFitCucumberish test-without-building | xcpretty |
Now that, You can trigger build after each PR and Push. Watch Live Build Here
We can set it to any CI server which supports Xcode8.
Give it a go
If you got a macOS Sierra and Xcode 8 and want to give it a quick go. Just Clone repo and execute following commands to see it up and running
|
1 2 3 4 |
$ git clone git@github.com:Shashikant86/XCFit-macOS-Sierra.git $ cd XCFit-macOS-Sierra $ xcodebuild -workspace SierraXCFit.xcworkspace -scheme SierraXCFit -sdk iphonesimulator -destination 'platform=iOS Simulator,id=54C3AC56-821B-405A-B4C7-B2BC2EC60650,OS=10.0' build-for-testing $ xcodebuild -workspace SierraXCFit.xcworkspace -scheme SierraXCFit -sdk iphonesimulator -destination 'platform=iOS Simulator,id=54C3AC56-821B-405A-B4C7-B2BC2EC60650,OS=10.0' -only-testing:SierraXCFitCucumberish test-without-building |
You may or may not need to change simulator ID and you will be amazed to see BDD style running in your terminal with Xcode8 and iOS 10.
Looking Forward
Looking forward we will see following
- Fastlane tool updated Scan to use Xcode8
- Xcode Server setup for Cucumberish and XCUI Tests
- Configure Test reports with xcpretty
- Getting Public release of macOS Sierra !
Hope you enjoyed this post about new Xcode8 feature and Cucumberish.