
Apple has very comprehensive documentation on Xcode Server and Continuous Integration with OSX Server (app) and Xcode Server (Xcode within the server app). You might be wondering what’s the point of this post if everything is documented in the guide. However Apple’s guide still reads as OSX Server than macOS Server but Apple has released new macOS Server (5.2) with some improvements in the Automated Xcode Builds. Anyway this is small tutorial aims to setup a Mac to run as a macOS Server with Xcode Service and Setup basic Xcode Bots for the macOS Server with Xcode 8 to perform Continuous Integration. We will cover
- macOS Server basics and setup
- Configure Xcode to use Xcode Service of macOS Server
- Setup Development Xcode to use Xcode Server on macOS Server
- Create a Xcode bot with example of XCFit Swift Package on Github
- Run Bot Integrations and Analyse Results
Requirements
In order to setup Continuous Integration using macOS Server and Xcode Service, we need
- Mac or Mac Mini with macOS Server 5.2 app installed. Download it from App Store
- Xcode 8 installed on the Server. Download from App Store
- Make sure Swift 3 is installed
- Xcode Project repository hosted on Github (optional for the tutorial)
- Another Development Mac from which we can trigger Xcode bots (optional for this tutorial)
What’s new in macOS Server 5.2
Apple has renamed their old OSX Server to macOS Server which has lot of new things like profile manager, Caching Server, NFS , Xsan 5 etc etc but let’s focus on what’s new for Xcode Service.
- macOS Server isn’t supporting old Xcode versions. It supports Xcode 8+
- macOS Server isn’t support old Swift version. Support Swift 3+. Read here
- Xcode bots running on OSX Server and Xcode Server are broken when server app is upgraded to 5.2 i.e macOS Server. Read customer reviews of the server app
This means using there are some significant changes in this release which can affect current CI system with Xcode Server. New macOS Server will have following features.
- Custom environment variable
This isn’t new but Xcode 8 will now allow us set environmental variable without creation of extra schemes.
- Advance trigger editing
macOS Server will now have two types of triggers, script triggers and email triggers. We will have now control over how to set email contains.
- Issue tracking and blame
Xcode Server will send email to person who broke build. We cab now configure bots instead of changing code.
- Upgrade integrations
Xcode Server now re-integrate the your project if it fails using same revision. It also prevent blaming for the broken build.
- Configurable integration user
Xcode Server will have now it’s own user called Xcode Server which give you full control with password as any normal macOS user. Setting new user seems fairly easy in the Xcode Server.
Now that, we will see how to setup macOS server for our fresh Mac or Mac Mini.
Setup macOS Server
Assuming, you have already downloaded Xcode 8 on the Mac also downloaded macOS Server 5.2 App which might cost some money but if you already have developer account then you might able to redeem that product for free.
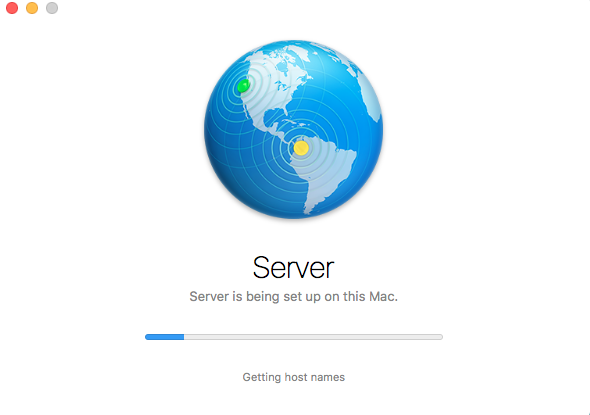
Start Server app
Once downloaded, we can launch “Server” app from the Applications Or Mission Control. macOS Server will start
Once launched it for the first time, it will show you entire tutorial how to use new macOS Server for all services.

You can read more about macOS Server services in the tutorials.
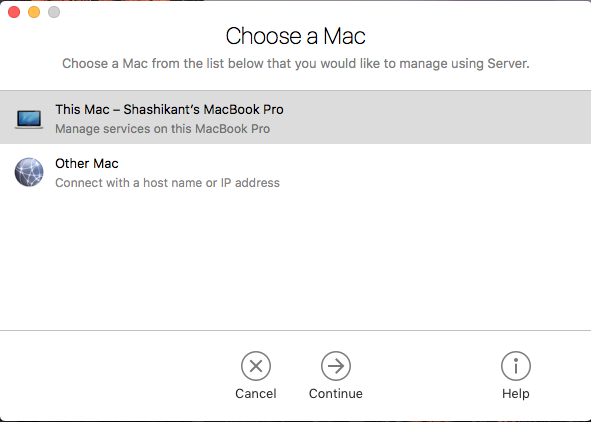
Choose Mac
Next step is macOS Server will ask to “Choose Mac”, select “This Mac” as we are setting the same Mac for Xcode Server
Select User to Run Integrations
Now next step is to ‘Select User” to run Xcode Bot Integrations, we can use same use which is logged in but we have a option to use another user ‘Xcode Server”. There will be an option to create new user.
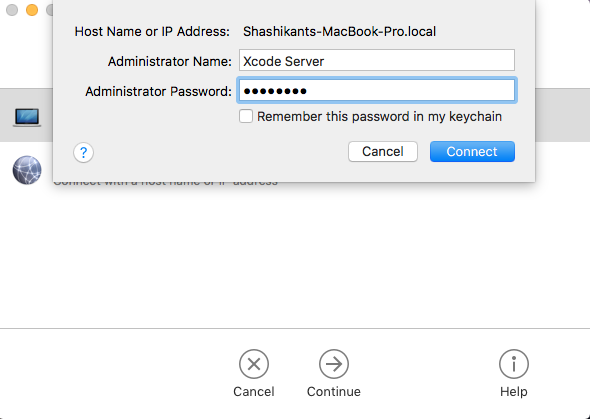
We will use same user to run test to avoid user swapping. My username is “shashi”
Now, macOS Server will take some time configuring and then we will be able connect to macOS Server.
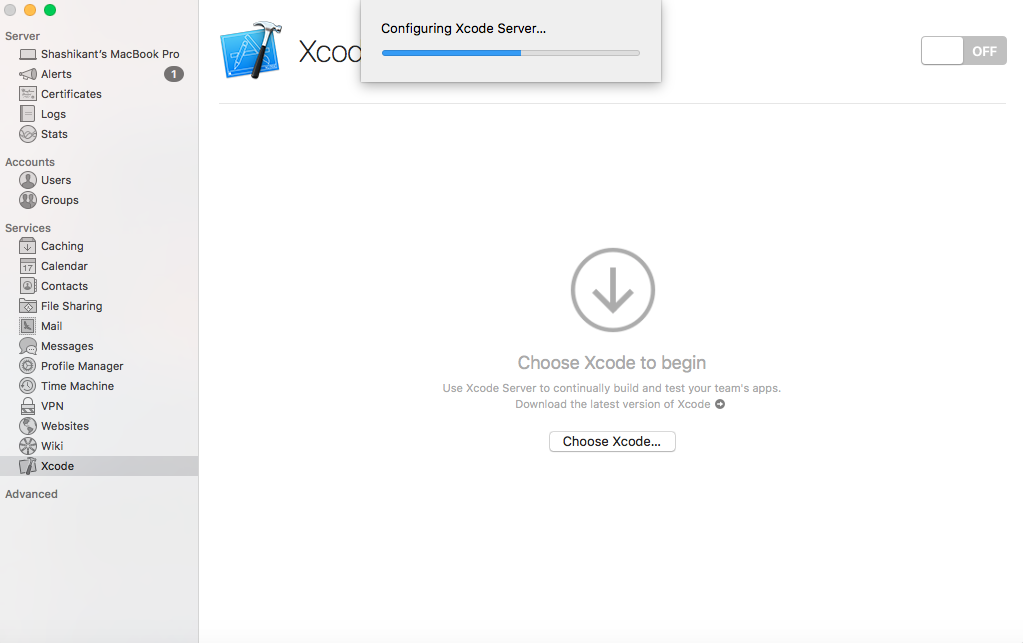
Configure Xcode for Xcode Service
macOS Server has lots of other services but we need ‘Xcode’ service which is a ‘Continuous Integration’ service to automate static analysis of code, build app, run tests, archive app, report code coverage, report test results, send notifications etc etc. Now that developers working on Git repository can trigger integrations by creating Xcode Bots. Xcode Integrations can be triggered manually, after code change or periodically.
Now we have various setting like choosing Xcode, setting up user permissions, configure development team and development devices.
Choose Xcode
Next Step is to configure ‘Xcode’ service from macOS Server to run our integrations. Now Select ‘Xcode’ service from the Server app and Choose Xcode 8 app installed on Mac.
Choose User to Run Test
Now we can select use here to run out test or Integrations triggered from Xcode “bot”. We have already created “Xcode Server” user but it can be any user. We can switch user if we with to. It isn’t good idea to give that user Administrative rights because it’s not required.
Choose Development Team and Devices
Now it’s time to configure details of our development team with our Apple ID. We need provisioning profiles, certificated to configure this. We can add real devices to the Server as well. Once provisioned devices connected to the Mac it will start appearing in the device list.
Add your Git Repo
Assuming you are team of developers working on the GitHub repo. We can add GitHub repo to our Xcode Service. We can setup ‘Repository Access” with SSH or HTTP. “Repository Creators” and finally there is button to add multiple repositories to be hosted on Xcode Server. You can do it from “Xcode Bot Setup” as well which we will cover later in the post. Let’s add Swift Package called “XCFit” as Git Repo
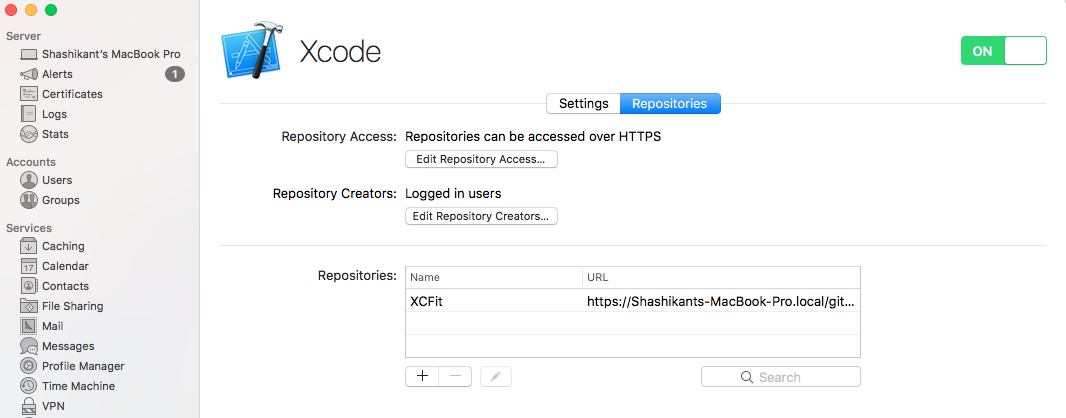
Turn ON Xcode Service
Turn on Xcode Service by Clicking on the button once we have everything setup. You should see that in the notification service as well as shown below.

At this stage, our Mac with macOS Server will be accept any Integrations triggered by the Xcode Bot. Now that, developers can create Bots as per their need and our Mac will be capable of running those integrations.
Share Server Details with Team
We have just completed all the nessesary setup to run Xcode Bot on our Mac. It’s time to share the server details to development team so that they can configure macOS Server on individual Xcode installed development Mac. The details are on the main Server tab. Details will be
- Host Name and IP address
- SSH access with username and password
- Network To be used
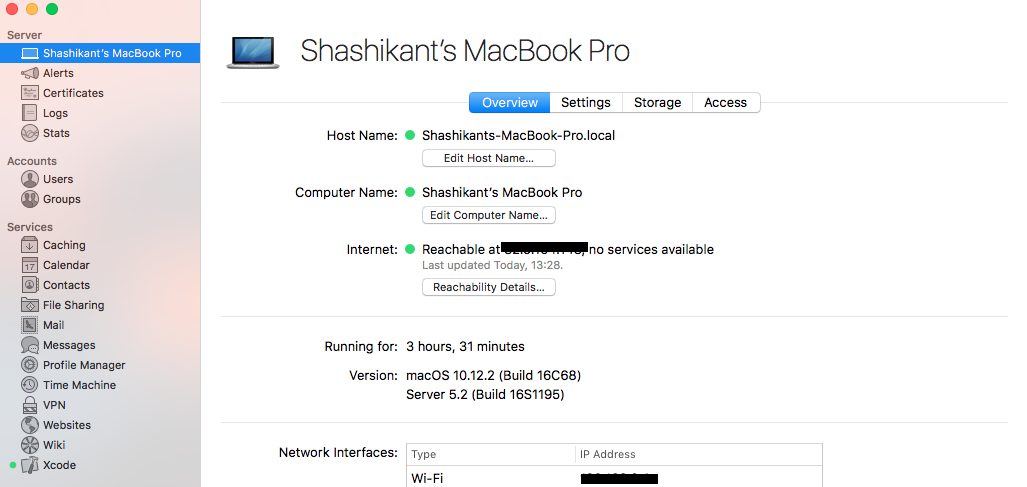
The developers will use these details to configure the local development Xcode to connect to the Xcode Server.
Configure Xcode to use Xcode Server
Now that, we have our macOS Sever fully setup for running our Xcode ‘bots’. We need to configure the local development Xcode to connect to the Xcode Service installed on the macOS Server. We have all the details of the Server to configure. We will configure the same Mac to connect to the local Xcode Server but ideally there will other development Macs connecting to the Xcode Server.
Add Server
In order to add macOS Server to Xcode, launch the Xcode project you are working on and Select “Xcode -> Preference -> Account” at the bottom, click on “+” sign to see “Add Server” option.
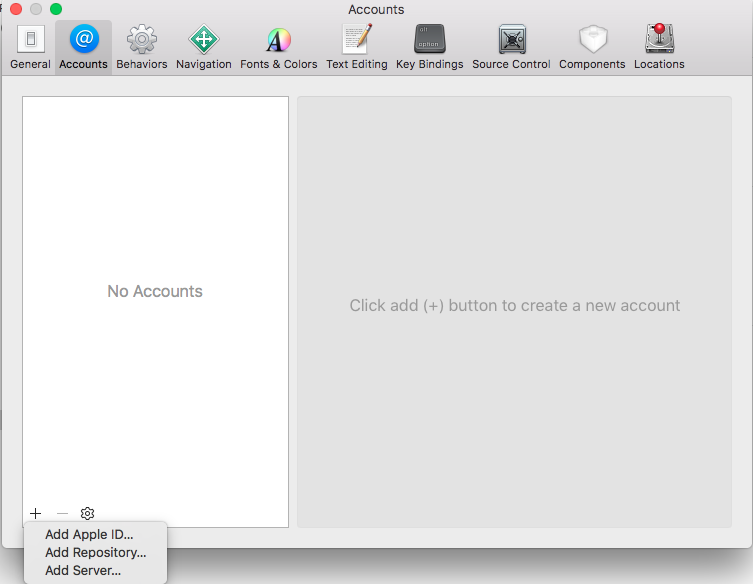
There will an option to select a Server or connect to host. Select the Server that we have just configured.
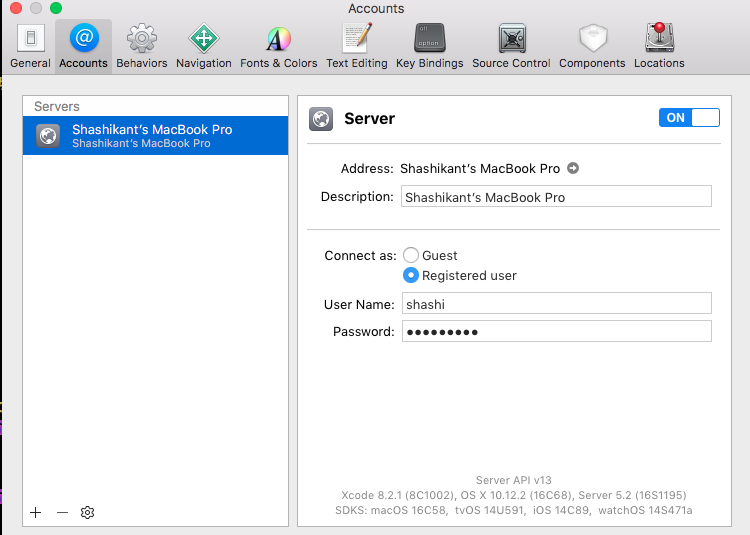
Add Integration User
The next screen, we will see option to login to the user on macOS Server. We have to login with the user we have setup to run integration otherwise Xcode Server will show an error. We have configured my user ‘shashi’ to run integrations so lets login to server with that user.
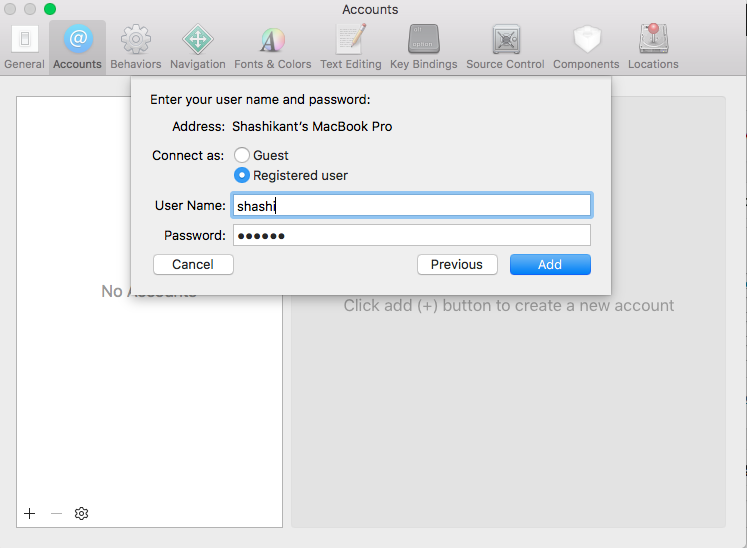
Once user is successfully added, we should see screen with Server status “ON“. It should look like this:
At this stage, we have configured our local Xcode to use macOS Server. We should now able to create Xcode Bots.
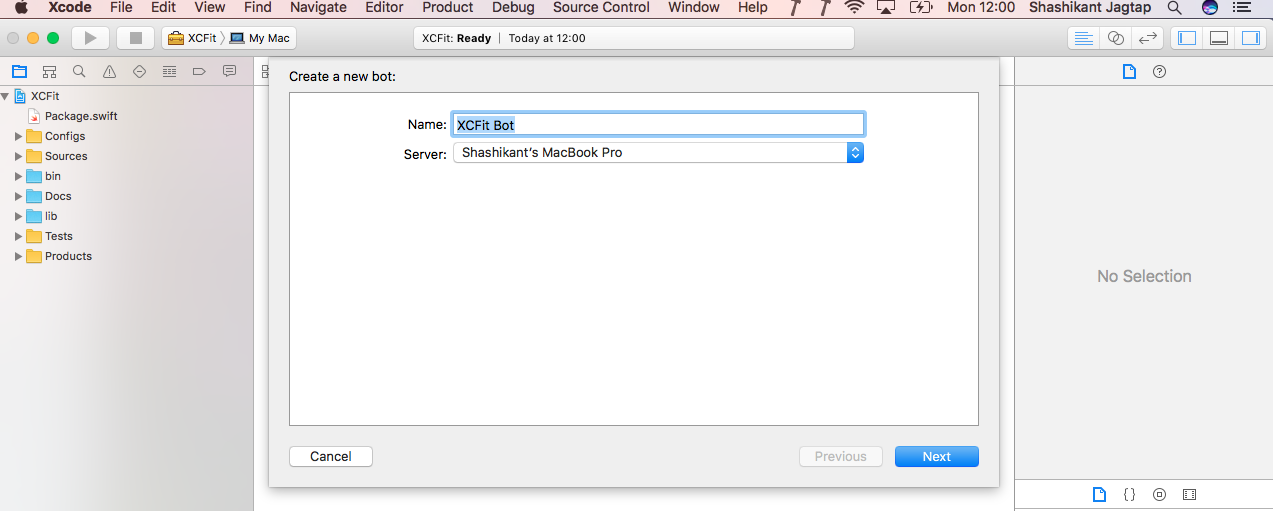
Create Xcode Bots
Xcode Bots are similar to the Jobs in Jenkins or Projects in TravisCI. We have to configure set of automated instructions to checkout source code, build, test and notify etc etc. The benefits of the Xcode Bot is that we can configure the Bot straight from the Xcode. We can see all the created Bots in the ‘Test Navigator’ of the Xcode. We will use “XCFit” GitHub repository to configure bots.
Clone the Project from the Github and Open the Project in the Xcode.
$ git clone git@github.com:Shashikant86/XCFit.git
$ open XCFit.xcodeproj
This will open the project in Xcode “Product -> Create Bot” and name the bot as “XCFit Bot”
Add Repository with SSH Credential
Next step is to add Github Repo to the Bot. We have to add Git Repo with SSH. Xcode will ask you to trust the identity repository. You have to select “Trust” and use credential of existing SSH Key
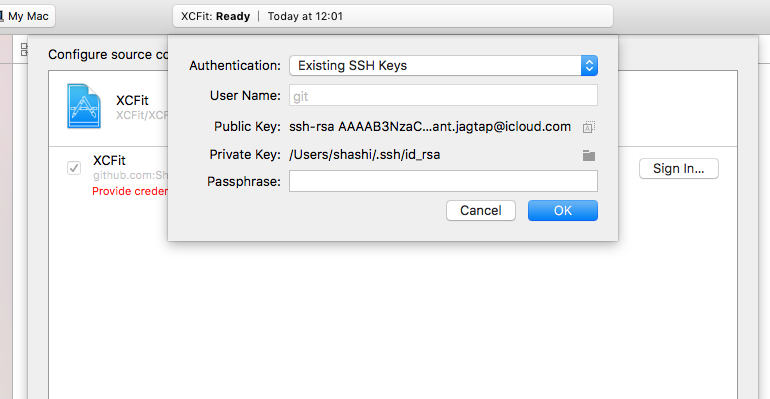
Once successfully authorised, we should able to configure build.
Add Build Configuration
The build configuration is main stage to configure what we want to perform as part of the build. Xcode Bot has some options like
- Scheme – Xcode Scheme to build
- Actions – We have to tick ‘Perform Static Analysis’ and ‘Perform Test Action” with code coverage enabled. At this stage we don’t need “Perform Archive Action” as it’s just a Swift Package.
- Cleaning and Configuration : Keep this default to “Never” and “Use Scheme Setting”

That’s it to build our Xcode Bot.
Schedule
We can then Schedule the build whenever we want to build Xcode bot. There are three major options to build Or Integrate Xcode Bot.
- Periodically : This has option to integrate Xcode Bot “Daily”, “Weekly” and “Hourly” at specific time.
- On Commit : After Every commit to Git Repository this Xcode Bot will be integrated.
- Manual : We have to manually click “Integrate” to perform Xcode Bot integration.
Devices
There is an option to select the device to run an integration on. We can run test on real device or simulators. The provisioned devices attached to the Xcode servers will appear on the list. We have various OS combination to run integration on like macOS, iOS, tvOS and watchOS.
In our case, we don’t any iOS device or simulator as it’s Swift package and can be run on Mac. In case we are using iOS App then we can select specific device or iOS Simulators. Now we will select “macOS” for this Bot.
Environment Varibales
There is an option to use custom environment variables or use predefined variables to perform integrations. Full list of Xcode Server environmental variable is here. In our case, we don’t need to select any variable.
Triggers
Triggers are set of actions to be performed before or after Xcode Bot Integration. Xcode Bot has following available triggers
- Pre-Integration Script : We can add bash scripts to run before integration starts
- Post-Integrations Script : Bash Script to be executes after integration is finished
- Email On New Issues : Email notification when new issue comes up
- Periodic Email Report : Email notification after regular interval.
We don’t need to select any trigger for our XCFit Bot. You should now see message that we have successfully configured our Bot.
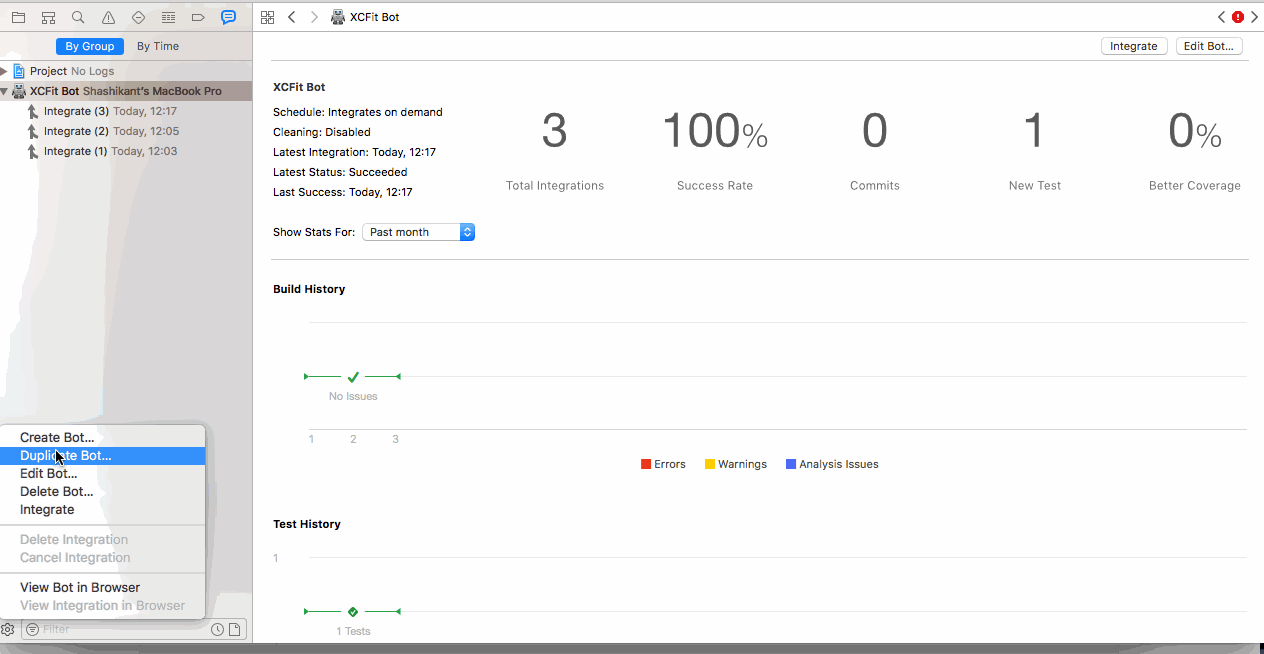
Run Integrations & Analyse Result
Once Xcode Bot is configured, it will automatically start Integration. The typical integration will checkout source code, and perform all the actions defined in the ‘Build Configurations” At the end of the integration we will see a summary of the integration.
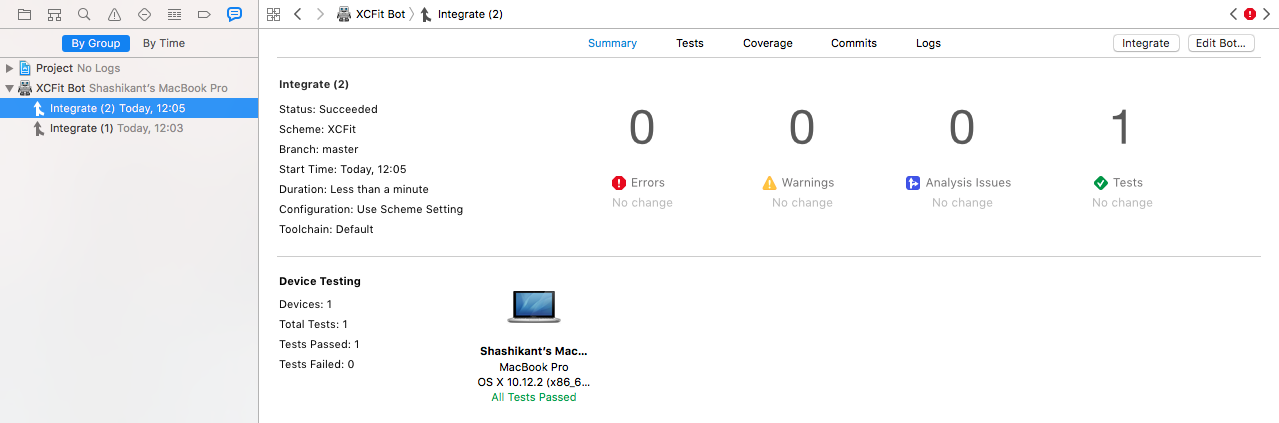
We wil also have option to view “Tests”, Code Coverage an Logs.
Xcode Bot in Action
Now let’s watch everything we described in an action. You can watch Youtube Video about this here Or watch animated gif.
Congratulations. We have successfully configured Xcode Bot and Performed Integrations.
WWDC Tips for Xcode Server
- Assign dedicated user for the Xcode Server
- Never give admin rights to the Xcode Server user
- Stay logged in and disable screen lock
- Customise needs such as advance provisioning and simulators
Hope this article is useful for you setting up Xcode Server as Continuous Integration Server for iOS. Thanks for reading. Let me know if you have any difficulties setting that up. Happy CI