Jenkin 2.0
The new version of the Jenkins a.k.a Jenkins 2.0 will be released very soon. Jenkins 2.0 will be bringing us some new amazing features.
- Pipeline as Code
- Improved User Interface and User Experience
- Security & plugin Enhancements
- New Jenkins WebSite as one stop for getting started guide
The detailed information about the new release can be found out here
In this post, let’s try out new version of the Jenkins with it’s own Docker image.
Jenkins inside Docker
The fastest way to get started is getting the docker image and run containers. The CloudBees has already created a Docker image jenkinsci/jenkins with tag of ‘2.0-beta-2’.
Assuming that, you have Docker ToolBox or similar setup on your machine, you can get the latest image. You can follow my previous post on practical guide to install Docker ToolBox. You can get the image just by pulling it from DockerHub.
|
1 |
$ docker pull jenkinsci/jenkins:2.0-beta-2 |
I have found some cool writeup on RiotGames blogs about setting up Docker and Jenkins. It’s worth having a look in order to detailed understanding of the Docker and Jenkins.
Jenkins Master and Mounted Data Volume
Let’s build couple of the Docker images in order to setup Jenkins instance with preserved data. There will be two images and containers
- Two manage Jenkins Master
- Store Data so that restarting container won’t loos jobs and plugin data
Let’s create Dockerfile to build our Jenkins master.
|
1 2 3 |
$ mkdir jenkins2-docker $ cd jenkins2-docker $ vim Dockerfile |
Now insert following in the Dockerfile
|
1 2 3 4 5 6 7 8 |
FROM jenkinsci/jenkins:2.0-beta-1 USER root RUN mkdir /var/log/jenkins RUN mkdir /var/cache/jenkins RUN chown -R jenkins:jenkins /var/log/jenkins RUN chown -R jenkins:jenkins /var/cache/jenkins USER jenkins ENV JAVA_OPTS="-Xmx8192m" |
In this Dockerfile, we are creating another image on top of Jenkins Docker image with some jenkins log directory and JAVA options.
Now, we will create another Dockerfile called ‘Dockerfile-data’ so that we can mount that image/containers while launching jenkins-master.
|
1 |
$ vim Dockerfile-data |
Add the following content to the Dockerfile.
|
1 2 3 4 5 6 7 8 9 10 11 12 |
FROM debian:jessie # Create the jenkins user RUN useradd -d "/var/jenkins_home" -u 1000 -m -s /bin/bash jenkins # Create the folders and volume mount points RUN mkdir -p /var/log/jenkins RUN chown -R jenkins:jenkins /var/log/jenkins VOLUME ["/var/log/jenkins", "/var/jenkins_home"] USER jenkins CMD ["echo", "Data container for Jenkins"] |
This image will be used to mount volume for the Jenkins master so that we can delete the Jenkins master without worrying about the data.
Build Docker images and run Containers
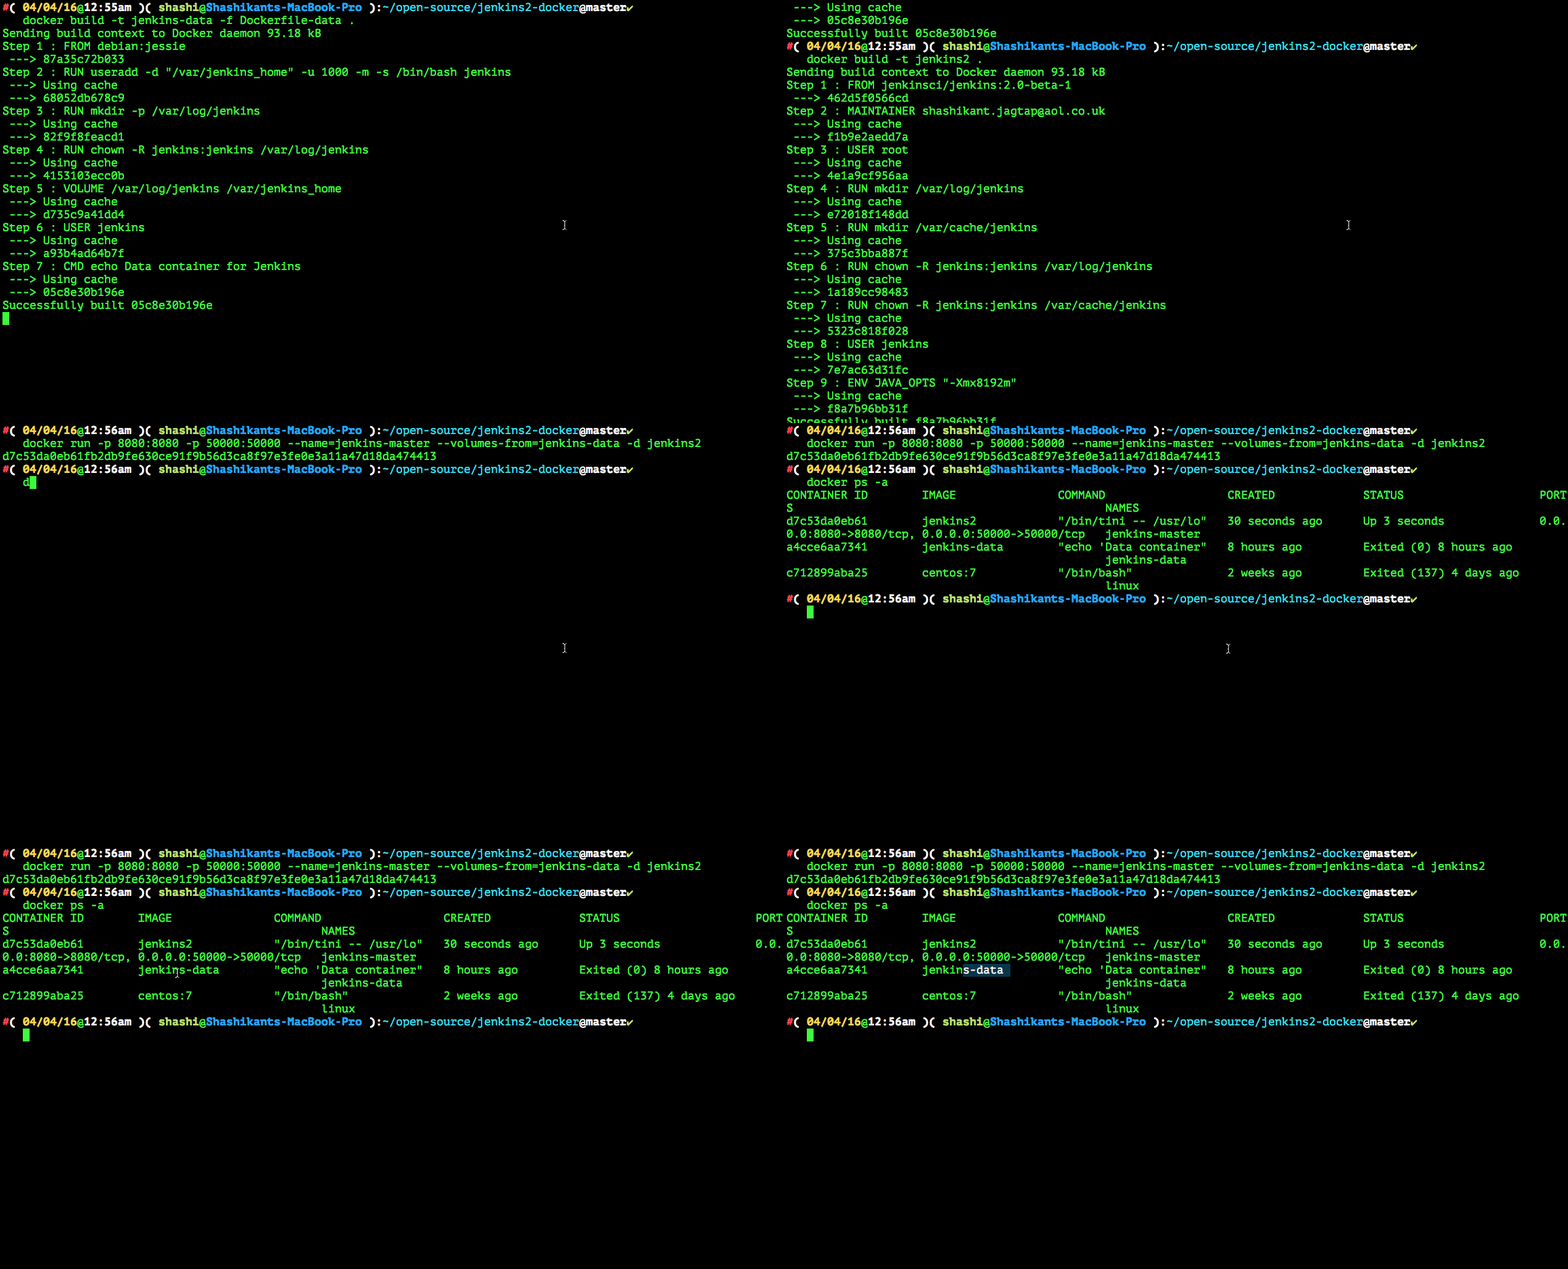
Now that, we have docker file for the Jenkins Master and Jenkins Data. We can build those images.
- Jenkins Data Image
|
1 |
$ docker build -t jenkins-data -f Dockerfile-data . |
- Jenkins Master Image
|
1 |
$ docker build -t jenkins2 . |
We can launch the containers for each image
|
1 2 |
$ docker run --name=jenkins-data jenkins-data $ docker run -p 8080:8080 -p 50000:50000 --name=jenkins-master --volumes-from=jenkins-data -d jenkins2 |
Now we can see Jenkins 2.0 will be started on Docker host ip and Port 8080 e.g http://192.168.99.100:8080/
Setting up Jenkins 2.o
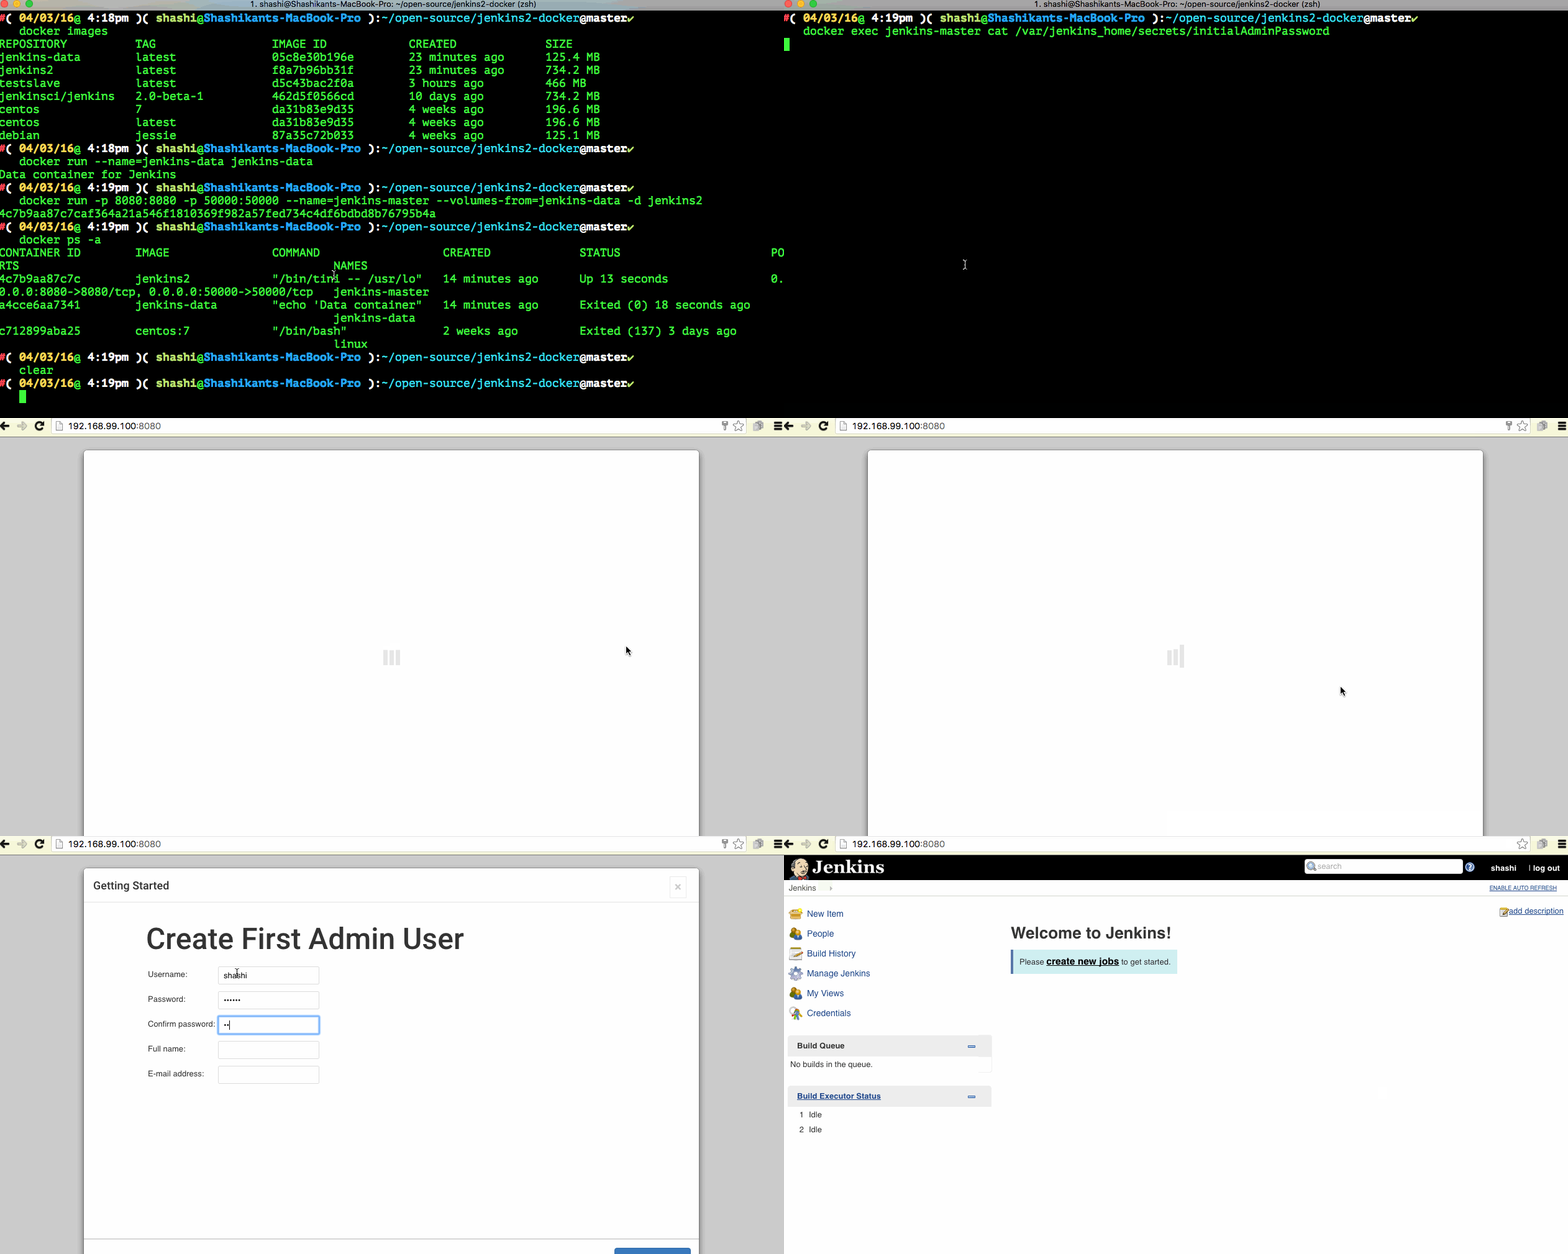
Now that we are running instance of the Jenkins at ‘http://192.168.99.100:8080/‘ (Assuming 192.168.99.100 is your Docker-Machine or equivalent IP), we can setup up the things
- Admin Password
Jenkins 2.0 will ask for the Admin password stored in the Jenkins Master container. We can get it and paste it in the console
|
1 |
$ docker exec jenkins-master cat /var/jenkins_home/secrets/initialAdminPassword |
- User Details
The next step is to fill in the required user details in order to login into the Jenkins.
- Plugins
You can then install default plugins
Now, we have ready instance of Jenkins to configure Jobs and Pipelines.
Exploring Jenkins 2.0 Features
Jenkins features are explained in the brief above but we will demonstrate two powerful features
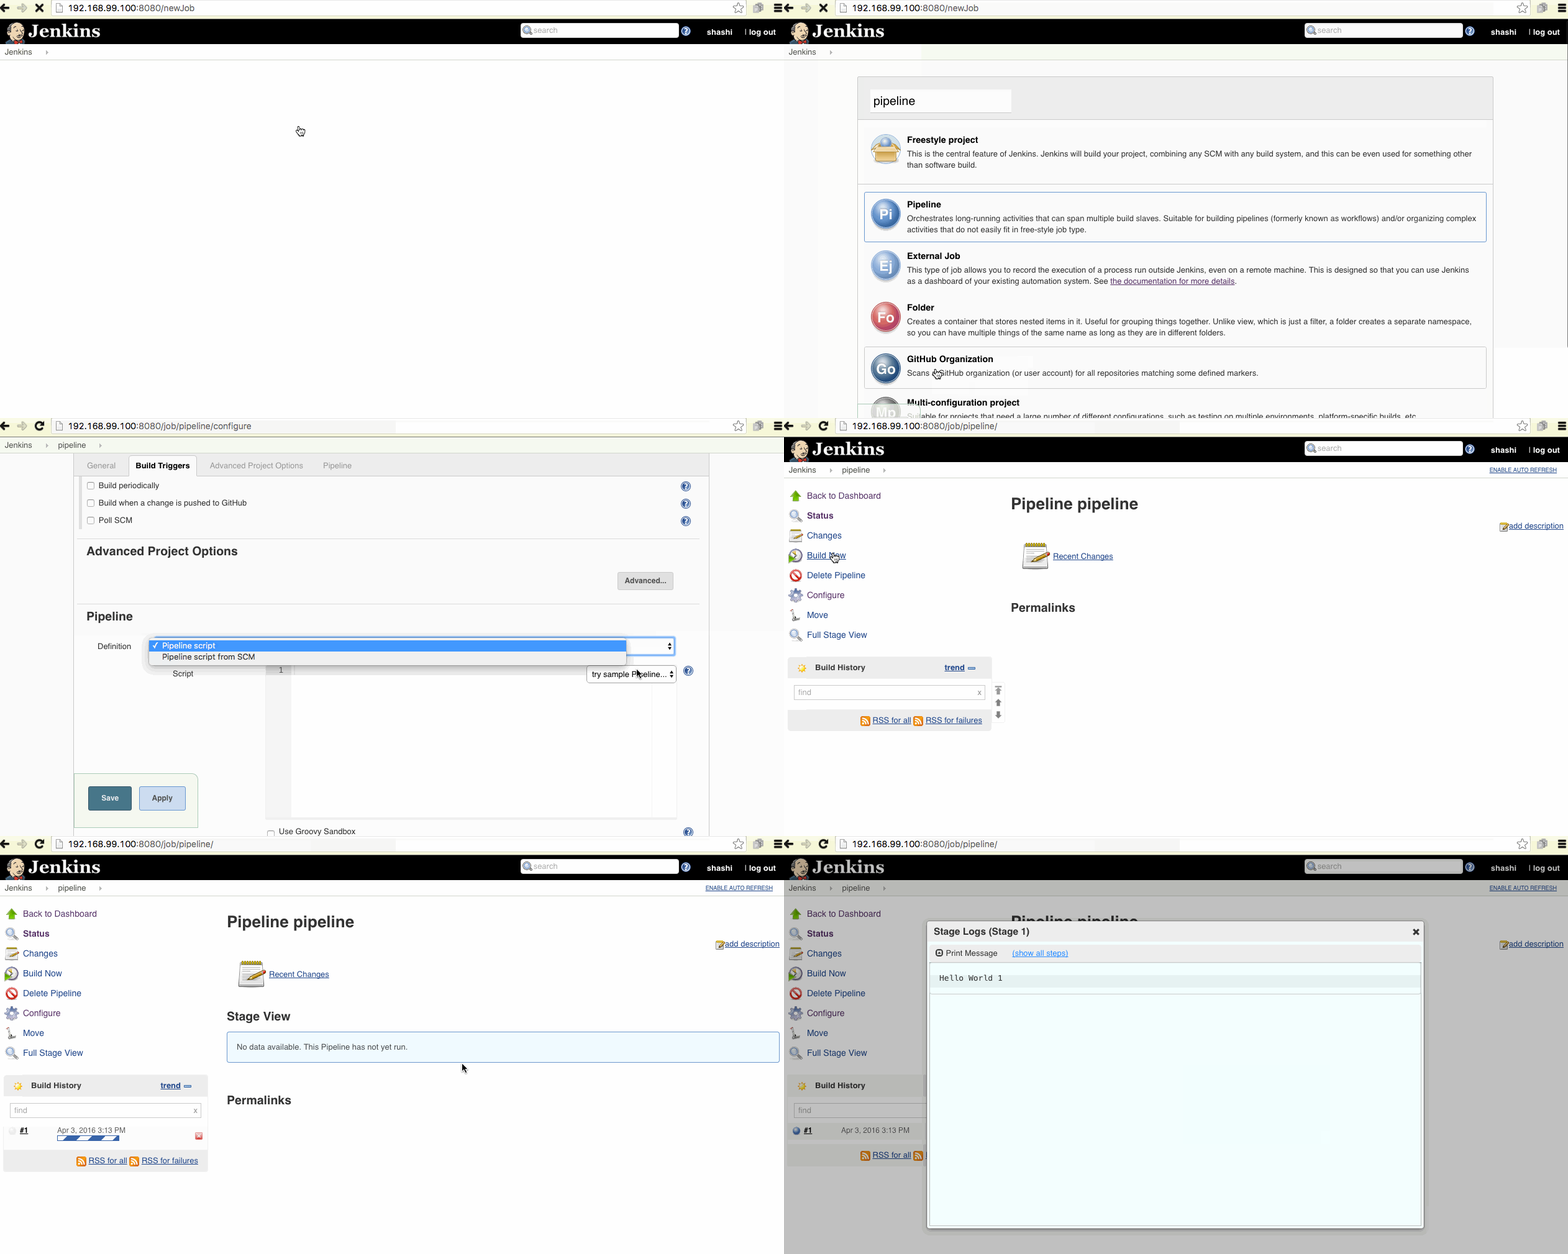
- Pipeline as Code
In the previous version of the Jenkins. We have
Pipeline as a code has following benefits
- Easily define simple and complex pipelines through the DSL in a
.1Jenkinsfile
- Pipeline as code provides a common language to help teams (e.g. Dev and Ops) work together.
- Easily share pipelines between teams by storing common “steps” in shared repositories.
Here is the demo how to create a default pipeline using Jenkins 2.o. Click on the image below.
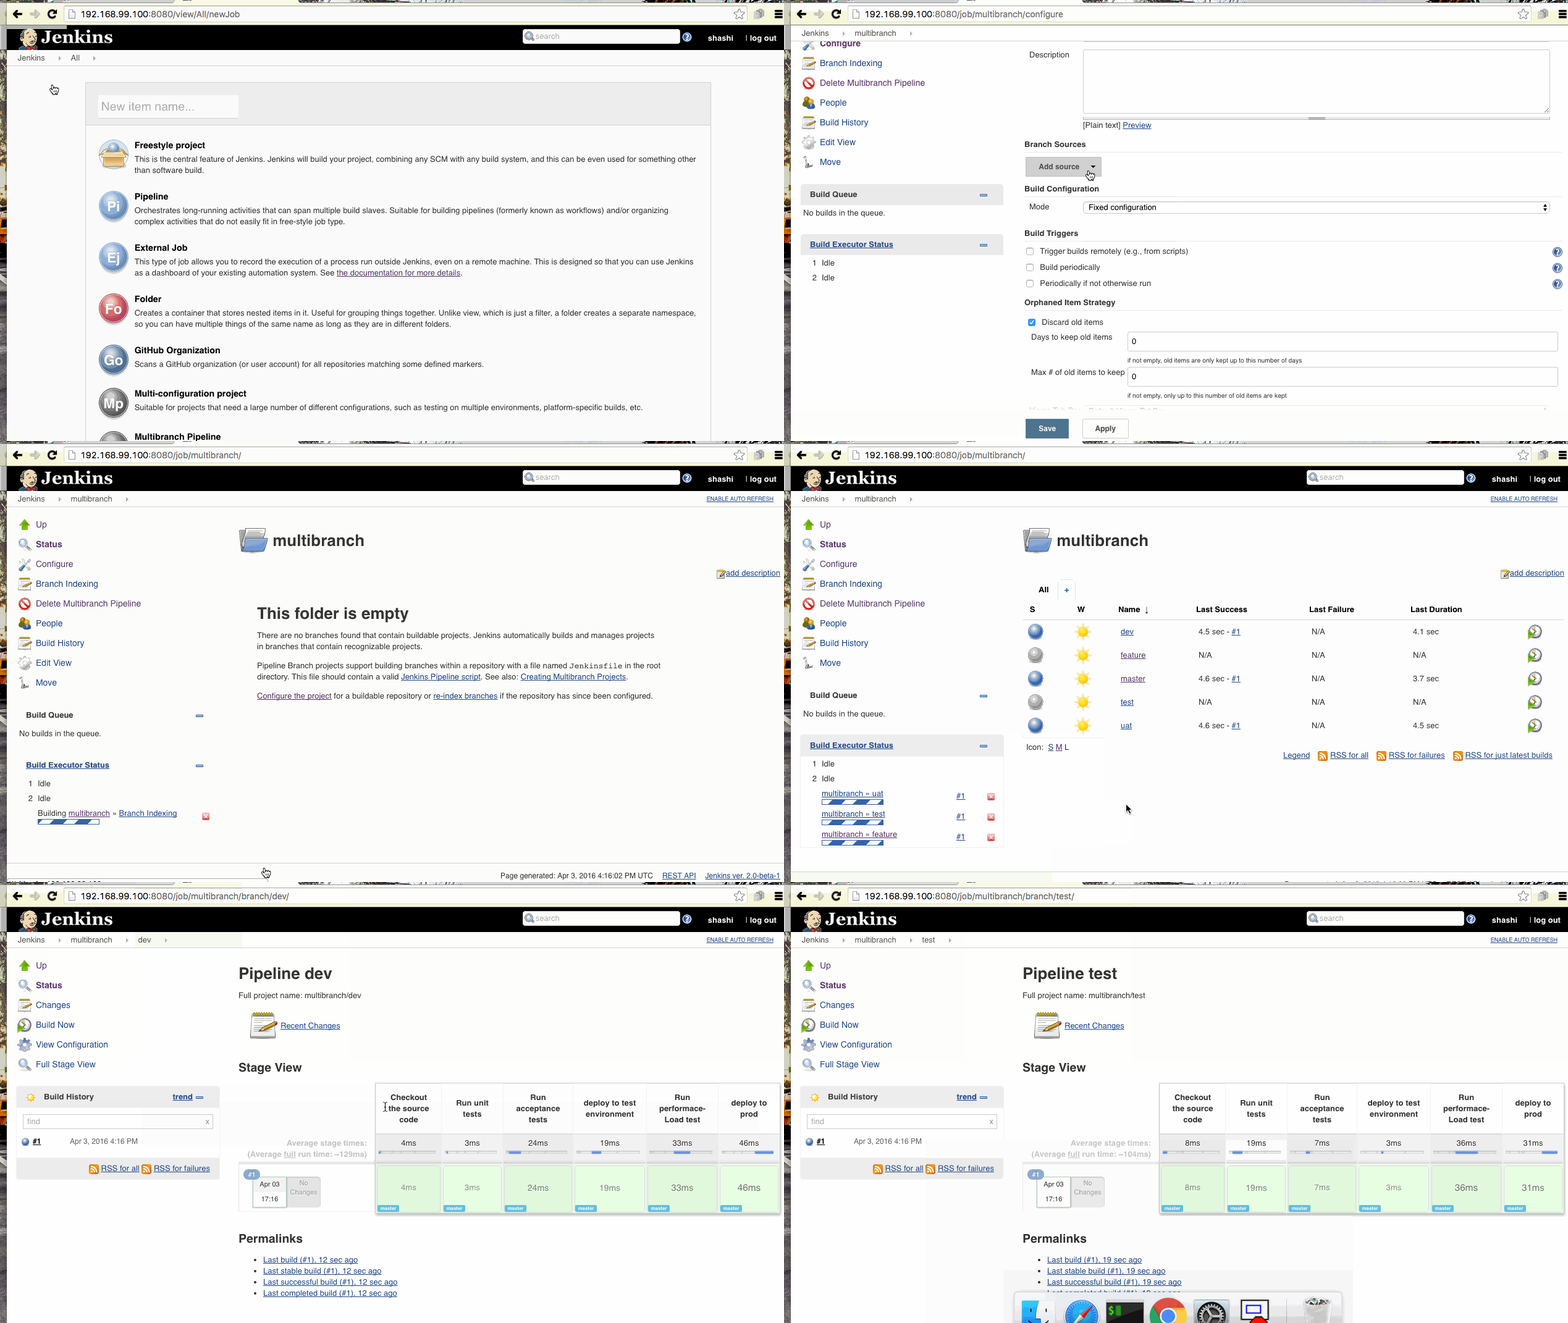
- Multi-branch Pipeline
Now we can create different pipelines as per the GitHub branches. I have created and Github repo ‘jenkins2-docker‘ with multiple branches and configured the Jenkins accordingly.
There are some other features as well but these two are very powerful. I will cover slaves and other features in the next post
Github Repo
https://github.com/Shashikant86/jenkins2-docker
Happy DevOps’ing !!


