

Fitnesse for iOS
Recently Fitnesse has entered in the world of iOS development. An OCSlimProject has enabled an ATDD and BDD practices in iOS development world. This project enabled us writing and blazing fast acceptance test with Fitnesse for iOS. Thanks to Paul Stringer and other contributors. You can read more about what are the problems that Fitnesse can solve in article ‘Acceptance Testing for iOS‘ by Paul Stringer.
As of now Fitnesse acceptance for iOS running in the separate process and reports are generated by different mechanism which wasn’t feel like Fitnesse is actually part of the development and CI workflow. The good news is latest release of the OCSlim project has integrated Fitnesse test reports along with XCTest framework which means we can execute Fitnesse tests along with Unit tests using xcode-build. In this post, we will see how to integrate Fitness with XCTest.
Fitnesse and XCTest
Pre-requisite
In order to get Fitnesse and XCTest working we need to have following toolkit
- RubyGems setup and Cocoapods [ gem install cocoapods]
- Xcode 8 (Should work on 7.3 as well)
- Java 1.8 – Scared ? Yes, Java! required to launch Fitnesse. Don’t worry we are not touching it [ brew install java]
- NodeJS [ brew install node ]
- iOS-sim [ npm install -g ios-sim]
Once we got these we are good to go.
Create new Xcode Project
Let’s create new Xcode project in Swift with Unit tests only, without UI Tests and Core Data.
Let’s build this project and run unit tests for the blank project by pressing CMD+B and CMD + U. Now we have a blank app running in the simulator.
Get Fitnesse Target Templates for Xcode
There are some pre-defined targets as part of the “OCSlimProject” we need to download and add to Xcode. Just run these commands from terminal/iTerm
|
1 2 3 4 5 |
$ git clone https://github.com/paulstringer/OCSlimProjectXcodeTemplates.git $ cd OCSlimProjectXcodeTemplates $ make |
Now we have all the necessary targets templates copied over to Xcode. Now Launch Xcode and Select new Targets for iOS. You will see Acceptance and Acceptance Unit Tests Bundle got added to Xcode.
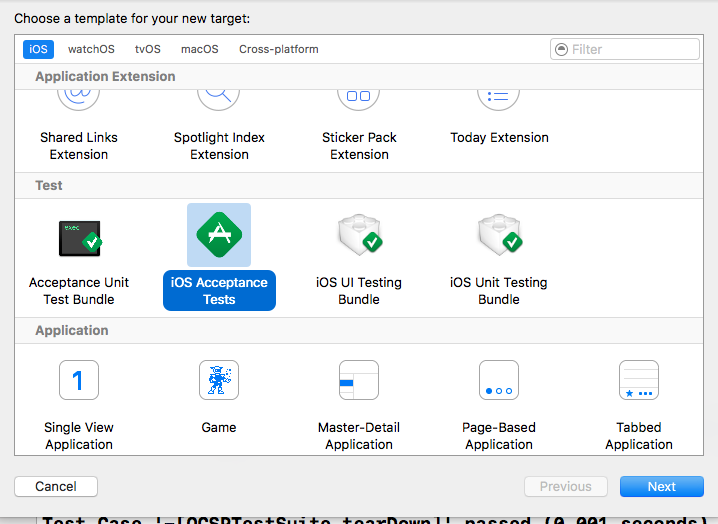
Add Acceptance and Acceptance Unit Test Target to Project
Now that we have all the predefined targets for Fitnesse. Just add “Acceptance Tests” target from the template and “AcceptanceUnitTests” target from the bundle. You will need “Fitnesse Suite page name” to create this target but just put “OCSlimProjectExamplePage” there for now . Add your ‘AcceptanceTests’ target as a ‘Target Dependancy’ of this new target in Build Phases. This ensures that it the latest code has been built prior to the tests being run.
If you click build at this stage, it will fail because we don’t have Pod dependencies added yet.
Add Pod Dependencies
We need to create a “Podfile” at the root of the project with the following content.
|
1 2 3 4 5 6 7 |
target 'AcceptanceTests' do pod 'OCSlimProject' end target 'AcceptanceUnitTests' do pod 'OCSlimProjectTestBundleSupport' end |
Now, we can run ‘pod install’ at this stage and close the current Xcode session and open project workspace.
Build Acceptance Tests Target
At this stage, we should be able to build the “Acceptance Tests” target. If you are using Xcode8, you might see some warning related to the Swift3 Syntax. Just Click on ‘Edit-> Convert-> To Current Swift Syntax
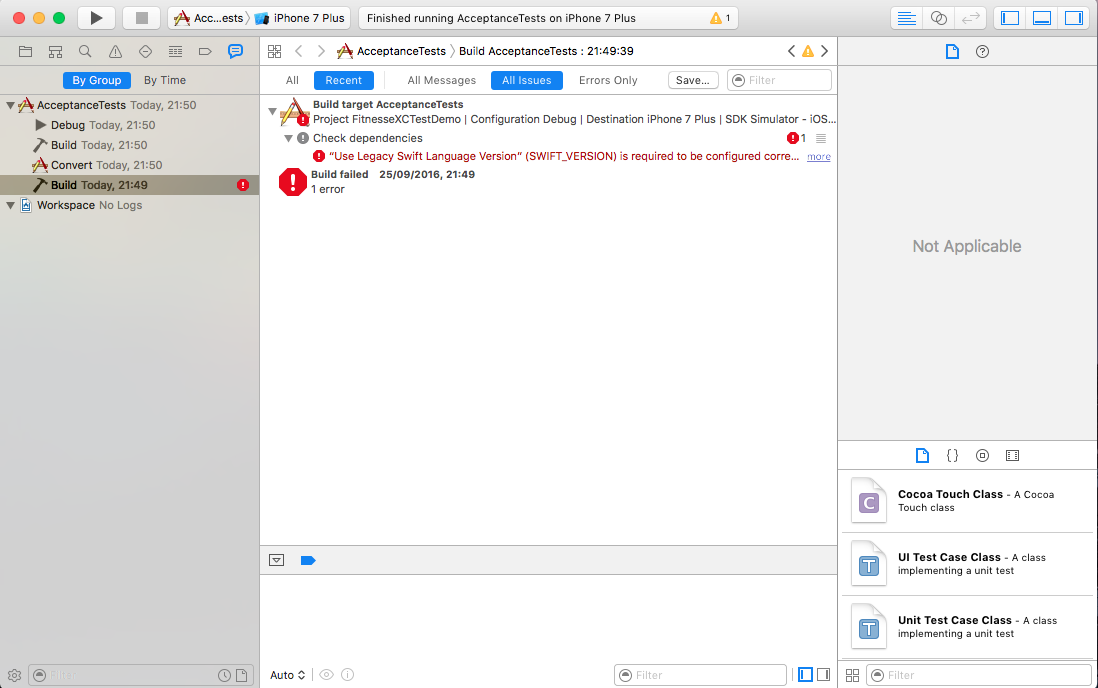
Just Click on ‘Edit-> Convert-> To Current Swift Syntax and this error will go away.
Now you should be able to build an “Acceptance Tests” target. Once, build is successful, you should see “LaunchFitnesse” script is generated in the root of the project. We can launch and execute the fitness test as shown below.
Test AcceptanceUnitTests Target
Now if you select “AcceptanceUnitTarget” and press CMD+U
Now we can see that Fitnesse tests are running as shown above. We can add this to main scheme to make sure we are running it after the unit tests to follow proper development workflow. We can build and run it as our normal unit tests.
Taking Control with Bundler, Fastlane and Trainer
Now that , we have seen how to run Fitnesse acceptance tests from Xcode but it’s good idea to run it with Fastlane. We can also take control of version of Cocoapods and Fastlane by using Bundler. Let’s create a Gemfile at the root of the project with following gem.
|
1 2 3 4 5 6 7 |
source "https://rubygems.org" gem 'cocoapods' gem 'fastlane' plugins_path = File.join(File.dirname(__FILE__), '.', 'Pluginfile') eval(File.read(plugins_path), binding) if File.exist?(plugins_path) |
Let’s also create directory “fastlane” and make “Fastfile” with following content
|
1 2 3 4 5 6 7 8 9 10 11 12 13 14 15 16 17 18 19 20 21 22 23 24 |
fastlane_version "1.104.0" default_platform :ios platform :ios do before_all do system "rm -rf ../test_reports/" system "bundle install" system "pod install" system "bundle exec fastlane add_plugin trainer" end desc "Runs all the Unit tests and Fitnesse Aceptance Tests" lane :xctest_fitnesse do scan( scheme: "FitnesseXCTestDemo", destination: 'platform=iOS Simulator,name=iPhone 7 Plus,OS=10.0', output_directory: "test_reports/", output_types: "html", fail_build: false ) trainer(output_directory: "test_reports/trainer_report/") end end |
Now we will create a “fastlane/PluginFile” to add “trainer” plugin
|
1 |
gem 'fastlane-plugin-trainer' |
After running “bundle install” we should be able to run those test from command line like this :
Source Code
The Source Code for this demo is available on Github “Fitnesse-XCTest“. Just run following commands
|
1 2 3 4 |
$ git clone https://github.com/Shashikant86/Fitnesse-XCTest $ cd Fitnesse-XCTest $ bundle install $ bundle exec fastlane xctest_fitnesse |
YouTube Video
You can watch video on YouTube here