PHP-Jenkins Template
Jenkins is a very popular Continuous Integration tool these days and using it with PHP project is became so easy with help of Jenkins-PHP template project. This project gives us ultimate guide to get started with basic setup of the PHP related tools and Jenkins plugins.
You can install Jenkins on various platform, in my old blog post ‘Adventures with JenkinsCI on Mac OSX and Linux‘ we have covered Jenkins installation. I got my JenkinsCI instance running on Mac OSX [http://localhost:8080]
Install Jenkins-PHP Plugins
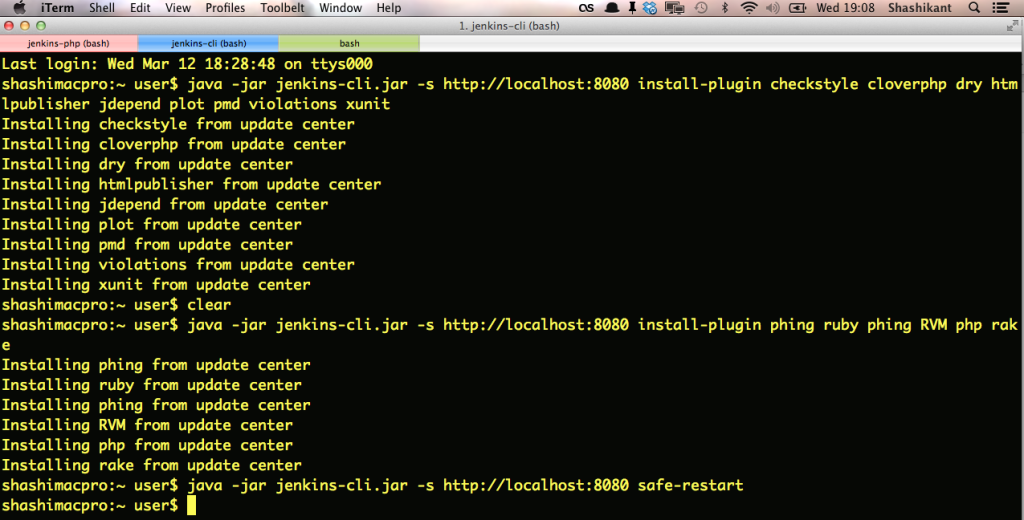
Let’s now install basic Jenkins plugins using Jenkins-CLI. In iTerm type following commands to install these required plugins:
|
1 2 3 |
$ wget http://localhost:8080/jnlpJars/jenkins-cli.jar $ java -jar jenkins-cli.jar -s http://localhost:8080 install-plugin checkstyle cloverphp dry htmlpublisher jdepend plot pmd violations xunit |
Here are some more useful plug-ins like phing, Ruby, RVM, PHP and Rake. You can install and restart Jenkins.
|
1 2 3 |
$ java -jar jenkins-cli.jar -s http://localhost:8080 install-plugin phing ruby phing RVM php rake $ java -jar jenkins-cli.jar -s http://localhost:8080 safe-restart |
Now, you should see something like this in your Terminal or iTerm:
Composer and PHP Tools
Composer is a great dependency management tools for PHP. We can take benefit of Composer in order to install all PHP related dependencies locally or globally, choice is yours.
Let’s create composer.json file with all Jenkins-PHP dependencies.
|
1 |
$ vim composer.json |
Now, let’s add following dependencies to composer.json
|
1 2 3 4 5 6 7 8 9 10 11 12 13 14 15 |
{ "require": { "phpunit/phpunit": "3.7.*", "theseer/fxsl": "1.0.*@dev", "theseer/phpdox": "0.5.*@dev", "squizlabs/php_codesniffer": "1.4.6", "phpmd/phpmd": "1.5.0", "phploc/phploc": "2.0.2", "sebastian/phpcpd": "1.4.3", "phpdocumentor/phpdocumentor": "v2.0.1", "mayflower/php-codebrowser": "1.0.*@dev", "pear/pear_exception": "dev-master", "phing/phing": "2.6.1" } } |
Now, Let’s install composer
|
1 2 |
$ $ curl -sS https://getcomposer.org/installer | php $ php composer.phar install |
I found an awesome template project on GitHub ‘Jenkins-php-quickstart‘ and forked it immediately. This project has all the required files to generate necessary reports. Here is how I installed this project.
In this project, if we execute:
|
1 2 |
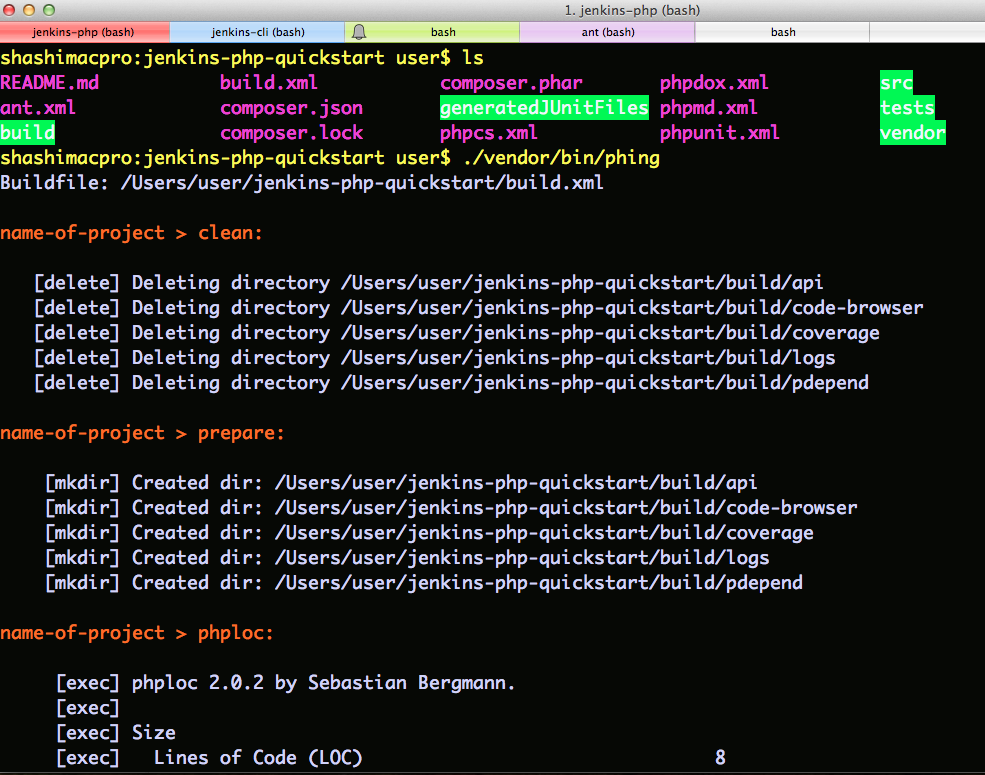
$ cd jenkins-php-quickstart $ ./vendor/bin/phing |
This will run all phing tasks and generate necessary reports.
List of Reports
Now we have list of all the reports generated in the /build/ directory. Let’s explore what we got there
- Code-Browser
There are code browser reports generated in the ‘build/code-browser/’ directory. You can open ‘index.html’ in the browser to explore your code
- CheckStyle
There is file called ‘checkstyle.xml’ in the ‘build/logs’ directory which displays checktyle reports for the existing project.
- JDpend and Junit
Two file ‘jdepend.xml’ and ‘junit.xml’ in the ‘build/logs’ directory which displays Junit style reports for the unit tests.
- Copy Paste Detector & Mess Detector
There are two file called ‘pmd-cpd.xml’ and ‘pmd.xml’ to detect smell in the PHP code in the ‘build/logs’ directory.
- Pdepend
Pdepend file are .svg file to plot a graph of the code analysis.
Configure Jenkins
Now, that we got all the necessary reports generated locally. Now, we need to configure all the reports on Jenkins. Let’s create a new job called ‘jenkins-php-quickstart’. You need to visit Jenkins dashboard and click ‘New Job’ or ‘New Item”
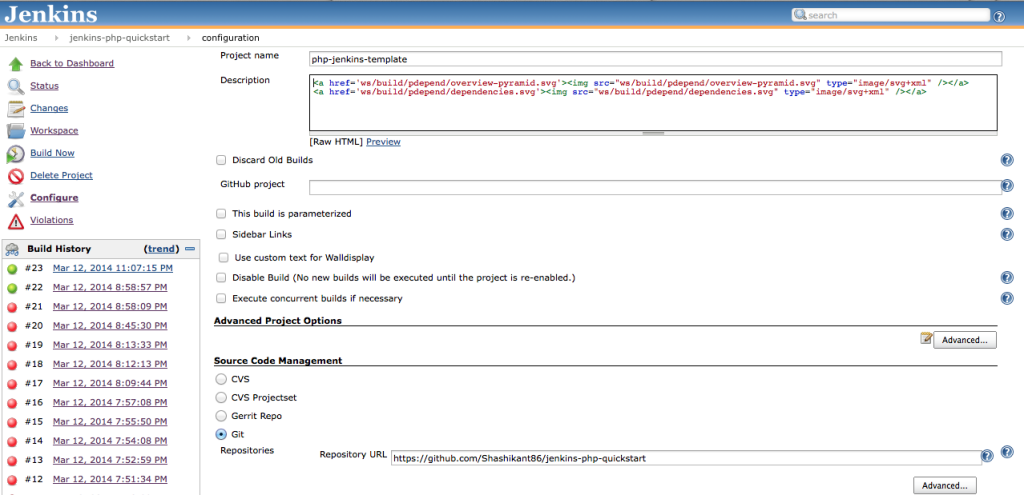
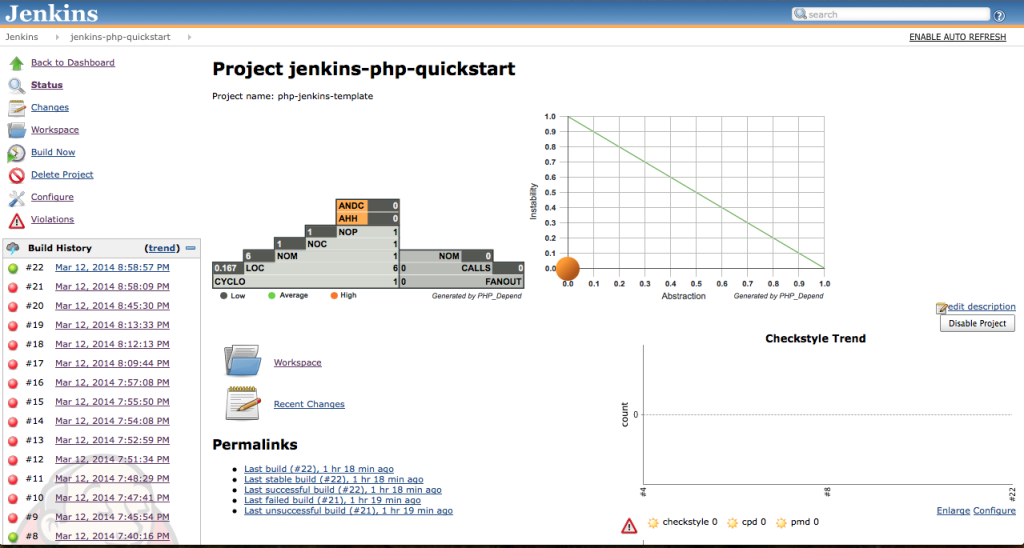
Now, we need to do little hack in order to display PDepend reports on the Jenkins Project home. Add following HTML code in the project description:
|
1 2 |
<a href='ws/build/pdepend/overview-pyramid.svg'><img src="ws/build/pdepend/overview-pyramid.svg" type="image/svg+xml" /></a> <a href='ws/build/pdepend/dependencies.svg'><img src="ws/build/pdepend/dependencies.svg" type="image/svg+xml" /></a> |
Let’s configure Github repo ‘jenkins-php-quickstart‘ as a SCM. We can then add ‘build’ as ‘Execute Shell’
|
1 |
./vendor/bin/phing |
Here it looks like:
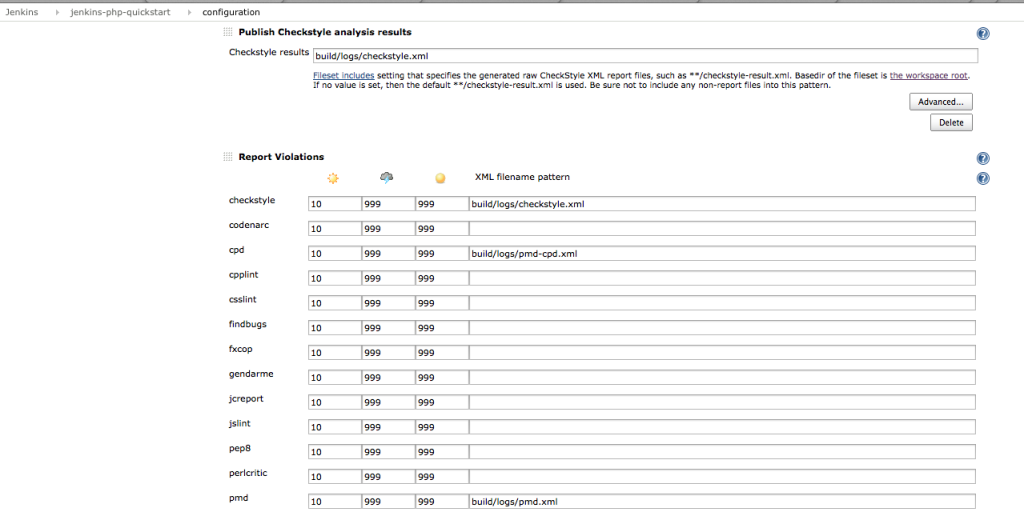
Now, configure Checkstyle, PMD, CPD reports as shown below:
Now, we are done. Click on ‘Save” and “Build Now” to build this project. Once we build the project. We got following nice looking reports on the project home page.
Composer Best Practices on CI
We got all the dependencies checked into the source control for this demo but it’s not ideal. We can follow some practice to use composer smartly
- Install composer globally on Jenkins box
|
1 2 |
$ curl -sS https://getcomposer.org/installer | php $ mv composer.phar /usr/local/bin/composer |
This will help to access all those build dependencies across various Jenkins jobs. This will save lot of time as we are not downloading dependencies all the time.
- Get benefit of various Jenkins plugins like Phing, PHP Or Rake plugins
- Browse required packages on Packagist website
Source Code & Video Demo
Source Code is available on GitHub : ‘Jenkins-PHP-QuickStart”
HAPPY CI !


