There is no doubt that Swift is amazing programming language to develop iOS apps. However, since Apple has open-sourced Swift, it is going through major breaking changes. Swift is evolving day by day but we have to make sure our apps or libraries still work with constantly changing Swift. Apple ship new Xcode version with the newest version of Swift all the all the time, it often requires iOS developers to switch the Xcode versions or keep multiple version of Xcode at the same time. In this post, we will see how we can switch between multiple Swift version without changing Xcode versions.
Xcode and Swift
Before jumping into changing Swift versions, let’s talk about how the Xcode and Swift version are related to each other. The new release of Xcode always has a latest stable version of Swift e.g Xcode 9.3 shipped with Swift 4.1. We can always find the version of Swift with Xcode in the release notes. Xcode developer directory for the located at /Applications/Xcode.app/Contents/Developer/ by default. However, if we have multiple Xcode versions installed we can switch the Xcode developer directory using xcode-select utility. e.g for beta versions we can switch to beta Xcode using
|
1 2 |
$ sudo xcode-select — switch /Applications/Xcode-beta.app/ $ export TOOLCHAINS=swift |
Its also important to check which Swift version being used at the moment of time. We can check the Swift version just running following command.
|
1 2 3 4 |
$ swift --version Apple Swift version 4.1 (swiftlang-902.0.48 clang-902.0.37.1) Target: x86_64-apple-darwin17.5.0 |
This will print the existing version of Swift being used by recent Xcode version. We can check the location of the Swift binary using the following command.
|
1 2 3 |
$ xcrun -f swift /Applications/Xcode.app/Contents/Developer/Toolchains/XcodeDefault.xctoolchain/usr/bin/swift |
Xcode can use the different version of the Swift using the build setting $SWIFT_VERSION from the build setting tab of Xcode target if we have other Swift versions available.

We can quickly scan the build setting using the following command from the terminal.
|
1 |
$ xcodebuild -showBuildSettings | grep SWIFT_VERSION |
This will print the current version of being used in your current Xcode project. Note that this command has to be run from the root of the iOS project.
Getting New Swift Toolchain
Since Swift is open-sourced, all the active development updated are posted on swift.org website. Latest snapshots of the Swift are always available to download from the website here. We have to download the Swift snapshot from there on our local macOS machine and it’s then available. Once desired Swift toolchain package is downloaded and installed then it became available for Xcode as well. It basically creates another “Toolchain” directory inside the Xcode developer directory. The default toolchain is located at the path
|
1 |
/Applications/Xcode.app/Contents/Developer/Toolchains/XcodeDefault.xctoolchain |
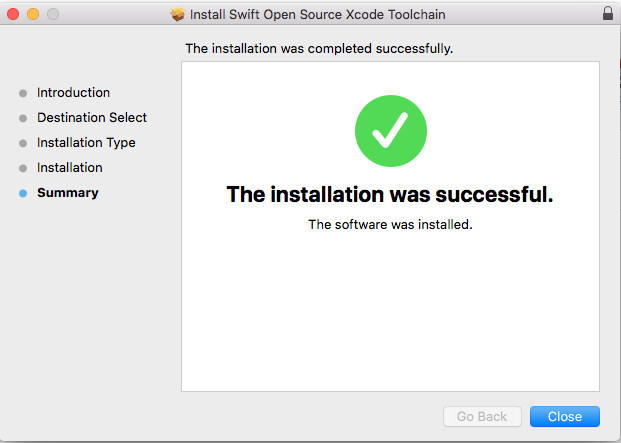
Now that, we already have Swift 4.1 available on pour machine and for some reasons, we need Swift 3.1 in the Xcode 9.3. We can Download Swift 3.1 toolchain from swift.org from here and install the package on the local macOS machine. The package will guide you through the installation process. You have an option to install the Swift toolchain for specific user or system-wide. Once, installation is complete, we will see below screen

Now that, we have successfully installed Swift 3.1 toolchain. The swift toolchain has been installed at the following path for the system-wide installation.
|
1 |
$ /Library/Developer/Toolchains/swift-3.1-DEVELOPMENT-SNAPSHOT-2017-06-14-a.xctoolchain |
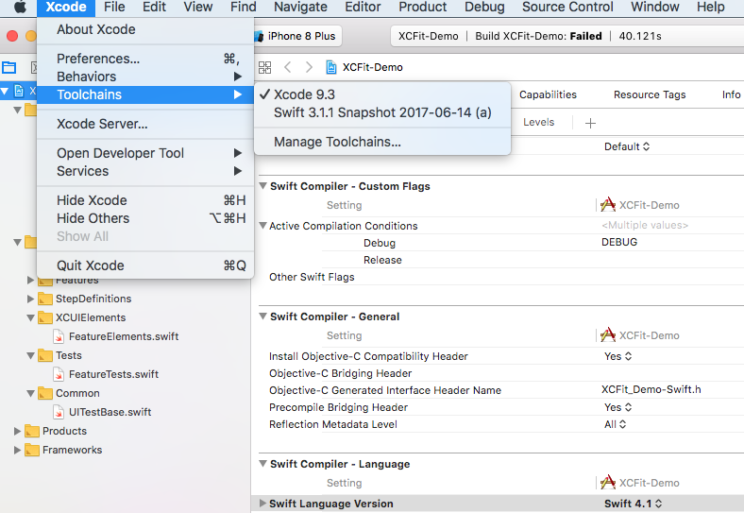
Directory /Applications/Xcode.app/Contents/Developer/Toolchains has user-specific toolchains. We can access the newly added toolchain from Xcode preferences as shown below

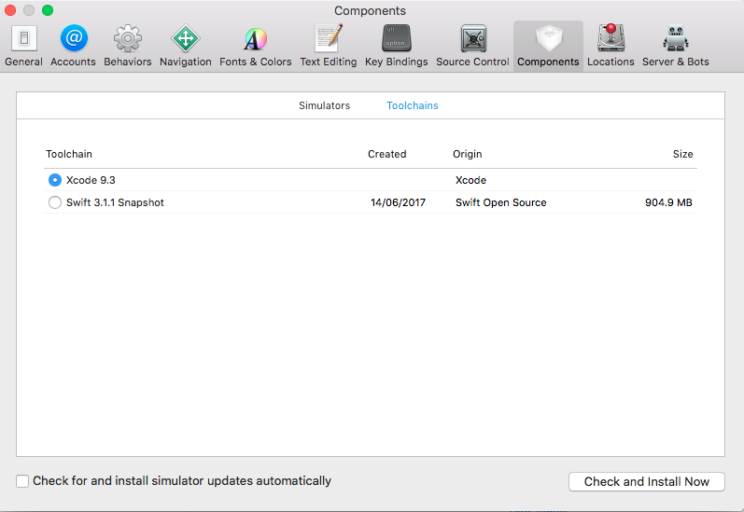
Another way, we can set the new toolchain in the Xcode preferences. Go to Xcode->Preferences->Components section. Now you will see another tab for the “Toolchains” where we can pick the desired Swift toolchain for our local development without changing the Xcode version.

Now that, we have successfully downloaded Swift 3.1 development snapshot. It’s time to use the newly downloaded Swift toolchain.
Switching Swift Toolchain
It’s fairly easy to Switch to the new toolchain when we downloaded it successfully. It can be done using Xcode, Go to Xcode->Preferences->Components-> Toolchains section and Select the Swift.3.1.1 snapshot, this will set the new Swift version for the local Xcode. You may need to restart Xcode. In order to see the new toolchain from the command line, we have to export the newly added toolchain.
|
1 |
$ export TOOLCHAINS=swift |
This will set the new Swift in place in the terminal and we will get the new version from a command line as well.
|
1 2 3 4 |
$ swift --version Apple Swift version 3.1-dev (LLVM 9cb6a3ccee, Clang f38438fc01, Swift b5b79f88f6) Target: x86_64-apple-macosx10.9 |
Now that, we have successfully switched the Swift versions without the need to download an old version of Xcode.
Switching Swift from CI Server
Swift toolchain can be easily switched from Continuous Integration server as well if the CI server has pre-installed Swift toolchain. However, if you use cloud-based CI services like TravisCI or CirlceCI then you have downloaded the Swift toolchain programmatically before building starts. Your sample script might look like this to download and install the toolchain.
|
1 2 3 |
$ curl -O https://swift.org/builds/swift-3.1-branch/xcode/swift-3.1-DEVELOPMENT-SNAPSHOT-2017-06-14-a/swift-3.1-DEVELOPMENT-SNAPSHOT-2017-06-14-a-osx.pkg $ sudo installer -pkg swift-3.1-DEVELOPMENT-SNAPSHOT-2017-06-14-a-osx.pkg -target / $ export TOOLCHAINS=swift |
Note that above script is just an example, you can always customize as per your need of CI server.
Things to Remember
Now that, we have seen that how can we switch the Swift version without changing the version of Xcode. However, there are certain things to remember while changing the Swift version from latest Xcode.
- The latest version of Xcode might have some features that may not be compatible with old Swift versions. e.g Main Thread Checker
- Some iOS applications have SWIFT_VERSION build setting already set in the Xcode so make sure we have that toolchain installed. The build setting takes preferences over the installed Swift versions.
- Make sure all the dependencies are compatible with the Swift version that you have just switched to, otherwise app won’t compile.
Conclusion
Using the Swift toolchain, we can avoid the hassle of installing different versions of Xcode for the sake of changing Swift version. Xcode installation is the time-consuming and huge job, we can simply avoid it if its possible to change Swift version using the toolchain. Let me know what techniques that you use to switch between Swift versions, waive in the comments below

