

Xcode Server is a continuous integration service launched by Apple a few years back. In the previous post about Xcode Server and Xcode 9, we have covered most of the major enhancement that has been announced at WWDC 2017 in the session on ‘What’s New in Signing for Xcode and Xcode Server‘ since then using Xcode Server become so easy and painless to use. The major enhancements announced in the Xcode 9 release were
- Inbuilt Xcode Server
- Code Signing and Device Provisioning within server & Automated Code Signing
- Headless test running on Xcode Server
All these features make Xcode Server, painless choice of continuous integration for iOS apps. However, some game-changing things happened at the beginning of 2018. Apple acquired BuddyBuild which is another Continuous Integration service. This is the major thing for Xcode Server and its ongoing development. This might be the reason, WWDC2018 was so exciting in terms of Continuous Integration. Apple didn’t utter a single word about Continuous Integration and Xcode Server. This is something very suspicious. Well, this is the completely different topic but as part of this post we will how it looks like using Xcode Server in the Xcode 10 and if anything changed.
Xcode 10: Xcode Server
Xcode 10 has dark mode so it would be interesting to see how it looks like to set up Xcode Server from scratch. We will create a blank application with unit and UI tests targets in Xcode 10, we call it Xcode10-XcodeServer.
Enable Xcode Server
As before, we can see “Servers & Bots” tab in the Xcode Preference. We can setup Xcode Server using local Mac or another Mac. We need to select the Mac and Integration user. See the GIF below to understand the process of enabling Xcode Server in Xcode 10.
Once, we enable the Xcode Server then we will get a macOS notification saying Xcode Server is ready and we will an icon on the top with the status of Xcode Server as shown below.
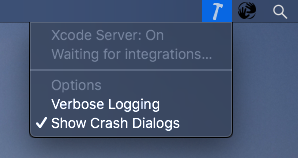
Now that, we have setup Xcode Server which is waiting for integration.
Adding Xcode Server
Once, we have enabled Xcode Server then it needs to be added to the local Xcode so that we can create a bot. As usual, it can be done from the Xcode Preference -> Account Section by adding new Xcode Server. We have to provide canonical hostname of the Xcode Server machine and details of the user to run integrations.
Now that, we are all set to create a new bot for our blank demo application Xcode10-XcodeServer
Creating a Bot
Once we have opened Xcode project for our app, we can easily create a bot to build and test the app. It’s the same process as explained in the previous blog post for Xcode 9 and Xcode Server here
The above GIF shows an entire process of creating a bot and running integration.
What has Changed
Well, looking at the Xcode Server from Xcode 9 and Xcode 10, there isn’t anything changed drastically apart from the dark mode. There were no any words about Xcode Server in this year WWDC 2018, there might be various reasons for this but some of the Xcode release notes have shown that there are some issues with the server
- Xcode may crash when selecting ssh credentials for Xcode server bots. (41848927)
- Certain Xcode Server logs, such as trigger logs, are now visible in the integration Logs report. (40462372)
Some major missing features like Support for testing Pull Request, Uploading the IPA to iTunes Connect or TestFlight hasn’t ben fixed.
Conclusion
With the acquisition of BuddyBuild, Xcode Server development seems to be slowed down, this might be an alarm bell for the existing Xcode Server users. It would be interesting to see what Apple and BuddyBuild are doing together to solve CI/CD issues for iOS app development in the near future. Let’s wait and watch the future of Xcode Server.