Travis CI
Travis CI is a continuous integration service for the open source projects hosted on GitHub. You can login into TravisCI with your existing GitHub account. Travis CI build will run after every checkin into the GitHub. Typically TravisCI loos like this
Setting up TravisCI +Poltergeist
Setting up Travis CI for the Cucumber Poltergeist project is easy task as PhantomJS is pre-installed on the TravisCI. Poltergeist uses PhantomJS as a headless browser to execute UI Cucumber+Capybara scenarios. If you haven’t came across Cucumber+Capybara+Poltergeist setup, please read my previous post ‘ Cucumber + CapyBara + Poltergeist: Rockstar BDD Combo‘
Now, let’s setup the TravisCI for the one of the Poltergeist project on GitHub: Poltergeist-Demo
https://github.com/Shashikant86/Poltergeist-Demo
I have logged into TravisCI with my GitHub account. You can view this public build here
Now, we need to create ‘.travis.yml’ file in the root of the project.
|
1 2 3 4 5 6 7 8 9 10 11 12 13 14 15 16 |
language: ruby cache: bundler rvm: - 1.9.3 before_script: 'bundle install' script: 'bundle exec cucumber' branches: only: - master notifications: email: - shashikant.jagtap@aol.co.uk |
Now that, we have created ‘.travis.yml’ file with Ruby version and script to be executed on the TravisCI server. You can learn more about Ruby setup on TravisCI here
Once you got your Poltergeist scenarios working on local machine then you are done. TravisCI build will trigger after every commit to GitHub.
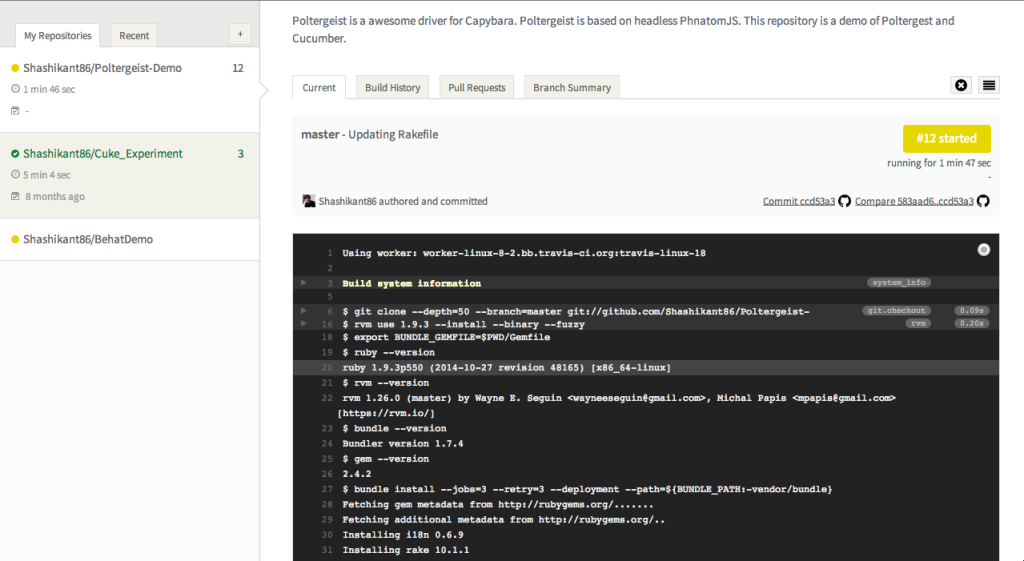
I have made commit by updating Rakefile and build has started on TravisCI:
Now that build has started and installing all the RubyGems as shown in the screen above. It will use pre-installed PhantomJS to execute scenarios using Poltergiest driver.
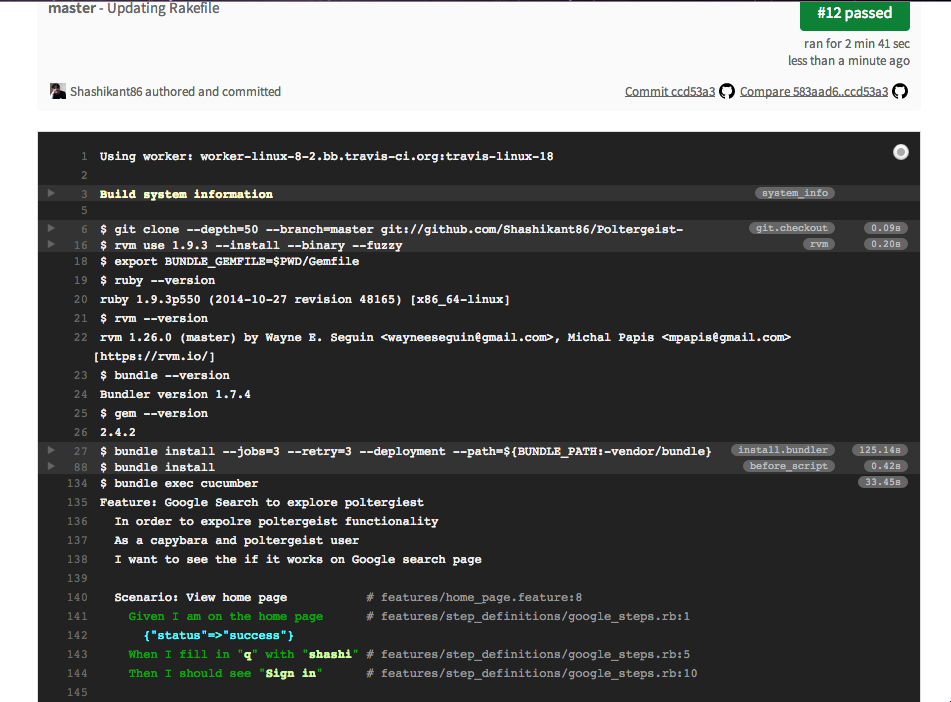
Now it will execute all the scenarios in the project in the headless driver.
You can see full text logs of the execution of this build here
Conclusion
TravisCI can be used for running automated acceptance scenarios using PhantomJS as it’s pre-installed headless browser. PhantomJS can be driven by combination of the Cucumber+Capybara+Poltergeist.
Youtube Video


