
BDD Tools
It’s an awesome idea to use BDD tools to automate your acceptance criteria and the tools like Cucumber can help to accomplish this task. The process of automating acceptance criteria using BDD tools can be defined in three layers
- BDD Tools: We can use BDD tools like Cucumber, SpecFlow or Behat to write an acceptance criteria in the human readable language a.k.s Domain Specific Language (DSL). Gherkin is a popular DSL which uses Given When Then format to write an acceptance criteria.
- Web Acceptance Frameworks: Web acceptance frameworks are needed to talk o BDD tools. Cucumber has Capybara, Behat uses Mink as a web acceptance frameworks.
- Drivers: Web acceptance frameworks uses drivers to launch browsers or to run scenarios headless. An examples of the drivers are Selenium, Webdriver, Sahi, Watir, PhantomJS, Zombie
In this tutorial, we will see how to setup Cucumber+Capybara with headless driver Poltergeist.
Poltergeist
Poltergeist is a headless Capybara driver which uses popular library called ‘PhantomJS’. We can run scenarios heedlessly using PhantomJS. You need install install PhnatomJS to use Poltergeist. Installation guide is available on PhantomJS documentation page.
brew update && brew install phantomjs
You may need to have Ruby 1.9.3 and Capybara 2.1.0 for the latest Poltergeist version. Please make sure you have Ruby 1.9.3 and Capybara 2.1.0 for this Demo
Project Setup
Let’s create sample Cucumber project to demonstrate Poltergeist
$ mkdir Poltergeist-Demo
$ cd Poltergeist-Demo
$ mkdir features
$ mkdir features/step_definitions
$ mkdir features/support
Now that, we have created all the directories required for our Cucumber Project. We will be writing features in the ‘features’ directory then implementing step in the ‘step_definitions’ directory and we will be keeping all config in the ‘support’ directory.
Let’s write very simple feature file which go to Google and search for particular word.
vim features/home_page.feature
And insert this simple Gherkin feature in it.
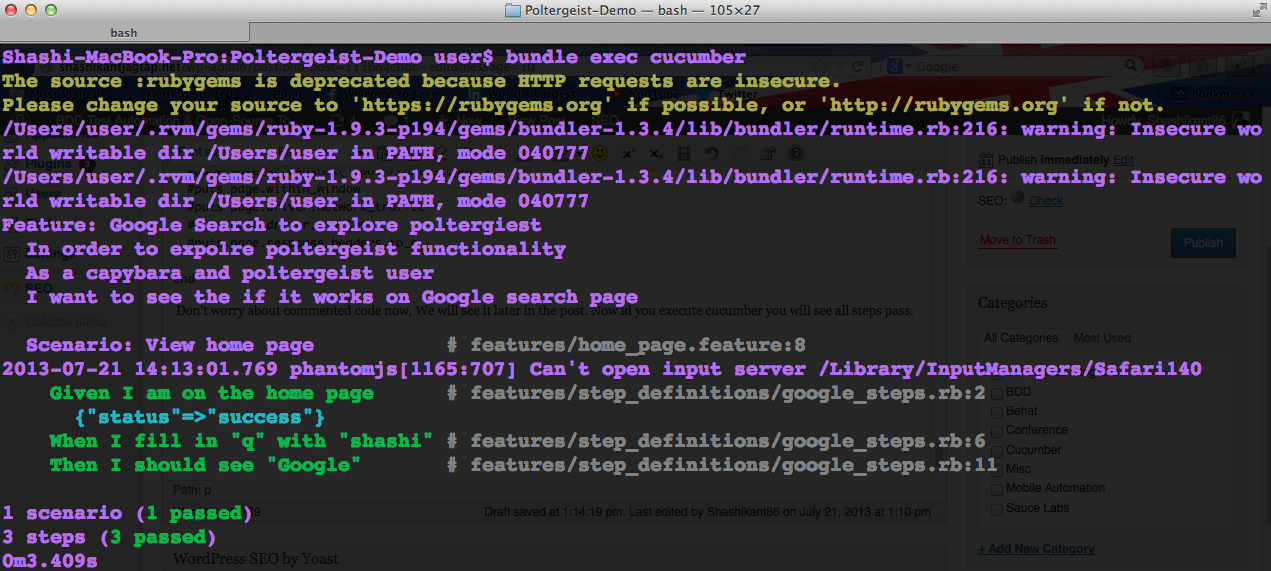
Feature: Google Search to explore poltergiest
  In order to expolre poltergeist functionality
  As a capybara and poltergeist user
  I want to see the if it works on Google search page

Scenario: View home page
  Given I am on the home page
  When I fill in "q" with "shashi"
  Then I should see "Google"
Now, we need to create a Gemfile with all the dependencies needed for our project. Let’s create a Gemfile
$ vim Gemfile
Add following Ruby gems in the Gemfile
source :rubygems

gem "capybara"
gem "cucumber"
gem "rspec", :require => "spec"
gem "poltergeist"
gem "selenium-webdriver"
Now, we need to install all dependencies using bundler
$ bundle install
This will download all the dependencies from RubyGems and create Gemfile.lock file
$ ls
Gemfile      Gemfile.lock     features
Now, Let’s create ‘env.rb’ file to configure and register Poltergeist driver.
vim features/support/env.rb
And insert following block of code which will register Poltergeist driver
require "Capybara"
require "Capybara/cucumber"
require "rspec"
require 'capybara/poltergeist'

Capybara.default_driver = :poltergeist
Capybara.register_driver :poltergeist do |app|
    options = {
        :js_errors => true,
        :timeout => 120,
        :debug => false,
        :phantomjs_options => ['--load-images=no', '--disk-cache=false'],
        :inspector => true,
    }
    Capybara::Poltergeist::Driver.new(app, options)
end
Here, we have included Cucumber, Capybara RSpec and Poltergeist. We have also registered Poltergeist driver. There are so many options we can use with Poltergeist, detailed info available in ‘Customization’ section GitHub Readme. We have configured options to detect JavaScript errors on the page, timeout, few PhantomJS options not to load images, debug info and inspector. We will see each of the options in details later.
Now, if you execute command
$ bundle exec cucumber
You will see undefined steps suggested by Cucumber.
You can implement step definitions for undefined steps with these snippets:

Given(/^I am on the home page$/) do
  pending # express the regexp above with the code you wish you had
end

When(/^I fill in "(.*?)" with "(.*?)"$/) do |arg1, arg2|
  pending # express the regexp above with the code you wish you had
end

Then(/^I should see "(.*?)"$/) do |arg1|
  pending # express the regexp above with the code you wish you had
end
We need to implement these steps using Capybara API in the ‘step_definitions’ directory.
Let’s create file to implement our step definition
$ vim features/step_definitions/google_steps.rb
Insert following step definition code into your feature files.
Given(/^I am on the home page$/) do
puts  visit "http://www.google.com"
end

When /^I fill in "([^"]*)" with "([^"]*)"$/ do |element, text|
 fill_in element, with: text
#page.driver.debug
end

Then(/^I should see "(.*?)"$/) do |text|
  page.should have_content text
  #page.driver.resize(20,30)
  #page.save_screenshot("/path/to/test.pdf")
  #puts page.within_window
  #puts page.driver.network_traffic
  #puts page.driver.cookies
  #puts page.response_headers.to_a

end
Don’t worry about commented code now, We will see it later in the post. Now id you execute cucumber you will see all steps pass.
Playing with Poltergeist
Let’s illustrate what we can do differently with Poltergeist than other Capybara drivers like Selenium, RackTest etc etc. We will see how to use different Poltergeist options in this section
Capture Screenshot
Poltergeist can easily take screenshot at any point during your scenario execution. You just need to call a method. In the step definition above there is a method to capture screenshot
page.save_screenshot("/path/to/test.pdf")
You need to tell Poltergeist where to save screenshot.
Capture Network Traffic
Poltergeist can capture network traffic for you. Getting the real time network information while writing tests can be really useful. In order to get network traffic, you need to call method
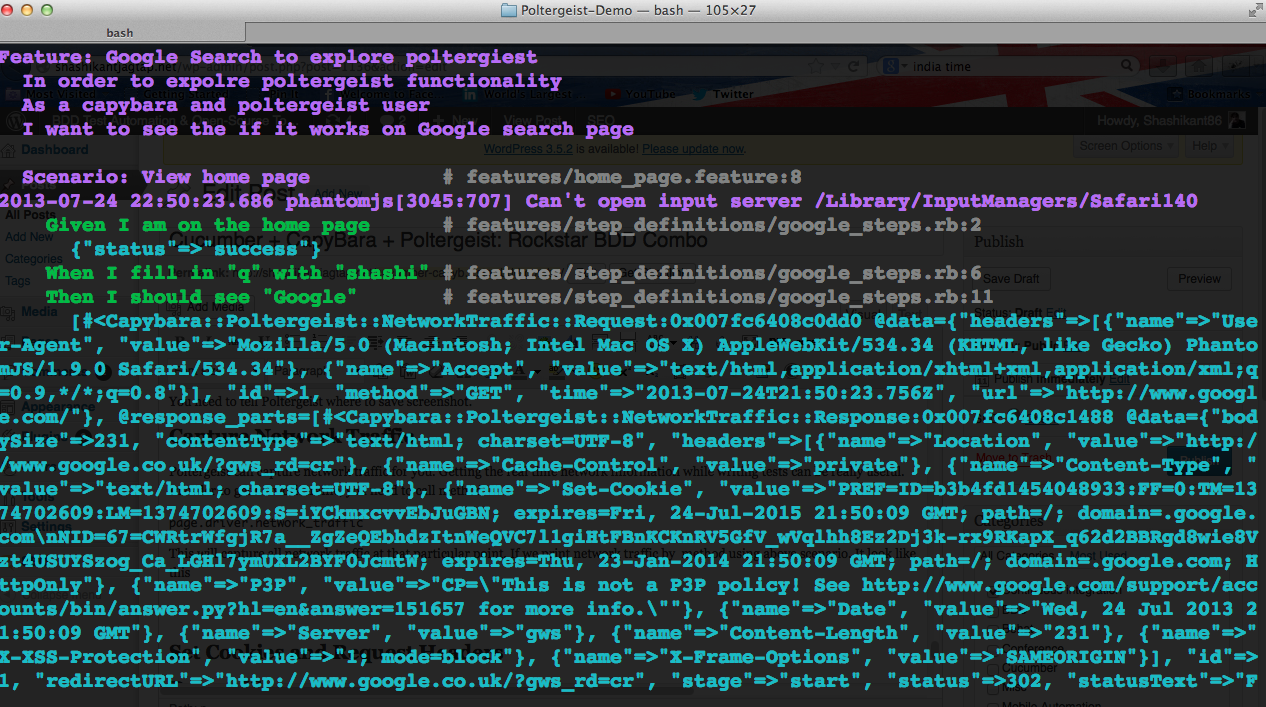
page.driver.network_traffic
This will capture all network traffic at that particular point. If we print network traffic by method using above scenario. It look like this
Set Cookies and Request Headers
Setting up cookies and request headers is cool thing and Poltergeist support both. Sometimes we need to test using different language or setting up cookies.
You can force other language by setting up the request header like this.
page.driver.headers = { "Accept-Language" => "cy" }
This will language as Welsh and run your scenario. Once scenario executed, header will expire automatically. In the same way we can set cookies.
Detect JS errors
Poltergeist can help to detect JavaScript errors on the page with very simple configuration. You just need to add an option to detect JS errors in the ‘env.rb’ file. We have already added that in out config.
Capybara.register_driver :poltergeist do |app|
    options = {
        :js_errors => true,
    }
    Capybara::Poltergeist::Driver.new(app, options)
end
Debug
You can debug your scenarios with easy configuration as above, just add an option debug to true in your ‘env.rb’ file
Capybara.register_driver :poltergeist do |app|
    options = {
        :debug => true,
    }
    Capybara::Poltergeist::Driver.new(app, options)
end
You don’t need to turn on debug mode all the time as it will turn your test too chatty. You need to use it when necessary.
Speed up tests
Poltergeist is a headless driver so it is much faster than other drivers which launches real browser. You can make it more faster by setting some PhantmJS options in the the ‘env.rb’ file. We have configured option not to load images on the page.
Capybara.register_driver :poltergeist do |app|
    options = {
        :phantomjs_options => ['--load-images=no', '--disk-cache=false'],
    }
    Capybara::Poltergeist::Driver.new(app, options)
end
You can use more Phantom API to make your tests faster.
Benefits of Poltergeist
- Headless and easy to configure
- No XVFB, X11 server on Continuous Integration servers.
- Detecting JavaScript error is so easy with Poltergeist
- Easy to Set Cookies and Request headers in the tests.
Source Code
The source code for this tutorial is available on the GitHub.
GitHub Repo => Poltergeist-Demo
In summary, Cucumber, Capybara and Poltergeist combination can make BDD more effective.
Happy BDD