

Vagrant
Vagrant is a great tool to build and distribute development environments. Vagrant allows us to keep development environment configuration same on various machines in order to avoid issues like “It works on my machine !”. If you haven’t started with vagrant please go though the getting started guide of vagrant. It’s very easy to setup. I have written up a post with detailed screenshots here
Ansible: Vagrant Provisioner
Vagrant can be provisioned with various provisioners. We can use basic shell provisioner or Chef or Puppet to provision vagrant boxes. My choice is Ansible , there are many reasons to choose Ansible but here are few
- Ansible is very simple to configure
- Ansible has many simple and easy playbooks
- Ansible has predefined roles which we can use directly. It reduces lots of scripting.
- Ansible is cross platform
- Ansible output is very readable as compared to Shell and Chef.
Android Appium with Ruby
Now that, we will provision Appium Android and Ruby environment with Ansible on a vagrant box. Appium is a mobile test automation framework. In order to set it up, we need following technology stack
- Ansible
- Ruby and RVM
- NodeJS
- Android SDK
- Java
Install Ansible
On Mac OSX, you can install Ansible with Brew
|
1 |
$ brew install ansible |
Create Vagrantfile
Let’s create a project directory and Vagrantfile inside the project
|
1 2 3 4 5 |
$ mkdir vagrant-appium-ansible $ cd vagrant-appium-ansible $ vim Vagrantfile |
Add details to Vagrantfile which looks like this:
|
1 2 3 4 5 6 7 8 9 10 11 12 13 14 15 16 17 18 19 |
# -*- mode: ruby -*- # vi: set ft=ruby : # Vagrantfile API/syntax version. Don't touch unless you know what you're doing! VAGRANTFILE_API_VERSION = "2" Vagrant.configure(VAGRANTFILE_API_VERSION) do |config| config.vm.box = "ubuntu/trusty64" config.vm.hostname = "appium-ansible" config.vm.provider "virtualbox" do |vb| vb.customize ['modifyvm', :id, '--usb', 'on'] vb.customize ["setextradata", :id, "VBoxInternal2/SharedFoldersEnableSymlinksCreate/vagrant", "1"] vb.customize ['usbfilter', 'add', '0', '--target', :id, '--name', 'Galaxy Nexus', '--vendorid', '0x04e8'] end config.vm.provision :ansible do |ansible| ansible.playbook = "playbook.yml" end end |
Vagrantfile:

Now Let’s understand what’s in the vagrant file.
-
Box Specification
We have specifiled box name as ‘ubuntu/trusty64’ which is a ubuntu desktop 14.04 also we have provided host name as ‘appium-ansible’
- USB and Vagrant Box
Second part is all about USB connection with Vagrant Box. We need to specify vendorID and ProductID of the attached device in order to recognise the device by the box.
-
Provisioning
In the final part of the Vagrantfile, we have specified config file ‘playbook.yml’ for ansible.
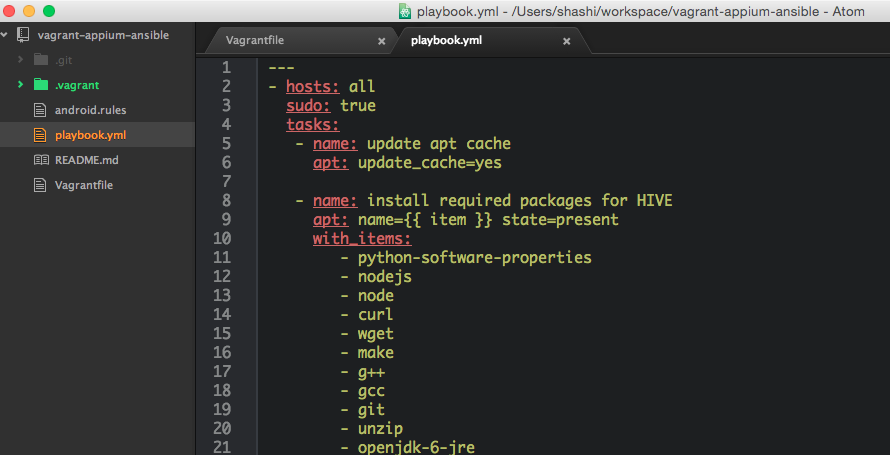
Create playbook.yml
Ansible uses ‘playbook.yml’ file to provision vagrant box. This file has all the task, to know more please read ansible playbook. You can find our project ‘playbook.yml’ on GitHub here.
-
Install Required packages
Now we will configure all required debian packages for ruby, appium and nodejs
-
Install Android and RVM
This part of the playbook file install Android SDK and Ruby/RVM.
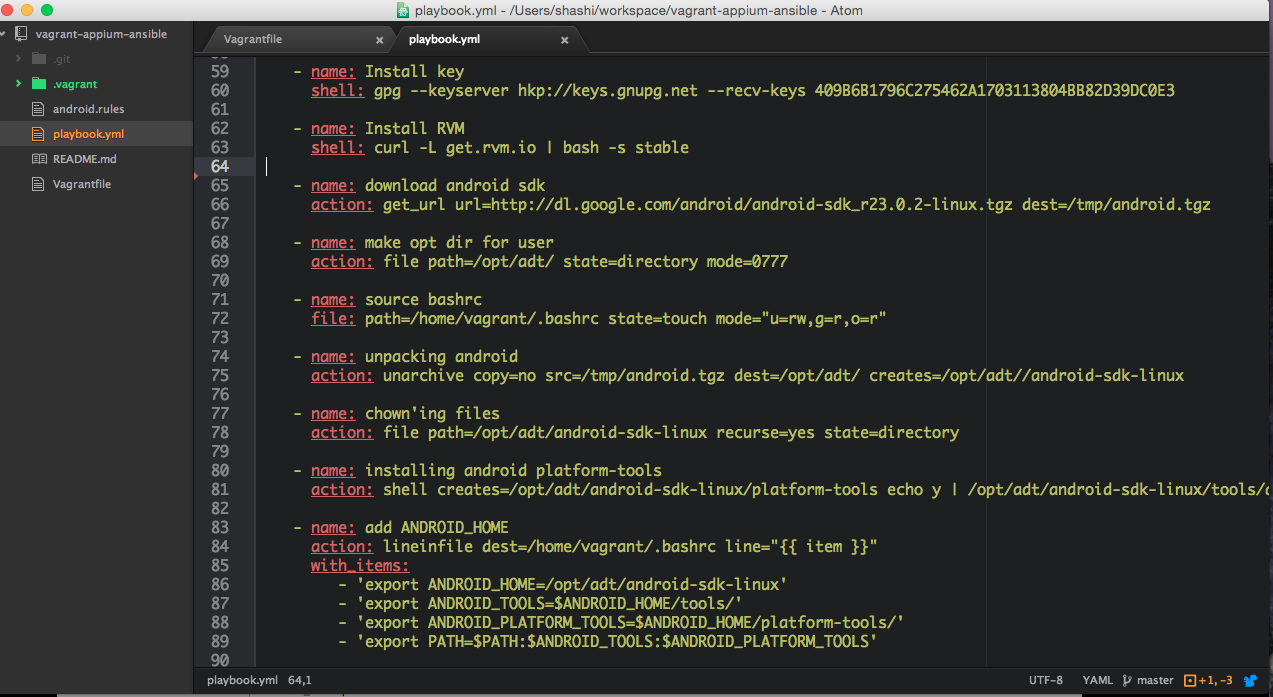
android.rules
We also need out android.rules file which will be then copied to ‘/etc/udev/rule.d/51-android.rules’
Sample file can be found on GitHub here
Vagrant UP
Now that, we are all set to boot our vagrant machine. We can now run command
|
1 |
$ vagrant up |
This will boot new ubuntu box with specified host name.

Now, our machine is booted and ready. It will now start provisioning from our playbook.
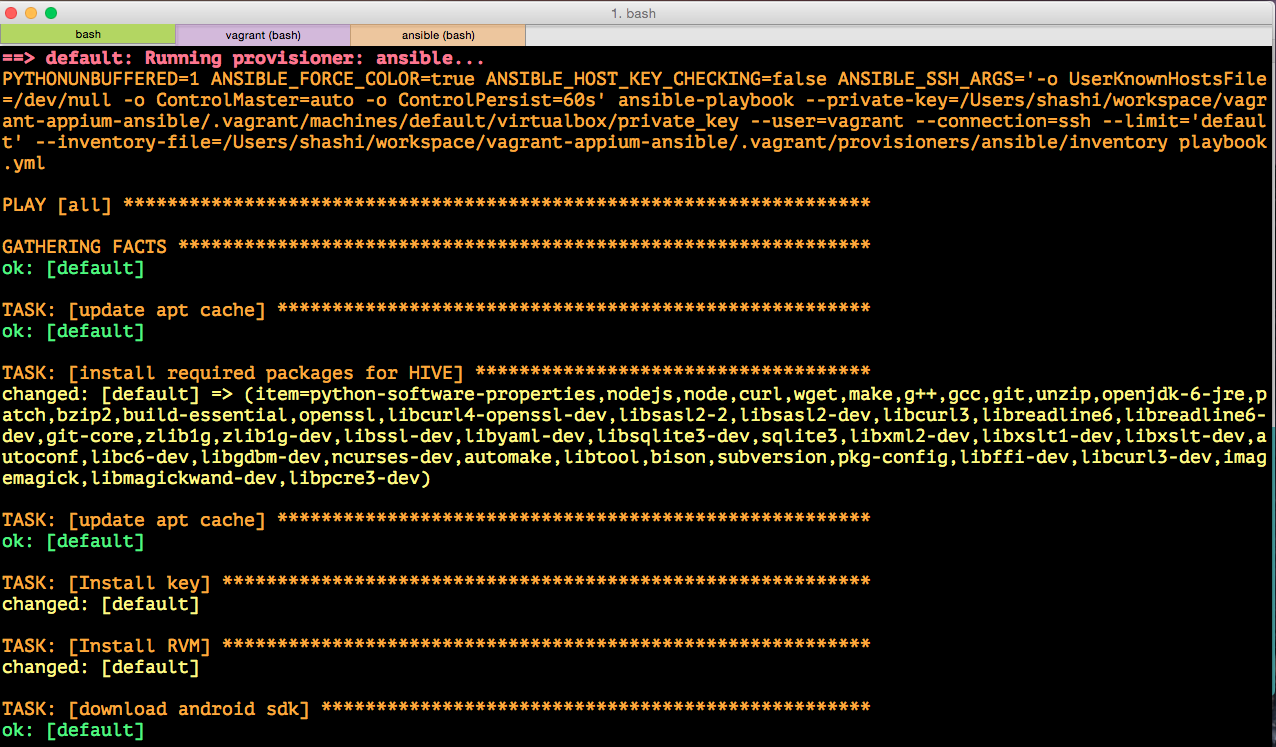
Vagrant Provision
Now that our machine will first install all the required packaged and then carry on installing RVM and Ruby
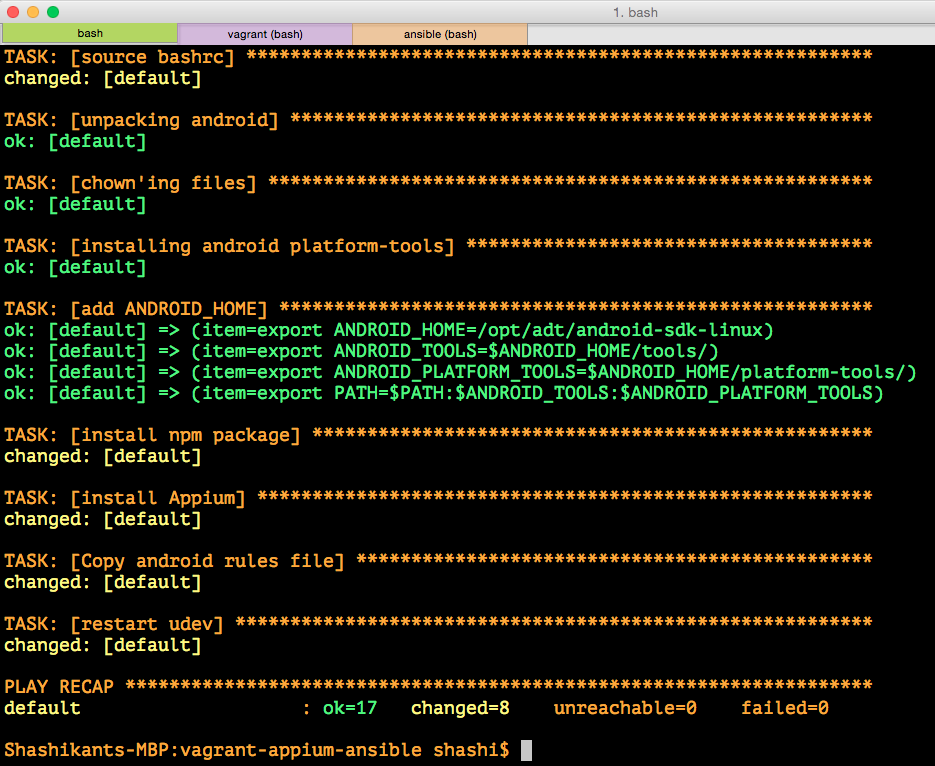
Ansible will then install Android and Appium as follows
Vagrant SSH
Now that we have our ubuntu machine fully provisioned with Ansible tasks. Now lets ssh into the machine and check all the things installed correctly

We can see that Android SDK and RVM and NodeJS has been installed correctly.
Run Appium Server
Now that, we have ‘node_modules’ directory with appium installed. We can launch appium server like this
|
1 |
$ nodejs node_modules/appium/bin/appium.js |
We can now make use of the Appium server to launch our mobile automated scenarios.

Conclusion
We can build and distribute vagrant development environments fully provisioned with Ansible for Appium mobile test automation. This can save lot of time in settting up development environments on every machine.
Source Code
You can find source code on GitHub ‘vagrant-ansible-appium‘
https://github.com/Shashikant86/vagrant-ansible-appium