

iOS Code Signing Tutorials
This is Part-4 of the iOS Code Signing tutorial series. This series covers fundamentals of the iOS code signing process. You can find all the posts in the series linked below
- iOS Code Signing: 1. Getting Started
- iOS Code Signing: 2. Certificate Signing Requests
- iOS Code Signing: 3. Certificates
- iOS Code Signing: 4. Provisioning Profiles
- iOS Code Signing: 5. Signing iOS App
*******************************************************
iOS Code Signing: Provisioning Profiles
In the previous post, we have looked into certificates and private keys required for the code-signing iOS apps. Now we will cover some important concepts specific to iOS which are provisioning profiles and entitlements. Historically, provisioning profiles are considered as most painful things in the iOS code signing process. Before we go into details of provisioning profiles, let’s understand some terminologies and concepts that we need to know to understand the provisioning profile. The things we must know before we understand provisioning profiles are
- Team ID
- Bundle ID
- App ID
- Device ID
- Entitlements
We will see each of this one by one before diving into the provisioning profile.
-
Team ID
The team ID is a unique identifier for each development team. You can find this team ID in the Apple Developer portal in the membership session.

You can also find the team ID from your development or distribution certification in the keychain.
|
1 |
$ security find-identity -v -p codesigning |
You will see the output which has teamID inside it. It’s in the form of “iPhone Developer: Team Name (YOUR_TEAM_ID)”. The team ID value is sensitive so you have to keep it secret and we need that in iOS code signing.
-
Bundle Identifier
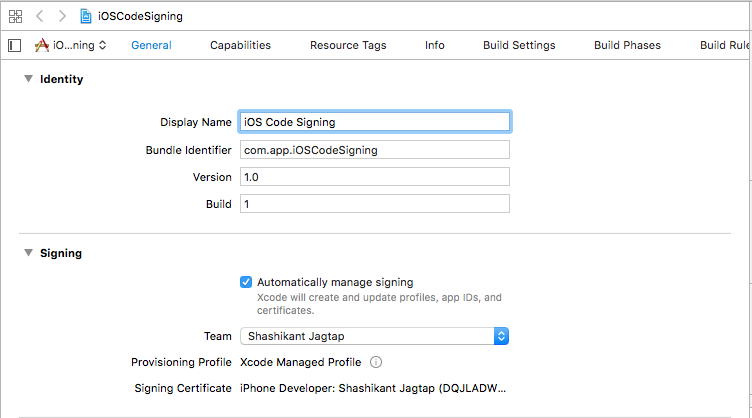
Every iOS app requires a unique identifier so that app can be identified without ambiguity. Every iOS app must set unique bundle identifier in the reverse domain name of the company or individual. The bundle ID can be set up while creating an app in the iTunes Connect which need to be used in the property list file of the iOS apps. Each target in the iOS app should have a unique identifier. You might have seen the bundle identifier in the format com.company_name.com or something like this. In Xcode, we can see the Bundle Identifier in the General tab of the target.
We can also find the bundle identifier of the apps by looking at the PRODUCT_BUNDLE_IDENTIFIER in the target Build Settings.
-
App Identifier
Generally, App ID is the combination of team ID and the bundle ID. It’s very common these days that a team can develop more that one app with different bundle identifiers. The App ID can be used to identify the one or more apps. he Team ID is supplied by Apple, while the bundle ID search string is supplied by you to match either the bundle ID of a single app or a set of bundle IDs for a group of your apps. App ID has two types single App ID for the single app and Wildcard App ID for the set of apps. You can read more about the App ID on the Apple official documentation here.
-
Device ID
Every iOS has a unique identifier also called UDID. With UDIDs, each iOS device can be found uniquely. Basically, UDID is 40 characters long number made up of the combination of numbers and letters. Like devices, each simulator also has unique UDID. We can find device UDID by attaching the device to Mac and with iTunes connect. There is a great guide here to find out device UDID using iTunes. You can simply get the UDID of the all attached devices and simulators using the following command
|
1 |
$ instruments -s devices |
You can see the devices with its name, iOS versions and UDID in the square brackets. It looks something like this
|
1 |
iPhone 6 Plus (11.2) [22B35E0D-C505-4713-8126-80D39A15B34C] (Simulator) |
You can see the device UDID 22B35E0D-C505-4713-8126-80D39A15B34C in the brackets for the iPhone 6 Plus simulator. In the same way, you can get it for the attached real devices.
-
Entitlements and App Sandbox
iOS apps can’t do everything on its own, we have to explicitly tell the app what app can do or can not do in the form of the entitlements. The app has entitled to do certain things that we need to define in the app sandbox. The app restrictions are managed by the sandbox. The app sandbox is the different infrastructure from the code signing infrastructure, code signing is responsible for running whats inside the sandbox. The app entitlements are configured to specify which resources of the system that app is allowed to use and under what situation. Entitlements also confer capabilities and security of an iOS app. The resources that app allowed to use usually have some default values but they are always disabled. The app developers have to enable them explicitly. The entitlements values that are commonly used are iCloud, push notifications, Apple Pay, and App Sandbox and many more. We can enable the entitlements in the Xcode capabilities tab for a specific target. You should only enable those entitlements that you need. This prevents malicious code to enter into the app. There are some restrictions on entitlements that you only use for debug builds e.g get-task-allow is only allowed to run an app that is signed by development certificate. This entitlement is not allowed for the app signed with distribution certificate.

You can read more about entitlements on the Apple’s official documentation here and about the App sandboxing infrastructure here get deep understanding.
Now that, we saw that what are the entitlements, let’s see how to check the apps entitlements and internal representation of the entitlements. Basically, entitlements are the property list a.k.a plist file generated by Xcode when you enable some capabilities. Xcode will generate .entitlements file depending on the what capabilities you selected.The typical file looks like this
|
1 2 3 4 5 6 7 8 9 10 11 12 |
<?xml version="1.0" encoding="UTF-8"?> <!DOCTYPE plist PUBLIC "-//Apple//DTD PLIST 1.0//EN" "http://www.apple.com/DTDs/PropertyList-1.0.dtd"> <plist version="1.0"> <dict> <key>aps-environment</key> <string>development</string> <key>com.apple.developer.icloud-container-identifiers</key> <array/> <key>com.apple.developer.ubiquity-kvstore-identifier</key> <string>$(TeamIdentifierPrefix)$(CFBundleIdentifier)</string> </dict> </plist> |
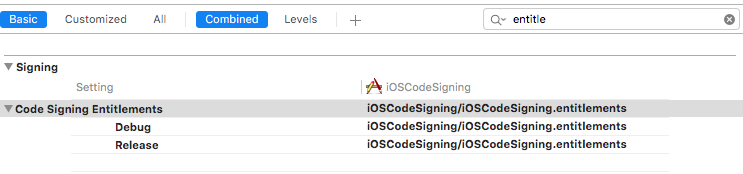
This file shows that we got iCloud and Push notifications enabled. There is also build setting Code Signing Entitlements which takes these entitlements while building an app.
In the case of the already compiled app, you can inspect the app entitlements using codesign command line tool.
|
1 |
$ codesign -d --entitlements :- /Users/shashi/Library/Developer/Xcode/DerivedData/iOSCodeSigning-gakpslthucwluoakkipsycrwhnze/Build/Products/Debug-iphones/iOSCodeSigning.app |
This will list all the entitlements of your pre-compiled app. In case you want to check the entitlements of the .ipa file then you need to follow these steps
- Find the .ipa file and change its the extension to .zip.
- Expand the file .zip. This will produce a Payload folder containing your .app bundle.
- Use the codesign tool to check the entitlements on the .app bundle as mentioned below
|
1 |
$ codesign -d --entitlements :- "Payload/YourApp.app" |
In the latest version of the Xcode, if you archive an app and export a .ipa file then in the Xcode organiser window you will see all the details with entitlements of the app in a summary tab.
Provisioning Profiles
At this point, you must be wondering why we need to know all the above things in order to know provisioning profiles. The short answer is provisioning profiles are the combination of all the things that we have seen so far. Basically, it consists of everything from certificates, app ID, device ID and entitlements. The provisioning profiles define the rule for running the app inside the device. Its role is t confirm that
- Specific app with App ID
- App with that app ID can run on certain devices that included in provisioning profile. The development provisioning profiles have the list of devices included whilst distribution provisioning profiles don’t have the list of devices.
- The app should only have those entitlements defined in the provisioning profile.
- The app can only run trust based on the certificate embedded in the provisioning profile.
Creating Provisioning Profile
There is a lot of the provisioning profile. It has App ID, device UDIDs, entitlements and certificate. We will understand this better when we create provisioning profile from Apple developer portal. The profile can be easily created from, Certificates and Profile tab of developer portal. Let’s add the development profile for the demo app.
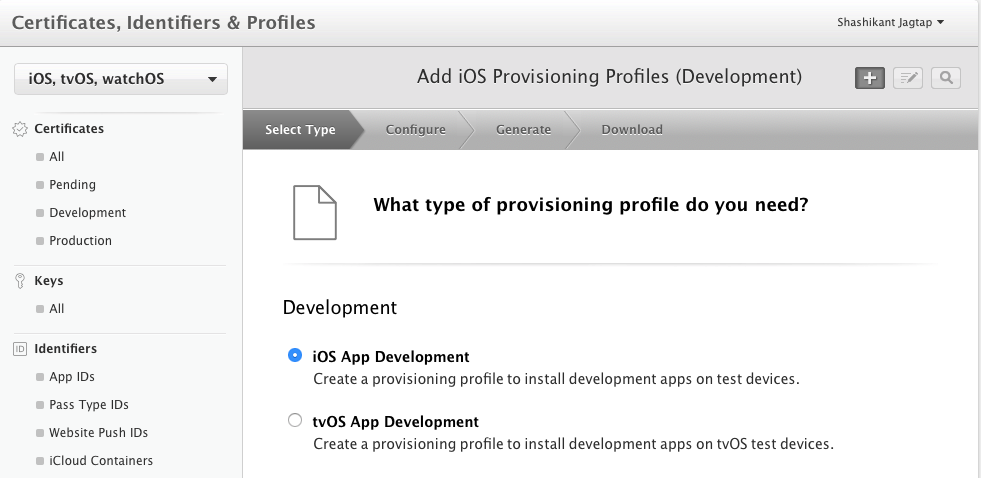
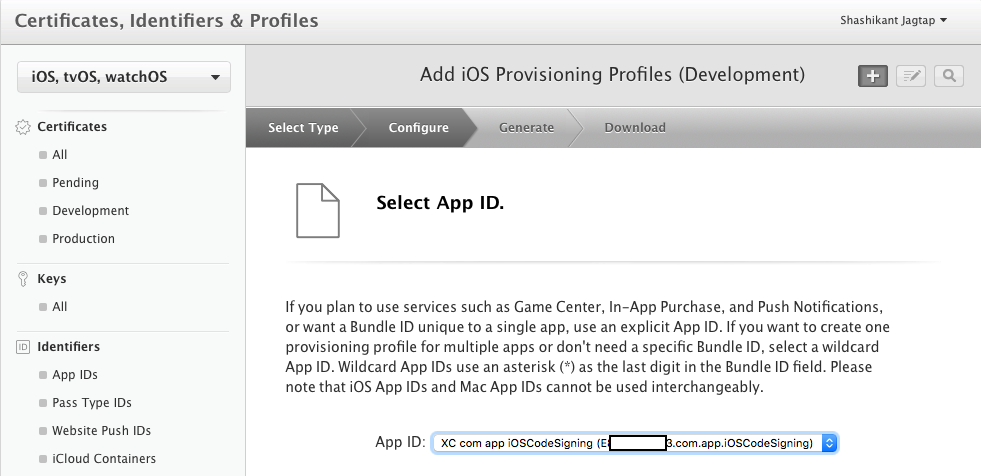
Note that, we are creating the profile for the development purpose. The next step portal will ask you which app you want to create the profile. We need to select the App ID, in this case, we are using demo iOSCodeSigning app.
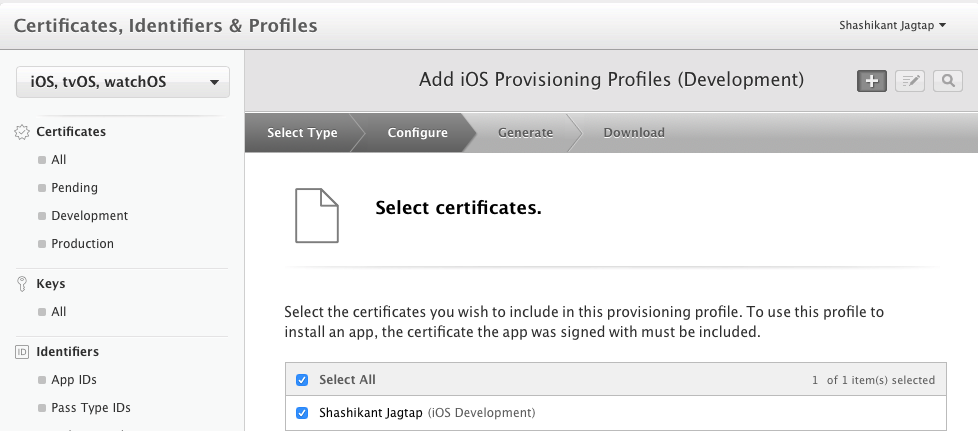
As we are creating the profile for development, we need to select the certificate for the profile as development certificate.
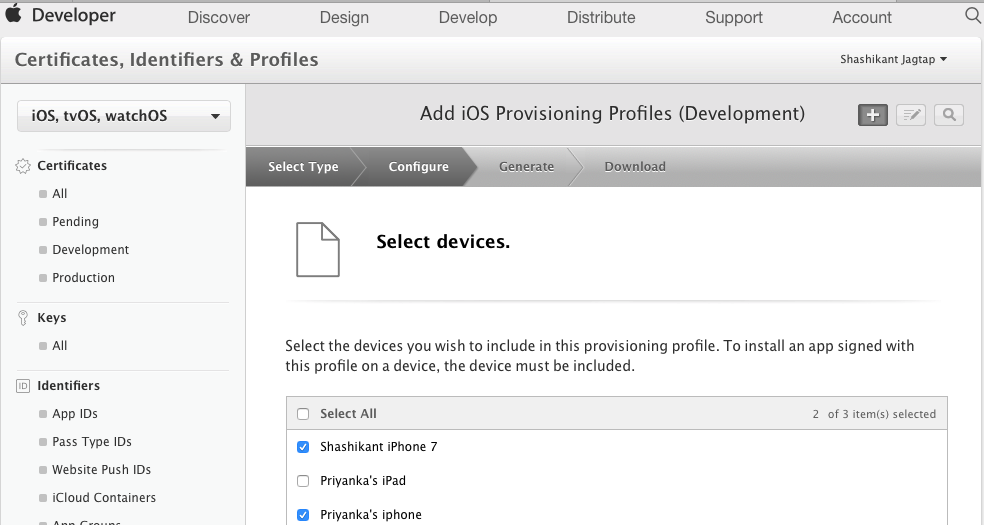
Note that, we have provided the information about app ID and certificate for creating the profile. In the step, we need to specify devices for this profile.
Finally, we have to give a proper name to profile and it will be ready to download.
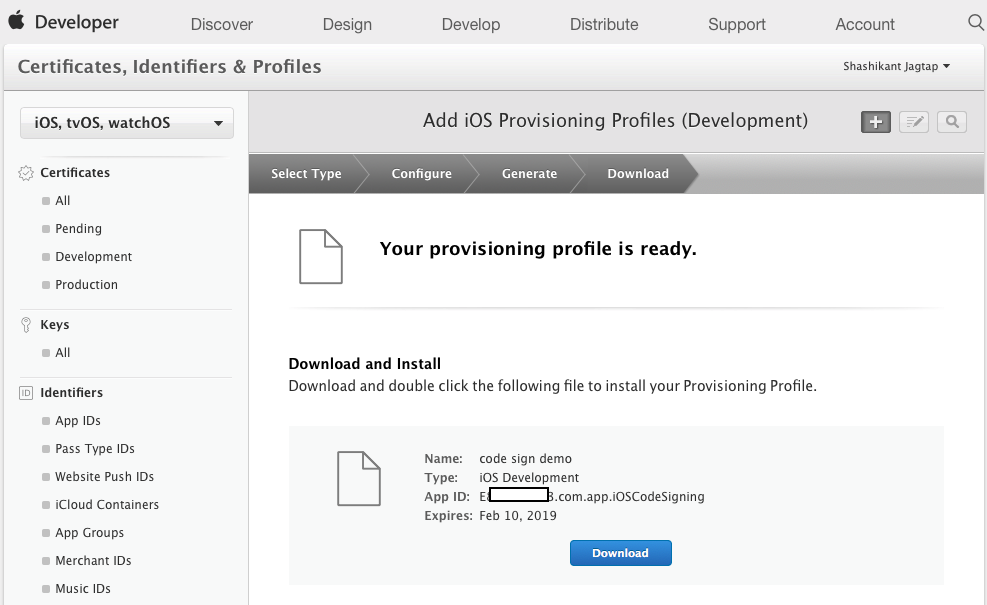
Once clicked on the Download button, it will be downloaded to the ~/Downloads directory. Once doubled clicked on the profile, it will be installed on the local machine. Now that, we have profile downloaded locally which also has the entitlement that we already enabled from Xcode. You can see those entitlements from the enabled services in the Apple developer portal.
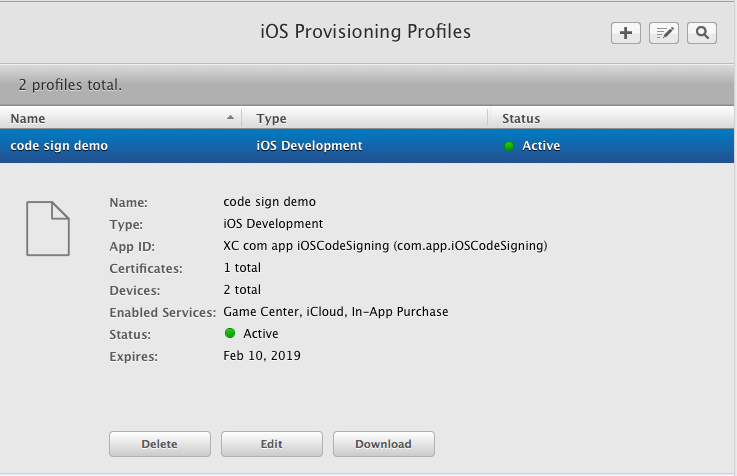
As mentioned earlier, we have provided all the details like App ID, Certificate, Devices and entitlements to generate provisioning profile. Now you should have understood why we need to know more about these things before learning about the provisioning profiles.
Inside Provisioning Profile
The provisioning profile is at the core of the code signing that binds signing, entitlements and app sandbox together. The profiles can be used to enable the app for development, ad-hoc, enterprise and app store distribution. It’s fairly easy to generate multiple profiles for the same certificate which adds complexity in the process of code signing to figure out which profile has been used for signing the app. Since Xcode 8, Apple introduced the automatic code signing which handles profiles automatically which make the process easier for the development but for automating the release process from Continuous Integration became harder. It’s important to understand what is provisioning profile and how it’s been used for signing the apps.
Once we downloaded the provisioning profile and installed, the profiles are stored in the following directory in the local machine.
|
1 |
~/Library/MobileDevices/Provisioning Profiles |
We can see all the provisioning profiles inside that directory. The profiles have .mobileprovision extension but how do we open this file in order to see the contents of the profile. It’s not the property list file, its stored in the Cryptographic Message Syntax format. Apple uses this format to ensure that profile shouldn’t be changed once it’s signed and issued by Apple. We can use security command line tool to explore the contents of the profile. Let’s navigate to the profiles directory and look at the contents of the provisioning profile.
|
1 2 |
$ cd ~/Library/MobileDevice/Provisioning\ Profiles/ $ security cms -D -i xxxxxxxx_your_pp_id.mobileprovision |
This will give all the information about the provisioning profile in the property list format. The property list file contains some main keys including
- App ID Name: This is app ID of the iOS application.
- Creation Date: This is the date when the profile is created.
- Platform: This is usually iOS for the iOS apps.
- Developer Certificates: This is an array of the certificates used to sign the profile.
- Entitlements: This is a dictionary of the array containing all the entitlements of the apps.
- Expiration Date: Expiry date of the provisioning profile.
- Name The name of the provisioning profile.
- Provisioned Devices: This is an array of device UDIDs of the devices registered with the profile.
- Team Identifier: This is team ID of the organisation or development.
- Team Name: This is real name of the team, not the ID
- Version: This is the version of the profile, usual 1 if a profile isn’t updated.
As you can see that provisioning profiles have all these details to sign our apps if anything changes we need to modify the profile accordingly.
Xcode and Provisioning Profile
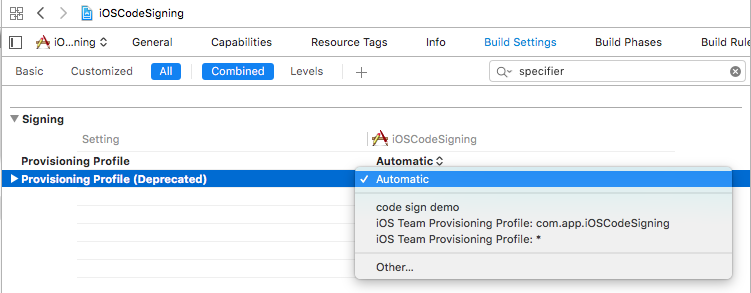
Since Xcode 8, Apple has completely refactored the code signing infrastructure by introducing automatic signing. The WWDC 2016 video here is must watch to understand the changes in the code signing. Xcode now creates profiles locally which handles the signing by adding another build setting PROVISIONING_PROFILE_SPECIFIER. Using the specifier, we have to specify the provisioning profile by name along with build setting DEVELOPMENT_TEAM. If the profile name became invalid and missing then it causes the build failure. By using the PROVISIONING_PROFILE it uses UDID of the provisioning profile rather than name.
Xcode now deprecated an option to provide an option to specify the provisioning profile in the automated signing.
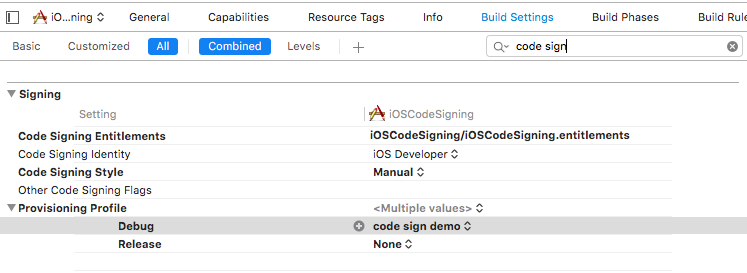
while in the manual signing we can still specify the provisioning profile in the build setting.
At this stage, we have covered most of the things about the provisioning profile. In the next post, we will see actual code signing process for the iOS apps.