LinkedIn recently open-sourced Bluepill which is a tool to run iOS tests in parallel. There is a Bluepill announcement blog post on LinkedIn Engineering blog here. Bluepill wasn’t supporting Apple’s XCTest and XCUITests framework from scratch but with latest release v1.0.0 we can able to run XCTest and XCUITests in parallel using Bluepill.
Bluepill Features
Bluepill has some great features which you can read full details on Github README but in summary we can
- Run XCUI Tests in parallel with multiple simulator.
- Spread tests in multiple simulators and allow running tests in headless mode.
- Generate reports per simulator and retry failed tests.
Bluepill Limitations
Along with some great features, Bluepill has some limitations which are as follows
- Bluepill installation process is painful. User has to manually download binaries from Github or download the source code and build the framework to get binary. Ideally it should be packages as Homebrew or some other package management system so that installation become easy
- There are two binaries ‘bluepill‘ and ‘bp‘ and running tests requires both. Currently ‘bluepill’ binary has a formula for homebrew package but there isn’t any formula for ‘bp’ binary.
- Bluepill travels over the test targets but there might be faster way to just parse .xctestrun file to find the tests.
- TravisCI build is not maintained it’s RED for long time.
- Bluepill is lacking user documentation. The documentation directories on github are still empty at the time writing this post.
Hopefully Bluepill team at LinkedIn will put some effort to fix these issues in near future.
Bluepill and Fastlane Marriage
As per the current Bluepill usage info on github, we have to build the app scheme with XCTest using xcodebuild ‘build for testing’ action so that we can have derived data to work with Bluepill. We can then pass ‘app_path’, ‘scheme_path’ , ‘output_directory’ and other flags to bluepill to run tests in parallel or use use JSON files configured with those flags and pass it to bluepill. We can make this process more dynamic by combining this with Fastlane which is a tool for automating iOS development tasks. In this post, we will see how to configure Bluepill to run with Fastlane !
Setup Xcode Project
Let’s get started and create a New iOS project in Xcode as ‘Single View Application’ name it as ‘Bluepillar’ with just Include UI Tests box checked. Do not check the box for Include Unit Tests or Use Core Data for this demo.
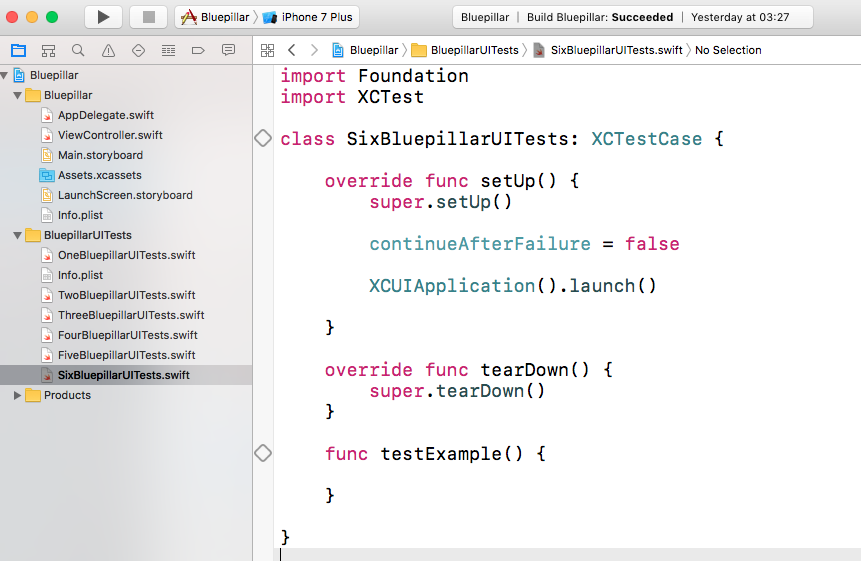
Now that, Xcode has generated project template for us, let’s replicate the template UI tests Six times name it as OneBluepillarUITests.swift , TwoBluepillarUITests.swift and so on. Don’t forget to change the class name accordingly. At this stage our Xcode project should look something like this :

Now that, we have six tests which are doing the same things but it doesn’t matter for the parallel test demo.
Install Bluepill
We can currently install Bluepill with using Homebrew by running following command
|
1 |
$ brew install bluepill |
but this is not enough as we need another binary ‘bp’ for which there is no homebrew formula yet, hopefully maintainers will add it soon ! so for now we will install it manually using below steps.
- Head over to Bluepill Github release page and download the zip file `bluepill-vX.X.X.zip’ file where X.X.X is the latest release or release you want to download.
- This file has two binaries ‘bluepill’ and ‘bp’ we can move it to /usr/local/bin/ directory so that it can be accessed from anywhere. Assuming we have downloaded binaries in ‘~/Downloads/bluepill-v.X.X.X/’ we can run
|
1 2 |
$ mv ~/Downloads/bluepill-vX.X.X/bluepill /usr/local/bin/ $ mv ~/Downloads/bluepill-vX.X.X/bp /usr/local/bin/ |
Now we have both binaries in the PATH and can be accessed from anywhere.
Install Fastlane
We can install fastlane using Homebrew, Installer Script or Rubygems as per the fastlane documentation here, Let’s install it using Rubygems for now
|
1 |
$ sudo gem install fastlane -NV |
In our Bluepillar project, let’s create ‘fastlane’ directory and empty ‘Fastfile’
|
1 2 |
$ mkdir fastlane $ touch fastlane/Fastfile |
Get Bluepillar Fastlane Plugin
There is a fastlane Bluepillar plugin which I recently wrote to make the configuration bit easier. We can get this plugin by running
|
1 |
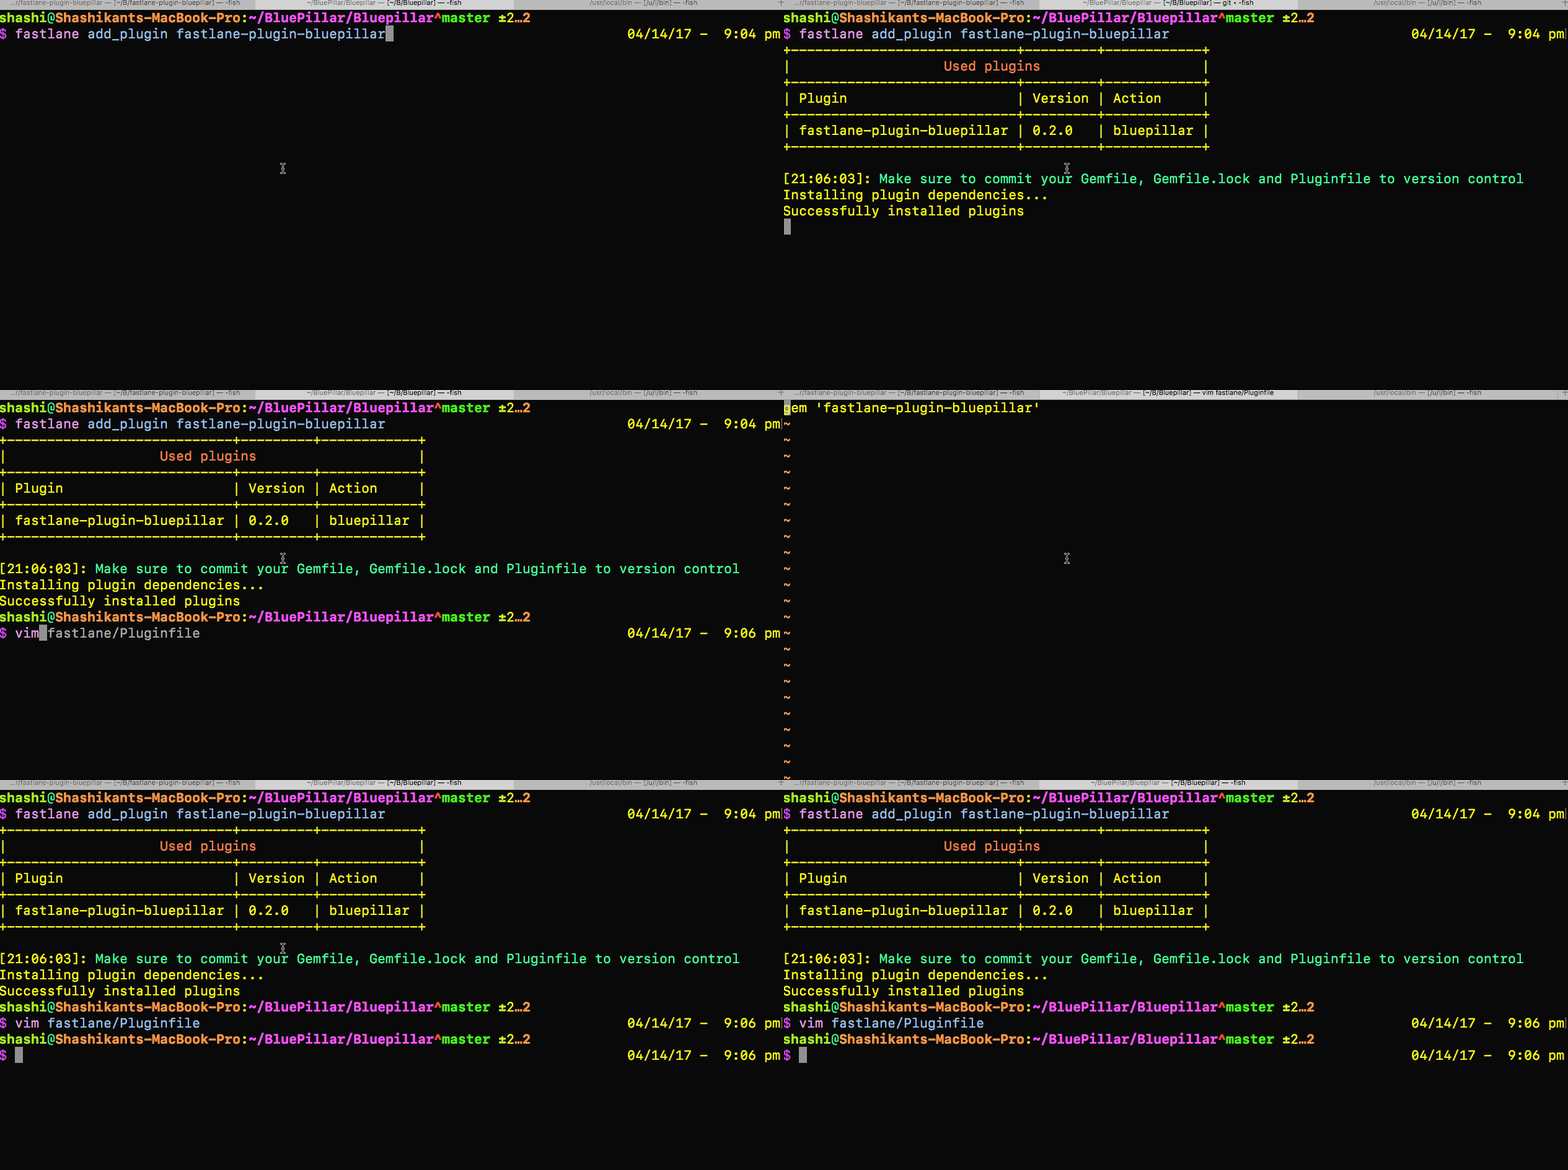
$ fastlane add_plugin fastlane-plugin-bluepillar |
This will create a file called Pluginfile inside ‘fastlane’ directory which we should commit in the source control. The setup will look like this:

Configure Fastfile
Now that, we have Xcode project with 6 XCUITests and fastlane installed. Next thing, we need to configure a lane to run XCUI tests in parallel using Bluepill.
First we need to build our scheme with XCUTest using fastlane scan to generate derived data so that we can pass it to bluepill. We have a scheme ‘Bluepillar’ which has XCUITest target and we will generate derived data in the project itself inside ‘bluepill’ directory. The scan setup will look like this
|
1 2 3 4 5 6 |
scan( scheme: 'Bluepillar', build_for_testing: true, derived_data_path: './bluepill', buildlog_path: './bluepill/logs/' ) |
Next, we will configure bluepillar plugin to take some parameter like ‘app‘, ‘runner_app_path‘, ‘output_directory‘ and ‘scheme_path‘ which are required. We can also pass optional parameters like ‘num_sims‘, ‘runtime‘ and ‘device‘. All other parameters will be taken as default from bluepill. So, blupillar setup will look like this:
|
1 2 3 4 5 6 7 8 9 |
bluepillar( app: 'bluepill/Build/Products/Debug-iphonesimulator/Bluepillar.app', runner_app_path: 'bluepill/Build/Products/Debug-iphonesimulator/BluepillarUITests-Runner.app', scheme_path: 'Bluepillar.xcodeproj/xcshareddata/xcschemes/Bluepillar.xcscheme', output_dir: 'bluepill_output/', num_sims: '3', runtime: '"iOS 10.3"', device: 'iPhone 6' ) |
At this stage we have all the required setup and we need to configure Fastfile with it. Let’s create a lane called ‘test’, add following code to Fastfile
|
1 2 3 4 5 6 7 8 9 10 11 12 13 14 15 16 17 18 19 20 21 |
lane :test do sh("rm -rf ../bluepill") sh("rm -rf ../bluepill_output") scan( scheme: 'Bluepillar', build_for_testing: true, derived_data_path: './bluepill', buildlog_path: './bluepill/logs/' ) bluepillar( app: 'bluepill/Build/Products/Debug-iphonesimulator/Bluepillar.app', runner_app_path: 'bluepill/Build/Products/Debug-iphonesimulator/BluepillarUITests-Runner.app', scheme_path: 'Bluepillar.xcodeproj/xcshareddata/xcschemes/Bluepillar.xcscheme', output_dir: 'bluepill_output/', num_sims: '3', runtime: '"iOS 10.3"', device: 'iPhone 6' ) end |
Now that, we are all set to run the test. Let’s execute this lane
|
1 |
$ fastlane test |
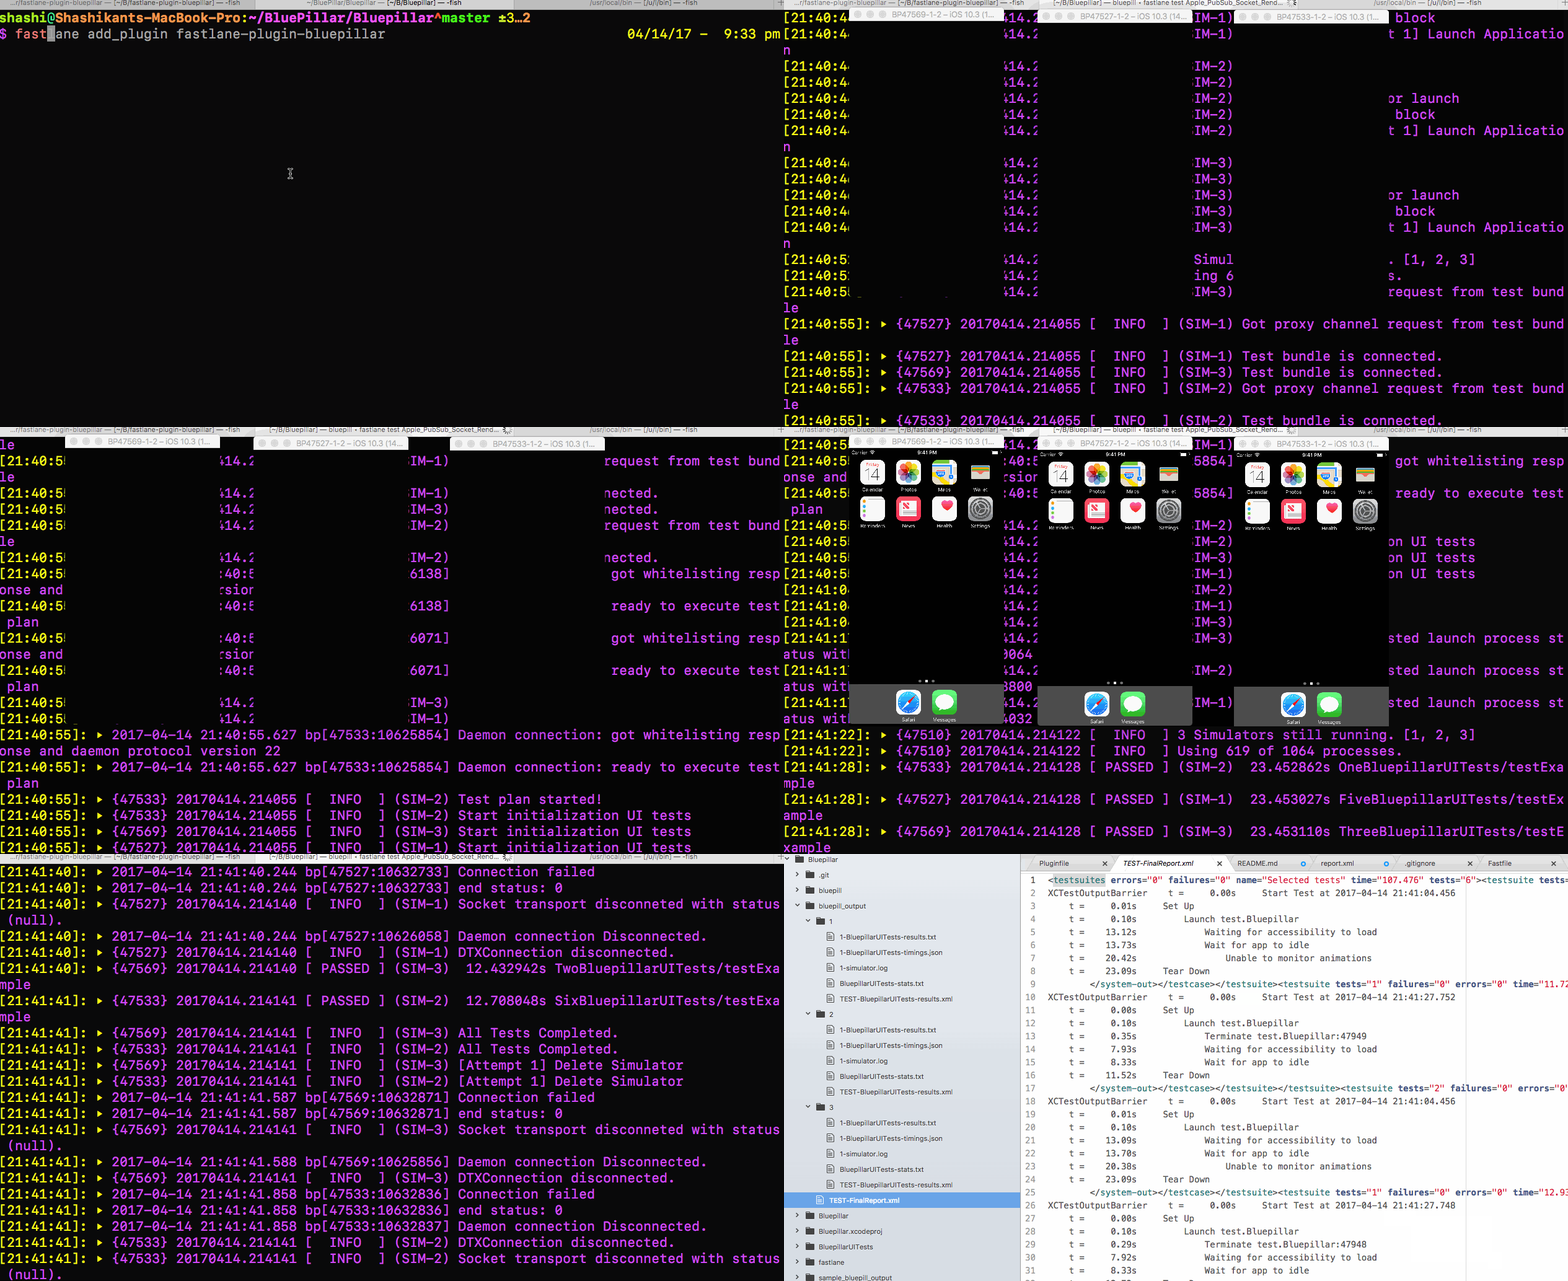
This will first build the app and then execute tests in 3 different simulators. It looks like this:

Nice ! It will also generate reports per simulators as well as final report in the JUnit xml format.
Things to Remember
As you have just seen, how awesome it looks like running the tests in the multiple simulators but there are certain things we should remember
- Bluepill creates simulators for new tests shut it down once test finished. After running some tests we will have 100’s of simulators created in our machine ! We have to delete/kill it manually.
- If number of simulators set to 10 or more, you just have to wait hours and hours to boot the simulators also think about the memory consumption as well.
- Running Bluepill on CI server need brevity and courage, your CI server might perform poorly unless you have most powerful server in the world.
- Running multiple simulator is against Apple’s recommendation so you never know when Apple will broke this or similar (fbsimctl) tools.
What Next
WWDC 2017 is coming soon, let’s wait and watch future of these tools. Hopefully Apple chaps won’t break these tools which are nothing but wrappers on native Apple developer tools or reverse engineered original frameworks/tools. Look forward some enhancements and speed in the future releases of the Bluepill.
Have you used Bluepill ? What are your experience, share in the comment below.

